

You are using an out of date browser. It may not display this or other websites correctly.
You should upgrade or use an alternative browser.
You should upgrade or use an alternative browser.
New Project: JBL L200 restoration
- Thread starter Speedbump71
- Start date

Speedbump71
Buried in speakers
OK. Spent a little time on these in between making room in the house for the last project I finished.
Today was cabinet #2. Bottom has a chunk missing, so it will get Bondo before the duratex and new platforms. Also had one corner separated a bit, so superglue and clamps will close that up with luck.
I have the oil stripped from the top and one side. Just a little lacquer thinner and some 000 steel wool to loosen things, then a quick wipe with a shop rag. Lots less mess than the citrus stripper I usually use.
Trying to talk myself out of pulling the foilcals, but I think I want to repaint all the black. Hair dryer and patience the way to go on those?
Anyway...pics: (Max doesn't like his picture taken. Second one is mid complaint
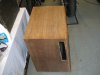
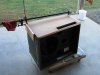


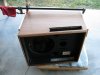

Today was cabinet #2. Bottom has a chunk missing, so it will get Bondo before the duratex and new platforms. Also had one corner separated a bit, so superglue and clamps will close that up with luck.
I have the oil stripped from the top and one side. Just a little lacquer thinner and some 000 steel wool to loosen things, then a quick wipe with a shop rag. Lots less mess than the citrus stripper I usually use.
Trying to talk myself out of pulling the foilcals, but I think I want to repaint all the black. Hair dryer and patience the way to go on those?
Anyway...pics: (Max doesn't like his picture taken. Second one is mid complaint
Last edited:

nedseg
Well-Known Member
Very nice!! You're sure to enjoy the heck out of 'em given the amount of sweat equity you'll have invested!!
Can't wait to see the finished product!
Nice doggy....looking for his woofers?
BTW, I use Smith's Fill-It for wood filler repairs - it won't expand contract at a different rate and so eventually separate & depart like bondo type products.
He's been supplying wood boat restorers for decades.
https://www.amazon.com/Smiths-Epoxy-Fill-it-12-Ounce/dp/B073CGKXNN?ref_=ast_bbp_dp
On the foilcals, that and a very thin flexible putty knife, of course. Good luck!
Can't wait to see the finished product!
Nice doggy....looking for his woofers?
BTW, I use Smith's Fill-It for wood filler repairs - it won't expand contract at a different rate and so eventually separate & depart like bondo type products.
He's been supplying wood boat restorers for decades.
https://www.amazon.com/Smiths-Epoxy-Fill-it-12-Ounce/dp/B073CGKXNN?ref_=ast_bbp_dp
On the foilcals, that and a very thin flexible putty knife, of course. Good luck!
Speedbump71
Buried in speakers
Weeknight baby steps. Tonight I worked on the bottom of the second cabinet. This one had a little more moisture damage. The water wicked up into the old bases and made it to the bottom of the speaker. The screws stayed damp enough to rust into place and snapped when I originally tried to remove them.
I drilled all of the screws out, then drilled a larger hole to remove any moisture damage from along where the threads were. I keep wood dowel around for plugging holes like this, and just cut plugs with a coping saw. Drill the hole slightly undersize, glue it up and hammer it in.
I also removed all loose material from where the bases were using 80 grit sandpaper. Once it was off, I soaked the areas with superglue to bind the underlying material back to itself. I will probably skimcoat this with Bondo when I fix the missing chunk.
Boring pics:


I drilled all of the screws out, then drilled a larger hole to remove any moisture damage from along where the threads were. I keep wood dowel around for plugging holes like this, and just cut plugs with a coping saw. Drill the hole slightly undersize, glue it up and hammer it in.
I also removed all loose material from where the bases were using 80 grit sandpaper. Once it was off, I soaked the areas with superglue to bind the underlying material back to itself. I will probably skimcoat this with Bondo when I fix the missing chunk.
Boring pics:
Speedbump71
Buried in speakers
Work continues on making sure the cabinets have solid bases and corners. The second speaker was sanded flat on the bottom, and since it had less moisture damage, I just filled the holes with some glue as I sanded. Once below the paint, and all loose material is removed, I have been using Varathane Wood Hardener (hehe). It is like opening a can of stinky air it evaporates so fast, but it soaks in quickly and does seem to leave behind a binding agent of some sort that seals the surface and some depth below. Any remaining edge gaps after clamping get runny el cheapo superglue until they wont take any more. It is going somewhere, and I suppose wherever it is going it's doing more good than harm.
Looking around for nice 1-2" thick yellow fiberglass. Thinking I may just have to buy some Owens Corning rigid fiberglass to keep the original look.
More boring pics.


Looking around for nice 1-2" thick yellow fiberglass. Thinking I may just have to buy some Owens Corning rigid fiberglass to keep the original look.
More boring pics.

GD70
Lunatic Member
Pics help tell the story, not boring at all!Work continues on making sure the cabinets have solid bases and corners. The second speaker was sanded flat on the bottom, and since it had less moisture damage, I just filled the holes with some glue as I sanded. Once below the paint, and all loose material is removed, I have been using Varathane Wood Hardener (hehe). It is like opening a can of stinky air it evaporates so fast, but it soaks in quickly and does seem to leave behind a binding agent of some sort that seals the surface and some depth below. Any remaining edge gaps after clamping get runny el cheapo superglue until they wont take any more. It is going somewhere, and I suppose wherever it is going it's doing more good than harm.
Looking around for nice 1-2" thick yellow fiberglass. Thinking I may just have to buy some Owens Corning rigid fiberglass to keep the original look.
More boring pics.
View attachment 1653947
View attachment 1653946
View attachment 1653944
View attachment 1653945
Nice progress!

Speedbump71
Buried in speakers
what padding did you use to replace the old ones?
Do you mean grills or fiberglass?
Do you mean grills or fiberglass?
I mean the damping material lining the inside of the cabinet.

Speedbump71
Buried in speakers
I mean the damping material lining the inside of the cabinet.
I'm pretty sure it is just 1" yellow fiberglass. I'm looking for a good source. It is a little more dense than home insulation. In between the rigid fiberglass board and typical home insulation.
Speedbump71
Buried in speakers
Man am I glad I pulled the fiberglass out. Mucho mildew/spores/etc came out in a cloud as I removed it. This was expected based on the environment these were obviously stored in. The insides will now be hosed out with mildewcide and allowed to dry in the sun for a few days (if things ever get sunny around here again this year). I'll try to get a pic of the second one when I do it tonight. Almost ready to start the duratex. I also noticed that some of the places I added superglue while clamping the corners allowed it through to the inside of the cabinet, so I will spend some time bracing and gluing before any fiberglass goes back in.
Foilcals came off without a hitch, and I am going to make JBL crossover sized plates with new binding posts on them to go with the crossovers I am going to build.
Pics later.
Foilcals came off without a hitch, and I am going to make JBL crossover sized plates with new binding posts on them to go with the crossovers I am going to build.
Pics later.
Speedbump71
Buried in speakers
Project back in progress. Painted surfaces are half complete, to be followed by finish of choice. Pics incoming, but boring (raw wood/new black paint).
Trying to get them out of the shop before the holiday crowd hits the house, so I have a place to escape to
Trying to get them out of the shop before the holiday crowd hits the house, so I have a place to escape to

Nyjblbob
Hooked on Horn's and Tubes. Go big or go home
I cannot stress enoughProject back in progress. Painted surfaces are half complete, to be followed by finish of choice. Pics incoming, but boring (raw wood/new black paint).
Trying to get them out of the shop before the holiday crowd hits the house, so I have a place to escape to
Don’t reuse the Lx16 Xovers
The worst! Get a pair of Lx10’s or Lx80’s
Or make new ones
Bobhorn
Speedbump71
Buried in speakers
OK. Cabinet one has some color at last. Are there a few imperfect corners? Yes. Did the metal feet from the peavey cabs stacked on top of them gouge the top a bit? Yes.
I just finally decided to let some of the 70's stay on the cabs, as to do more upped the level of effort considerably. I have stretched the 45 year old particle board all I can without going to new veneer.
This is with one coat of Watco "Medium Walnut" Danish Oil. I will let it cure a couple days and do another coat.


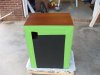

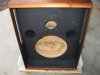


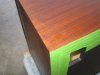
I just finally decided to let some of the 70's stay on the cabs, as to do more upped the level of effort considerably. I have stretched the 45 year old particle board all I can without going to new veneer.
This is with one coat of Watco "Medium Walnut" Danish Oil. I will let it cure a couple days and do another coat.
Last edited:
Nyjblbob
Hooked on Horn's and Tubes. Go big or go home
Very niceOK. Cabinet one has some color at last. Are there a few imperfect corners? Yes. Did the metal feet from the peavey cabs stacked on top of them gouge the top a bit? Yes.
I just finally decided to let some of the 70's stay on the cabs, as to do more upped the level of effort considerably at this point. I have streched the 45 year old particle board all I can without going with new veneer.
This is with one coat of Watco "Medium Walnut" Danish Oil. I will let it cure a couple days and do another coat.
View attachment 1701524
View attachment 1701525
View attachment 1701526
View attachment 1701527
View attachment 1701528
View attachment 1701529
View attachment 1701530
View attachment 1701532
View attachment 1701533
GD70
Lunatic Member
Love it! Furniture grade cabinets!OK. Cabinet one has some color at last. Are there a few imperfect corners? Yes. Did the metal feet from the peavey cabs stacked on top of them gouge the top a bit? Yes.
I just finally decided to let some of the 70's stay on the cabs, as to do more upped the level of effort considerably. I have stretched the 45 year old particle board all I can without going to new veneer.
This is with one coat of Watco "Medium Walnut" Danish Oil. I will let it cure a couple days and do another coat.
View attachment 1701524
View attachment 1701525
View attachment 1701526
View attachment 1701527
View attachment 1701528
View attachment 1701529
View attachment 1701530
View attachment 1701532
View attachment 1701533
One of the BEST parts of a restoration! It's immediate gratification!
Mine took 5 oil applications. I sand each application with 600 grit after 24 hours drying time.
By the fifth application, the veneer can't soak up any more oil.
Glenn
Nyjblbob
Hooked on Horn's and Tubes. Go big or go home
After sanding, how do you get the sawdust off completely? Did you add any stain?Love it! Furniture grade cabinets!
One of the BEST parts of a restoration! It's immediate gratification!
Mine took 5 oil applications. I sand each application with 600 grit after 24 hours drying time.
By the fifth application, the veneer can't soak up any more oil.
Glenn
I have to finish my 4343 cabinets