


You are using an out of date browser. It may not display this or other websites correctly.
You should upgrade or use an alternative browser.
You should upgrade or use an alternative browser.
Novalux Stereophonic - Things to check on vintage equipment.
- Thread starter Mr Boochie
- Start date
Register to hide this ad
He has several easy-to-understand, "approachable" videos.Seems like an OK vid, doesn't come across as a "know-it-all", covered glue, fusibles and relays as other problem areas. Newb's should watch.

I really don’t like the whole “recap” craze.
It isn’t a repair, and it isn’t a restoration, it’s just something that anyone with a soldering iron and some skills can do with a list off of the internet. People seem to think that any piece of vintage audio needs a “recap”, but doesn’t need any resistors or semiconductors to be tested or replaced.
If it needed repair, that is a separate skill and function, if it’s old, it needs more than a “recap”.
It isn’t a repair, and it isn’t a restoration, it’s just something that anyone with a soldering iron and some skills can do with a list off of the internet. People seem to think that any piece of vintage audio needs a “recap”, but doesn’t need any resistors or semiconductors to be tested or replaced.
If it needed repair, that is a separate skill and function, if it’s old, it needs more than a “recap”.
The problem I've come across with the "wholesale recap" process is when someone isn't recording what they are doing. Or how the thing looked before the "resto."If it needed repair, that is a separate skill and function, if it’s old, it needs more than a “recap”.
Then, after the recap, the stupid thing doesn't work or sounds like it's going to blow up or something. The unit ends up on the bench, with a box of spare new and used parts.
These are not fun fixes — that I will not do them anymore.

Last edited:
To the credit of this video, they guy did say that the 3 areas of glue, fusibles and relays were also important, I think he may have even said was "more important", he also said the caps would likely test ok and confirmed with DCA tester.People seem to think that any piece of vintage audio needs a “recap”, but doesn’t need any resistors or semiconductors to be tested or replaced.
I've done my share of recaps with results ranging from "oh-wow!" to barely discernable, the better results coming from equipment where cheap caps were used, eg, NAD 3020, 3150,,,
edit agree with SaturationPt, seen too often where people have a problem (eg protection) then do a recap as a repair attempt rather than some simple diagnostic tests (dc offset) then get frustrated because problem persists
Last edited:
He also has a nice, complete DIY video for building an amp dummy load.


Wholesale re-capping is not necessary- until it is. There are certain pieces of equipment that in 2026 need all electrolytic capacitors replaced. Even before you can trouble shoot other problems.
Technics RS1500 for example. All units will exhibit cap leakage now. You can't even discern what else is wrong until you change almost 300 caps. Or....If you are looking at a Frako cap it has to be replaced.
Unfortunately, non- professional occasional hobbyists will apply wholesale re-capping everywhere. That is where problems start with poor practices and causing more problems than solved. If you see equipment regularly you get to know how deep you have to go.
Technics RS1500 for example. All units will exhibit cap leakage now. You can't even discern what else is wrong until you change almost 300 caps. Or....If you are looking at a Frako cap it has to be replaced.
Unfortunately, non- professional occasional hobbyists will apply wholesale re-capping everywhere. That is where problems start with poor practices and causing more problems than solved. If you see equipment regularly you get to know how deep you have to go.
Attachments
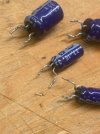
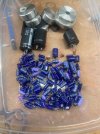
Vintage reel-to-reel is a different ballgame, for me. I avoid units that need wholesale cap changes, if possible. Because I worry about some inherent frailty and basic engineering issues with them.
I put all my Nakamichi cassette decks in storage after the last know-good tech retired. They had to be aligned, cleaned, and tested each year to ensure optimal performance. Parts (like OEM or good aftermarket belts) were starting to become difficult. Kinda too bad.
I put all my Nakamichi cassette decks in storage after the last know-good tech retired. They had to be aligned, cleaned, and tested each year to ensure optimal performance. Parts (like OEM or good aftermarket belts) were starting to become difficult. Kinda too bad.

I think it's probably not a bad idea to do a recap on something that is 40 years old. It can't hurt if you want to keep a vintage piece going for another 30 to 40 years... But yeah, don't also ignore other components that could be aging as well. If I take a unit in for rehabilitation I want it to be gone through thoroughly. Not just a superficial recap... Look at the relays. Look at the controls. How do the transistots look and does the thermal compound need to be replaced? Do it all... Check the measurement. Are they in spec?you all are really going to regret not recapping units while you can still buy through hole parts.
but whatever. do what you want. i will remain pro-recap.
Yep, through hole parts are going to be more of a problem just like belts , springs and idlers for tape machines.you all are really going to regret not recapping units while you can still buy through hole parts.
but whatever. do what you want. i will remain pro-recap.
As long as you do it correctly, with the correct parts.I think it's probably not a bad idea to do a recap on something that is 40 years old. It can't hurt if you want to keep a vintage piece going for another 30 to 40 years... But yeah, don't also ignore other components that could be aging as well. If I take a unit in for rehabilitation I want it to be gone through thoroughly. Not just a superficial recap... Look at the relays. Look at the controls. How do the transistots look and does the thermal compound need to be replaced? Do it all... Check the measurement. Are they in spec?
I don't like wholesale fixes. I have seen the idea backfire on people. Just take lots of photos and keep notes on everything you do.

Another nice video.

I have watched some of the Novalux videos and they are good. I don't agree with everything he does/says, but mostly that's just my personal way of doing things. I dislike the term 'recapping' and that too many people regard it as literally as the word implies, i.e. replacing only the electrolytic capacitors, and doing nothing else.
People who have read through the proper restoration threads on AK will know the significant difference between recapping and restoring.
People who have read through the proper restoration threads on AK will know the significant difference between recapping and restoring.
Last edited:

In doing this for a little over 20 years, I can tell you that the number of issues that were traced down to, and resolved by replacing, a cap or a couple of them, is pretty small.
The number one cause of problems in audio gear, IME, is connection issues. Dirty switches and potentiometers, cracked solder joints, cruddy relay contacts, and in units previously worked on, broken wiring. Well over 90% of the units I have worked have been brought back to functionality just by addressing those things.
The number one cause of problems in audio gear, IME, is connection issues. Dirty switches and potentiometers, cracked solder joints, cruddy relay contacts, and in units previously worked on, broken wiring. Well over 90% of the units I have worked have been brought back to functionality just by addressing those things.
Last edited:
In case you didn't see this before, here's a nice post by Jim McShane about tube amps and some problems he's seen over the years.
________________________________
Posted by Jim McShane (D) on August 29, 2013 at 15:51:50
I have been deluged lately with people asking about issues with their tube gear that they have decided, for whatever reason, must be the tubes. Occasionally, it is, but in my experience, at least 75% of the time it is not. I wanted to share some tips to help.
1. The #1 cause of noise problems with tubes is poor contact between the tube pins and the socket. There are a wide variety of possible causes: dirty pins and/or sockets (in the case of a noisy new tube, the socket is the PRIME suspect), socket contacts that have been stretched out or worn out and don’t make good contact, or, in a few cases, bad solder joints on the socket itself.
Tube sockets, even excellent ones, are not sophisticated, high-reliability connectors. You won’t see tube sockets used in critical applications because they aren’t reliable enough.
Do yourself a favor — clean the tube pins and sockets every time you change tubes. A bottle of DeOxit D5 and a handful of good old-fashioned pipe cleaners work great for octals and other large pin sockets; for miniatures, D5 and tiny dental brushes (another drugstore item) do a solid job. BTW, D5 is good to 400F, so don’t lose sleep over it because of something you read on the “Hi-Fi Hysteria” forum. And it doesn’t gum up, either. Spray some in a paper cup and let it evaporate — you’ll be able to see for yourself.
Sometimes, you swap a tube, and the new tube is okay. So the tube you removed must be bad, right? NO! Sometimes, the scraping action of removing and reinstalling a tube in that socket is enough to temporarily restore contact, fooling you into thinking the tube is bad. KEEP YOUR SOCKETS CLEAN!!
If you are installing new production tubes into vintage or older gear, keep in mind that most modern tubes have slightly smaller pins than the original stock tubes did. You may need to re-tension (or, in the worst case, replace) the original sockets that can’t make good contact with the smaller pins.
Honest — only a few % of the tubes I get back for noise are bad. Most go on to play fine in another socket.
2. The metal cans surrounding the tubes serve as shields designed to prevent external fields from inducing noise in the tube. Would a manufacturer spend the money to put them on there unless they were worth it? Will the tube run a bit warmer with it in place? Possibly, but be smart about removing shields!
3. Would you like to use KT-120s in your amp? It’s more than just an increased heater current that’s the issue. I’ve had a couple of cases where excessive grid circuit resistance causes unstable bias. The KT-120 has a maximum grid circuit resistance of 51 k-ohms. If your amp is above that, using the KT-120 carries a risk. Just like the EH and Tung-Sol 7591As, some KT-120s will be compatible with excess resistance, but others will not.
4. Don’t fry those expensive new power tubes! If your amp has an adjustable bias, turn the bias current DOWN significantly before plugging in new tubes. The bias that was correct for the older, worn tubes may not apply to the fresh, new ones. And it doesn’t take much overcurrent to damage a tube or shorten its life. Adjust the bias to spec, and make sure the amp is fully warmed up, including both the tubes and the internal parts. The whole amp should be warm, which takes at least half an hour, in my experience.
Keep one last thing in mind: often, you see a voltage “spec” on a schematic at the control grid of a tube. DO NOT TRY TO SET THE VOLTAGE AT THE GRID TO THAT SPEC! Set the negative voltage at the tube grid to the value required to achieve the specified cathode current. If the tube is passing the correct amount of current and the grid voltage is -20 volts, then to hell with the “spec” of -22.5 volts or whatever it is. Making the grid voltage more negative relative to the tube’s cathode is like reducing the pressure on a garden hose to restrict water flow. And if you let up the pressure on the hose, more water flows — that’s the same thing that happens if the tube grid is less negative.
5. Most tube testers do not test power or other high-voltage/high-current tubes at a sufficiently high voltage to be very meaningful. Current matching is pretty much out of the question for all but the few “lab grade” testers that can apply high voltages at reasonable current levels. What your tube tester says with 150 volts on the plate will differ significantly from what my rig says at 465 volts! Our old pal Steve Melkisethian (proprietor of Angela Instruments) used to say he didn’t even CARE what your tube tester said! It’s a little harsh, but not entirely unreasonable. Remember, a tube’s test results depend on the conditions under which you test it.
6. Other components, besides the tubes themselves, can make your matched tubes seem less well-matched. Power tubes may be matched for transconductance, but it is imperative that if you need matched tubes, they are matched for current — some say plate current, I say cathode current. Why cathode current? Because between the cathode and ground of many (most?) power tubes, you will find a resistor in the circuit — low value; 10 Ohms is common — and that resistor’s purpose is to make it possible for you to measure the voltage across that resistor and use Ohm’s Law to calculate the current. Measuring the current with an ammeter requires breaking into the circuit and inserting the ammeter. However, with a voltmeter, we don’t have to break into the circuit; we can measure the voltage across the resistor and determine the current flowing through it. For instance, if you read 0.5 volts across a 10-ohm resistor, you can compute the current flow by dividing the voltage by the resistance. .5 volts divided by 10 Ohms = .05 amps, 50 milliamps.
However, keep in mind that not only the plate current but also the screen current flows through the tube cathode to the ground (of course, triodes have no screens, so this doesn’t apply). We’ll ignore situations where the grid is driven positively and current flows through it as well for now.
So that’s 50 mA. Did you just read the example above? That’s the plate current and the screen current combined (unless the tube is a triode). And that combined current is what is causing the voltage across the resistor. By knowing the total current, the cathode current, and the voltage across the tube from the plate to the cathode, we can easily calculate the tube’s total power dissipation. That’s important, since excessive dissipation (measured in watts) kills a tube.
Why would the readings be different on “matched tubes”?
a. The tubes are never perfectly matched — some tolerance exists
b. The screen and/or plate voltages are slightly different across the different tubes due to variations in the resistances of the output transformers’ primary windings.
c. The cathode resistors are never the same value.
d. Etc.
Or some combination of the above...
7. Variance in the brightness of the tube heater is normal and not an issue. When using tubes, it is essential to distinguish between the orange glow of the tube heater at the tube's center and the reddish glow of the large internal metal tube plate. The picture below shows one tube from a set with a reddish-orange tube plate. That is a problem for sure!
There can be some variation in the brightness/glow of the tube heaters, both at the top and bottom of the internal tube structure. This is normal and results from minor production variances. There is no cause for concern.
The amount that the heater protrudes outside the cathode sleeve varies from tube to tube, and if one protrudes more than the other at the top, it will be brighter. It can also happen at the bottom of the tube; it depends on whether the heater protrudes more (as it does at the top). Don’t worry! It is not a malfunction and isn’t a reason for concern.
I just wanted to share a few things that maybe will help people struggling to understand why they had “problems” with their tubes. One of the points mentioned above is almost always the case!
.
________________________________
Posted by Jim McShane (D) on August 29, 2013 at 15:51:50
I have been deluged lately with people asking about issues with their tube gear that they have decided, for whatever reason, must be the tubes. Occasionally, it is, but in my experience, at least 75% of the time it is not. I wanted to share some tips to help.
1. The #1 cause of noise problems with tubes is poor contact between the tube pins and the socket. There are a wide variety of possible causes: dirty pins and/or sockets (in the case of a noisy new tube, the socket is the PRIME suspect), socket contacts that have been stretched out or worn out and don’t make good contact, or, in a few cases, bad solder joints on the socket itself.
Tube sockets, even excellent ones, are not sophisticated, high-reliability connectors. You won’t see tube sockets used in critical applications because they aren’t reliable enough.
Do yourself a favor — clean the tube pins and sockets every time you change tubes. A bottle of DeOxit D5 and a handful of good old-fashioned pipe cleaners work great for octals and other large pin sockets; for miniatures, D5 and tiny dental brushes (another drugstore item) do a solid job. BTW, D5 is good to 400F, so don’t lose sleep over it because of something you read on the “Hi-Fi Hysteria” forum. And it doesn’t gum up, either. Spray some in a paper cup and let it evaporate — you’ll be able to see for yourself.
Sometimes, you swap a tube, and the new tube is okay. So the tube you removed must be bad, right? NO! Sometimes, the scraping action of removing and reinstalling a tube in that socket is enough to temporarily restore contact, fooling you into thinking the tube is bad. KEEP YOUR SOCKETS CLEAN!!
If you are installing new production tubes into vintage or older gear, keep in mind that most modern tubes have slightly smaller pins than the original stock tubes did. You may need to re-tension (or, in the worst case, replace) the original sockets that can’t make good contact with the smaller pins.
Honest — only a few % of the tubes I get back for noise are bad. Most go on to play fine in another socket.
2. The metal cans surrounding the tubes serve as shields designed to prevent external fields from inducing noise in the tube. Would a manufacturer spend the money to put them on there unless they were worth it? Will the tube run a bit warmer with it in place? Possibly, but be smart about removing shields!
3. Would you like to use KT-120s in your amp? It’s more than just an increased heater current that’s the issue. I’ve had a couple of cases where excessive grid circuit resistance causes unstable bias. The KT-120 has a maximum grid circuit resistance of 51 k-ohms. If your amp is above that, using the KT-120 carries a risk. Just like the EH and Tung-Sol 7591As, some KT-120s will be compatible with excess resistance, but others will not.
4. Don’t fry those expensive new power tubes! If your amp has an adjustable bias, turn the bias current DOWN significantly before plugging in new tubes. The bias that was correct for the older, worn tubes may not apply to the fresh, new ones. And it doesn’t take much overcurrent to damage a tube or shorten its life. Adjust the bias to spec, and make sure the amp is fully warmed up, including both the tubes and the internal parts. The whole amp should be warm, which takes at least half an hour, in my experience.
Keep one last thing in mind: often, you see a voltage “spec” on a schematic at the control grid of a tube. DO NOT TRY TO SET THE VOLTAGE AT THE GRID TO THAT SPEC! Set the negative voltage at the tube grid to the value required to achieve the specified cathode current. If the tube is passing the correct amount of current and the grid voltage is -20 volts, then to hell with the “spec” of -22.5 volts or whatever it is. Making the grid voltage more negative relative to the tube’s cathode is like reducing the pressure on a garden hose to restrict water flow. And if you let up the pressure on the hose, more water flows — that’s the same thing that happens if the tube grid is less negative.
5. Most tube testers do not test power or other high-voltage/high-current tubes at a sufficiently high voltage to be very meaningful. Current matching is pretty much out of the question for all but the few “lab grade” testers that can apply high voltages at reasonable current levels. What your tube tester says with 150 volts on the plate will differ significantly from what my rig says at 465 volts! Our old pal Steve Melkisethian (proprietor of Angela Instruments) used to say he didn’t even CARE what your tube tester said! It’s a little harsh, but not entirely unreasonable. Remember, a tube’s test results depend on the conditions under which you test it.
6. Other components, besides the tubes themselves, can make your matched tubes seem less well-matched. Power tubes may be matched for transconductance, but it is imperative that if you need matched tubes, they are matched for current — some say plate current, I say cathode current. Why cathode current? Because between the cathode and ground of many (most?) power tubes, you will find a resistor in the circuit — low value; 10 Ohms is common — and that resistor’s purpose is to make it possible for you to measure the voltage across that resistor and use Ohm’s Law to calculate the current. Measuring the current with an ammeter requires breaking into the circuit and inserting the ammeter. However, with a voltmeter, we don’t have to break into the circuit; we can measure the voltage across the resistor and determine the current flowing through it. For instance, if you read 0.5 volts across a 10-ohm resistor, you can compute the current flow by dividing the voltage by the resistance. .5 volts divided by 10 Ohms = .05 amps, 50 milliamps.
However, keep in mind that not only the plate current but also the screen current flows through the tube cathode to the ground (of course, triodes have no screens, so this doesn’t apply). We’ll ignore situations where the grid is driven positively and current flows through it as well for now.
So that’s 50 mA. Did you just read the example above? That’s the plate current and the screen current combined (unless the tube is a triode). And that combined current is what is causing the voltage across the resistor. By knowing the total current, the cathode current, and the voltage across the tube from the plate to the cathode, we can easily calculate the tube’s total power dissipation. That’s important, since excessive dissipation (measured in watts) kills a tube.
Why would the readings be different on “matched tubes”?
a. The tubes are never perfectly matched — some tolerance exists
b. The screen and/or plate voltages are slightly different across the different tubes due to variations in the resistances of the output transformers’ primary windings.
c. The cathode resistors are never the same value.
d. Etc.
Or some combination of the above...
7. Variance in the brightness of the tube heater is normal and not an issue. When using tubes, it is essential to distinguish between the orange glow of the tube heater at the tube's center and the reddish glow of the large internal metal tube plate. The picture below shows one tube from a set with a reddish-orange tube plate. That is a problem for sure!
There can be some variation in the brightness/glow of the tube heaters, both at the top and bottom of the internal tube structure. This is normal and results from minor production variances. There is no cause for concern.
The amount that the heater protrudes outside the cathode sleeve varies from tube to tube, and if one protrudes more than the other at the top, it will be brighter. It can also happen at the bottom of the tube; it depends on whether the heater protrudes more (as it does at the top). Don’t worry! It is not a malfunction and isn’t a reason for concern.
I just wanted to share a few things that maybe will help people struggling to understand why they had “problems” with their tubes. One of the points mentioned above is almost always the case!
.
Last edited:

Frbock
Active Member
Felt like an idiot last week. My Adcom C272 would not power up. Bad fuse?
I unhooked everything, and dropped in my backup Onkyo M5010, plugged it in. It didn't power up either. Everything else in the power strip works.
Yep, an outlet on the power strip went bad even though the lights were still showing green.
Got a new surge suppressing power strip, and I'll try hooking it up in the morning.
I unhooked everything, and dropped in my backup Onkyo M5010, plugged it in. It didn't power up either. Everything else in the power strip works.
Yep, an outlet on the power strip went bad even though the lights were still showing green.
Got a new surge suppressing power strip, and I'll try hooking it up in the morning.
Similar threads


- Replies
- 3
- Views
- 353
- Replies
- 1
- Views
- 199


- Replies
- 3
- Views
- 373
- Replies
- 2
- Views
- 1K
