• The move to the new server is done. There are some software and database maintenance updates in process. This has us passing the hat around to help out. We appreciate any donations. Seriously, even a dollar helps. The payment page may be found here - https://www.audiokarma.org/support.html

One Method for Veneering Speaker Cabinets

Very nice, alot of work indeed and will be helpful for others. Nice PDFing. :)

I have been working with paperback veneer lately, just curious if you've tried that yet? It's very easy to work with (little more expensive I think) using rubber cement and a small roller. I tried regular birds eye veneer my first time and gave up.

Either way, at the end of the project it's always worth it. Give veneering a try everyone!
 
Good work Mike, another warning about that blue tape - do not leave it in place when using the clamp method of applying veneers, with the pressure of the clamps it practically bonds to the veneer.
 
Beautiful work Mike! Thanks for sharing it with the rest of us and taking the time to document and photograph the process.:thmbsp:
 
Very nice indeed! You should be proud of yourself and you have helped quite a few people in the process. :thmbsp:
 
Very great documentation...

The one thing I would (and do) differently is use true veneer tape for splits, and to help keep splits from forming.

Veneer tape is a very thin paper tape with holes in it, that you wet to activate the glue. Once you wet it and apply it to the veneer, it actually shrinks to help pull the veneer together, thus making any splits very tight.

Once you have applied the veneer, you just take a rag, re-wet the tape, and rub off..

This way, once you are done, you will have no residue left since it's a water based glue, and it wipes off completely after you have completed the veneer.
 
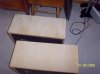
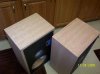
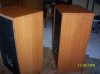
My weekend project which actually started Friday evening is a pair of beat up Infinity Qb's in vinyl and as you can see I followed Mike's tutorial to the letter.

Mike your instructions were perfect; I probably wouldn't have attempted this without your thread, Thank you!

I'll add more details later since it's late and I've got to get up early. I'm call it quits for now with the veneering done and ready for a light sanding and finish hopefully tomorrow night.
 

Attachments

  • 100_2357.jpg
    100_2357.jpg
    141.9 KB · Views: 203
  • 100_2358.jpg
    100_2358.jpg
    128.6 KB · Views: 200
  • 100_2359.jpg
    100_2359.jpg
    137.1 KB · Views: 234
BRAVO! They look great! Did you do those front strips too?

What wood is that now? Please do post pics after you get them oiled up, would love to see the finished product.

Glad the document helped out a bit :thmbsp:

Mike
 
Good work, guys -- looks great. :thmbsp:

For all of you out there who would love try this but have been put off by the process -- go for it! It really isn't so hard, and it's really nice when you are done to know that you've turned something that looked like crap into something beautiful once again (or even for the first time, in the case of nasty vinyl-covered speakers).

How many of you out there were afraid to refoam a woofer the first time? This is pretty much the same; it gets easier after the first try. I use contact cement and raw veneer, and have done a bunch of things since my first attempt. Just put some gorgeous Koa wood on my folk's great big old Westinghouse table radio yesterday (a wedding gift nearly 60 years ago) -- man, what a difference. :thmbsp:

Anyhow, there's speaker boxes to be done, men -- quick, to the hardware store and get your supplies! :D
 
BRAVO! They look great! Did you do those front strips too?

What wood is that now? Please do post pics after you get them oiled up, would love to see the finished product.

Glad the document helped out a bit :thmbsp:

Mike

Yes Mike I did the fronts also using Cedan brand veneer I purchased at the local Menards (also found at Home Depot and Lowes). I wanted something different then walnut or red oak so I went with the only other choice which was cherry and it only came in paper backed. I also purchased the Cedan 1" wide preglued edging that came in a 96" roll and it worked great. :thmbsp:

Here is a few of the things I learned along the way:

Vinyl veneer doesn't come off easily; even using a heat gun it takes a lot of effort and heat. I seriously doubt that one could get it removed with their wifes hair dryer unless the speakers were left outside on a very hot day and preheated.

When applying wood glue I used a disposable plastic roller tray the same width as the sponge roller and it was pretty handy. I also sped up the process of applying two coats by applying gentle heat with my wifes blow dryer.

The directions on Cedan brand veneer are pretty vague and don't really tell you that the paper backing on paper backed veneer stays on and isn't to be removed. Also I was concerned that since the paper backed veneer was rolled the opposite way from Mikes tutorial that it would curl up and stick together and make a mess of things. But as it turns out once the glue is applied the paper absorbs some of the moisture and lays flat nicely. But it works better if you don't leave it dry completely over night or it will curl some.

The best tool for cutting the veneer I found was a cheap utility knife the kind that has the tips you break off as they dull; it also was handy that you can extend it out an inch or more for trimming so you can lay the back of the blade against the surface and trim closer to the edge before sanding without fear of gouging.

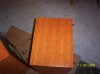
I'll post up some pics once I get these completed. I hope to get these completely done in the next week. I didn't get to the staining yet because I'm still playing around with color mixing the Watco. And I need to repair one grill that is broken in two and once that is done put new cloth on.
 
Finally got the color I wanted by mixing Watco light oak and Watco cherry 1/2 and 1/2. The cherry was way too red by itself and the light oak didn't bring out any of the natural dark colors of the wood. This I like, the gold of the lighter areas of the wood and the darker red stands out just enough.
 

Attachments

  • 100_2360.jpg
    100_2360.jpg
    128.9 KB · Views: 232
  • 100_2361.jpg
    100_2361.jpg
    144.3 KB · Views: 201
  • 100_2362.jpg
    100_2362.jpg
    144.9 KB · Views: 196
I've found it not necessary to remove the vinyl of the speaker to be veneered as I simply remove any loose areas patch any gouges/ holes and lightly sand with some aluminum oxide sandpaper. Clean off residual dust and then use a water based contact glue on speaker and new veneer. Apply and trim with your choice of tool......beautiful job on your Qb's, Army. I'd add some internal bracing while you have the drivers out( baffle to back). Enjoy.
 
Back
Top Bottom