• The move to the new server is done. There are some software and database maintenance updates in process. This has us passing the hat around to help out. We appreciate any donations. Seriously, even a dollar helps. The payment page may be found here - https://www.audiokarma.org/support.html

Onkyo tx-6500 mkII needs some repairs

Rookum

New Member
Hey, new to all this but I've had this tuner since 88' and I absolutely love it. But now it's not working properly, audio quits after a few seconds of being on, I would like to Do a restore but I'm lucky I got dressed this morning so I don't wanna make his super complicated. I'd like to get some help/advice to diagnose the main issue and get that handled. Then I'm sure there will be more things to do, like led's, knobs etc. Any help would be greatly appreciated, Thanks In Advance for the help.
 
Last edited:
Register to hide this ad
Greetings and welcome to Ak.

Protection circuit kicking in or (perhaps relay) Disconnect ac plug and remove speaker wires. ( let cool down if run.) Another set of speakers or headphones okay? Most all user manuals going into protection mode #1 is speakers and or wiring. Again unplug before removing wires because a short will blow stuff (( and don't try to connect stuff while power on either.))
 
If it acts consistently as you describe, I suspect a transistor going bad and heating up to the point where it overdrives the amp circuit until the relay reacts to protect the speakers.

Finding and replacing that transistor.
You need to learn the amp circuit and identify the transistors in the audio chain and associated protection and any feedback transistors.

Get a service manual and study it.
Perhaps from hifiengine.com

Can you read a schematic?
Can you identify parts?
Can you unsolder and solder electronics well.
Since the damn thing kinda works, testing it out of circuit is going to be useless.

You may be able to trick it by cooling when it fails. Either freeze spray (spendy) or a q-tip and alcohol. By dabbing a little alcohol on a transistor and letting it evaporate, it cools the transistor and if may cause the circuit to work again briefly ( relay kicks in until the bad boy over heats again ).

If you find a transistor that you can trick into working that way, then finding a replacement (old transistors are obsolete so we use modern replacements). Once found, ordered, installed, maybe life gets good.

Then again, it could be something completely different.

Fixing electronics is trickier than keeping a woman happy.
 
If it acts consistently as you describe, I suspect a transistor going bad and heating up to the point where it overdrives the amp circuit until the relay reacts to protect the speakers.

Finding and replacing that transistor.
You need to learn the amp circuit and identify the transistors in the audio chain and associated protection and any feedback transistors.

Get a service manual and study it.
Perhaps from hifiengine.com

Can you read a schematic?
Can you identify parts?
Can you unsolder and solder electronics well.
Since the damn thing kinda works, testing it out of circuit is going to be useless.

You may be able to trick it by cooling when it fails. Either freeze spray (spendy) or a q-tip and alcohol. By dabbing a little alcohol on a transistor and letting it evaporate, it cools the transistor and if may cause the circuit to work again briefly ( relay kicks in until the bad boy over heats again ).

If you find a transistor that you can trick into working that way, then finding a replacement (old transistors are obsolete so we use modern replacements). Once found, ordered, installed, maybe life gets good.

Then again, it could be something completely different.

Fixing electronics is trickier than keeping a woman happy.


When I turn it on, you hear the "click" of something turning on and then I'll have audio for 5-10 seconds, then nothing. It's not on long enough to get hot, imo, unless this transistor is roached and causing an immediate overload. As far as reading a schematic and soldering, I guess I can learn cause I really miss having this stereo.
 
Pop the bottom cover off and look at the main filter caps. I have one of these in the queue and one of the main filter caps is leaking electrolyte. I understand this was a problem with this vintage of monster Onks...TX-8500II also. If they're leaking you'll probably also see corrosion on the inside of the bottom cover where the electrolyte dripped.
 
jheu02 makes an experienced pointer as those mains caps (biggest caps in the amp) failing(failed) would certainly trigger the protect circuit right away. Pop the top cover, too if no leaking is present as John describes, if the top of the caps are 'bulged' that's the basic other indicator of failing caps. Shoot & a pic if in doubt.

In my opinion although I try to promote and help guys without much experience, this is not the amp to learn on without some testing knowledge but no harm in taking a good look and attempt to understand the layout

We have no idea of your location but perhaps you have a reliable shop nearby and if the mains caps are indeed faulty at least you have a clue to repair. Perhaps you have a friend or tech school nearby with lab equipment. Be surprised how far pizza and donuts go. :D
 
jheu02 makes an experienced pointer as those mains caps (biggest caps in the amp) failing(failed) would certainly trigger the protect circuit right away. Pop the top cover, too if no leaking is present as John describes, if the top of the caps are 'bulged' that's the basic other indicator of failing caps. Shoot & a pic if in doubt.

In my opinion although I try to promote and help guys without much experience, this is not the amp to learn on without some testing knowledge but no harm in taking a good look and attempt to understand the layout

We have no idea of your location but perhaps you have a reliable shop nearby and if the mains caps are indeed faulty at least you have a clue to repair. Perhaps you have a friend or tech school nearby with lab equipment. Be surprised how far pizza and donuts go. :D

I can definitely take the top off and have a look. I'm basically located between Des Moines and Omaha. There's a local community college, but I'm not sure about there programs, mostly agriculture related stuff out here. I probably should get this into a shop but I'm a tight wad and would like to learn. But I have a Harmon Kardon that needs a power supply. Forget what model it is but it's a beast too. I'll go mess with it this afternoon when the daughter takes her nap, shoot some pictures and see where I'm at. Thanks again!
 
I have a feeling that when I open this up I'm going to be disgusted with the amount of dust inside. Before I crack it open, what basic supplies should I have? Can of air? screwdriver set? Anything else?
 
Soft bristled paintbrush for dusting while blowing air, 1/2" - 1" "chip" or artist's brush with the bristles cut short to make stiffer for harder crud. Before even opening the top case, take off the bottom cover first and look for the leakage as I mentioned. this will also give you a chance to look at several boards for cracked solder joints, darkened areas, etc. If this reveals nothing, then turn the unit over again to take the top cover off and look at the component sides of the boards for darkened areas, obviously burned components, etc. DON'T do anything with the tuning capacitor (aluminum housing with vanes and attached at the tuning flywheel) at this point...no sprays, no brushing, no nothing...and try to avoid blowing dust into it. Take detailed (bright lighting and best quality you can manage) photos of anything that looks amiss...browned boards, cracked solder joints, etc and post them so we can better help.


IMGP8759.JPG
Tuning Cap
IMGP8760.JPG
 
Last edited:
Soft bristled paintbrush for dusting while blowing air, 1/2" - 1" "chip" or artist's brush with the bristles cut short to make stiffer for harder crud. Before even opening the top case, take off the bottom cover first and look for the leakage as I mentioned. this will also give you a chance to look at several boards for cracked solder joints, darkened areas, etc. If this reveals nothing, then turn the unit over again to take the top cover off and look at the component sides of the boards for darkened areas, obviously burned components, etc. DON'T do anything with the tuning capacitor (aluminum housing with vanes and attached at the tuning flywheel) at this point...no sprays, no brushing, no nothing...and try to avoid blowing dust into it. Take detailed (bright lighting and best quality you can manage) photos of anything that looks amiss...browned boards, cracked solder joints, etc and post them so we can better help.
Got it! Thanks!
 
I use the same brush technique but use a vac hose off the upright (or canister) and simply hold the hose near manual brushing area and sucks up the bunnies and fine dust. I use same brush for the tuner cap vanes etc as noted by John, too.

imo air canned blasters are waste of money & just blow more dust around and makes me sneeze, too (home shop). :D
 
I use the same brush technique but use a vac hose off the upright (or canister) and simply hold the hose near manual brushing area and sucks up the bunnies and fine dust. I use same brush for the tuner cap vanes etc as noted by John, too.
So how about my small shop vac and a tooth brush I use to dust off my rc cars? I'm far away from a craft store and the wife will tell me to get bent if I ask her to bring home some brushes.

imo air canned blasters are waste of money & just blow more dust around and makes me sneeze, too (home shop). :D
 
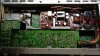
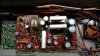
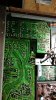
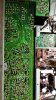
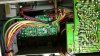
Here's some pics with the bottom panel off.
 

Attachments

  • IMG_20170807_145108581.jpg
    IMG_20170807_145108581.jpg
    72.9 KB · Views: 30
  • IMG_20170807_145111109.jpg
    IMG_20170807_145111109.jpg
    78.9 KB · Views: 29
  • IMG_20170807_145118859.jpg
    IMG_20170807_145118859.jpg
    103.9 KB · Views: 29
Certainly looks clean! Nice job, hardly looks old now..... Maybe look for evidence of heat on the bottom side of those boards too.....
 
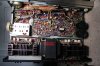
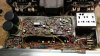
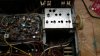
Took the top off.
 

Attachments

  • IMG_20170807_151424223.jpg
    IMG_20170807_151424223.jpg
    93.9 KB · Views: 45
  • IMG_20170807_151541407.jpg
    IMG_20170807_151541407.jpg
    79.4 KB · Views: 46
  • IMG_20170807_151546007.jpg
    IMG_20170807_151546007.jpg
    64.3 KB · Views: 43
More pictures. Dusty but not as bad as I thought it would be.
 

Attachments

  • IMG_20170807_151553930.jpg
    IMG_20170807_151553930.jpg
    79.9 KB · Views: 23
Back
Top Bottom