• The move to the new server is done. There are some software and database maintenance updates in process. This has us passing the hat around to help out. We appreciate any donations. Seriously, even a dollar helps. The payment page may be found here - https://www.audiokarma.org/support.html

Personalized my Magnavox 9304

rpampt

Analogeous Vinylitis
I received this little gem from a fellow AKer 63pontiacgp. Great deal on a great little amp. My first foray into tubes. He already had a wood case around it, but I thought I might personalize it a bit. I went through it and checked the resistors a found 1 that was out of spec quite a bit. I also found a couple with the wrong value. I corrected those and replaced a few others while I was in there if I was working in that area. Some caps had already been replaced, and mods to make it a standalone amp. Although I did some relocation of some caps, and wiring too.

Thanks to Fasterdammit, I also have a proper schematic and also suggested upgrades, which I will take on later when I have time.

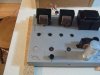
So anyway, I thought I give the chassis a new paint job. I also wanted to relocate the inputs and speaker outputs on the back panel. But I also wanted to have the wood case extend on around the back. More on that later. I'm full of ideas but short on skills. I thought about veneering the top surface of the chassis, but thought better of it. My next option was paint. I wanted to cover some of the holes and didn't know what to use, but settled on JB weld and used it like a body filler. I used some of it to glue some tin on the backside of the holes.

attachment.php
 

Attachments

  • IMG_0346.jpg
    IMG_0346.jpg
    67.7 KB · Views: 363
Register to hide this ad
For some of the smaller holes, all it took was a little masking tape on the backside and then just fill the hole in with JB Weld. Taped off or put pennies in the tube sockets where applicable. And sanded down the patched portions. This method seemed to work, but I didn't do a very good job of sanding down the old holes. Next time I'll know.

attachment.php


While I was letting the JB Weld dry, I built a new oak frame and I fabbed up some RCA and 5 way speaker post plates for the back. Sorry no pictures yet.

More to follow later.
 

Attachments

  • IMG_0347.jpg
    IMG_0347.jpg
    69.2 KB · Views: 351
Will get some decent pics up tomorrow if I can get outside for awhile and snap a few photos.

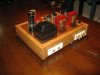
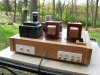
Used a brownish gold hammered paint finish on the chassis, some black hammered on the main transformer. Added some color to the other transformers, relocated the power light a bit differently than I've seen, and made up a new nameplate. Couple different cosmetic ideas I tried out too, but remember, my skills are mediocre. I still give a good effort though!

Everything is mounted and tested, and by some miracle, I got all the wiring functional again. :banana::banana:
 
Went ahead and snapped a couple pics inside with the flash. One of the issues was I didn't get enough filler in the hole on the front left side of the chassis. You can see the indentation. Some other minor imperfections, but overall, turned out pretty decent for me. What ya think about the light location? Good or not so good? How bout the wood trim on the transformers?

These pics reminded me. I need another coat of red paint.

I still will try and get some better shots outside tomorrow.

attachment.php


attachment.php
 

Attachments

  • IMG_0350.jpg
    IMG_0350.jpg
    69.6 KB · Views: 475
  • IMG_0353.jpg
    IMG_0353.jpg
    79.1 KB · Views: 347
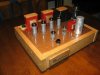
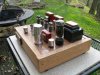
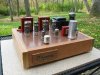
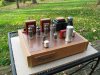
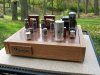
Light rain quit outside so I grabbed a few more pics. Gave the transformers a second coat. Put on different knobs. Snapped pics with and without the wood trim on the transformers. Which way do you think looks better? All input welcome (positive or negative). I can take it if you're gentle. :yes:


What about the location of the on/off light? Good, bad, very bad? Actually what I wanted to do was have a letter M laser cut into the capacitor can and insert the light inside so it would shine through the letter M, but didn't want to spend the $$$ to have it cut.

attachment.php


Was thinking about painting the Magnavox logo red also.

attachment.php


New RCA's and 5 way binding posts. Also thought adding the spring relief on the cord gave it an old school look. You can also see the new fuse mount.

attachment.php


Here is a pic with the transformers wearing their oak hats.

attachment.php


And another with the wooden lids.

attachment.php
 

Attachments

  • IMG_0358.jpg
    IMG_0358.jpg
    113.6 KB · Views: 338
  • IMG_0356.jpg
    IMG_0356.jpg
    108.9 KB · Views: 831
  • IMG_0355.jpg
    IMG_0355.jpg
    107.8 KB · Views: 835
  • IMG_0357.jpg
    IMG_0357.jpg
    125.3 KB · Views: 343
  • IMG_0354.jpg
    IMG_0354.jpg
    109.6 KB · Views: 335
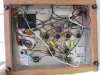
One underside shot. Still need to secure some new wiring. You can see where I glued on the tin to cover the holes.

attachment.php


And the money shot.

attachment.php
 

Attachments

  • IMG_0360.jpg
    IMG_0360.jpg
    101.8 KB · Views: 337
  • IMG_0359.jpg
    IMG_0359.jpg
    93.6 KB · Views: 330
Looks to me like you did very nice work! It's cool to see the different ways in which people dress up their old amps. Everything about it looks great except the wooden tops on the transformers. Those just look odd and out of place to me. The ones on the outputs fit in to the overall look OK but just don't seem necessary. The one on the power transformer looks worse IMO because the rounded top of the transformer doesn't make for a smooth visual transition into the wooden piece, which just looks like an unnecessary thing stuck on there. But it looks like they are easy enough to add or remove as you please.

edit: Oh, and I also would suggest against painting the Magnavox logo - I think that would ruin its nice vintage appearance.
 
Thanks Mike. It was in great shape to start with, thanks again for the great deal.

Audiozaz, my yard is mostly in the woods. The first 20 yards or so is mowed, then the next 80 or so are bush hogged down. We have to be careful not to get run over by the deer and turkeys. There was a nice red fox standing there a couple days ago while my fearless beagle just stood on the porch and barked.

Andy, thanks man! Finally some feedback on the wood pieces. I agree that the piece on the main Xformer looks a bit odd. I thought about a square piece that sat down over the top portion and exposed the part in the middle, and rested on the hold down bolts, but wasn't sure how that would look either. I go back and forth on the OPT's. It's a different look for sure. Right now I've just been laying them on there. If I decide to keep em, I'll secure them then.

Thanks all!
 
Looks awesome! I would agree that visually the wood caps look a lil odd, but thats just one opinion, and the only person to please is you. Wish I had the knowledge to attempt something like that.
 
I was kinda thinking that I'd like to have it back:D. Actually, if I pick up another maybe I'll send it to you to gussy it up for me:thmbsp:

Mike
 
I was kinda thinking that I'd like to have it back:D. Actually, if I pick up another maybe I'll send it to you to gussy it up for me:thmbsp:

Mike

Lemme think for a second. NO! Not coming back! :nono:

Thanks for the kudos. I kinda hurried through this but learned alot. The next one will be even better, but I am happy with how it turned out. Can't wait to find time to get some more mods done and see how much better it can get.
 
is that a homebrew model or manufactuer made looks pretty simple compared to some of the philco radios that i have done!
 
Back
Top Bottom