• The move to the new server is done. There are some software and database maintenance updates in process. This has us passing the hat around to help out. We appreciate any donations. Seriously, even a dollar helps. The payment page may be found here - https://www.audiokarma.org/support.html

Pioneer SX-727 - Relay Issues

toymanmsp

Active Member
Greetings everyone,

I've run into an issue where the relay is not coming out of protection mode.

Resources used for servicing 727
  • Have and use DBT
  • Lot's of photo's
  • DVM
  • Transistor Tester
  • Electronic Solder and Desolder Stations
  • Original Service Manual
  • Willingness to learn, I'm rather new at doing refurbishments but have had successes previously.
Work that was done on 727.

  1. Started with rebuilding Power Supply Board; replaced all electrolytic caps with the same uF ratings and higher voltage in some cases. Used Panasonic FM/FC, Nichicon PW's, and Wima's if lower uF ratings. Replaced the C373 transistor with a KSC2383. Replaced the two heatsinked transistors with new KSC2073 (silicon heat sink compound used on both sides of insulator on new heatsinks). Replaced the 4 large diodes with 1N4004 or 1N5404, sorry can't remember, but they are the correct replacement diodes. Replaced the glass Zener diode with a new IN4148 Zener. The double diode was replaced with a MUR1620G double diode, installed with metal back away from the heatsink. Replaced the red 330 ohm 2W resistor with a new 330ohm 3W resistor mounted up off-board. Reflowed solder connections in the corner near the 330 resistor. Process, I installed a couple of caps, tested the receiver, if good, next group of caps, etc. When I got to the transistors, I would install one, test receiver, if good, move to the next transistor. Had no issues with rebuilding the board and the relay coming out of protection.
  2. Rebuilt the protection board; used the same process as above started with caps, moved to transistors replaced A572 with KSA992, and replaced Q7 transistor (C495) with KSC2690 and remaining transistors with KSC2383. Replaced all small glass diodes on board with IN4148 diodes except for D10, which was replaced with a 1N4004. I also did the diode mod with a 1N4004 across pins 14 & 15 lining up the line with pin 15. Fired up DBT, all good the relay came out of protection and I moved to the next step.
  3. Next up was the phono board, again same process installed a couple of caps, turned on the receiver, the relay clicks moved onto the next set of caps. No problems with the install of all caps and the relay coming out of protection mode. Moved onto the transistors replaced all 6 C458 transistors with KSC1845's. Again, went one at a time, all good, relay clicks upon start-up. Completed install of transistors, fired up DBT checked both phono inputs (hmm, only sound on the right channel, none on the left for both phono inputs. Same for the tuner, which I found a bit strange, especially since the AUX input worked as it should with sound coming from both left and right channels. I checked my transistor orientation and found two that were installed incorrectly. Adjusted them, and then the relay stopped clicking on. The receiver powers on and the DBT does go dim, but the receiver doesn't come out of protection. I know that I'm close to resolving, but need some direction.
My assumptions; I'm guessing that I've either have a short somewhere in the circuit, that is keeping the receiver in protection mode, at least it is working as it should? I've tested Q7 and it tested out ok. Is it possible that the issue is lying with the phono board due to the loss of signal on the left channel on both phono inputs or is it more likely that it's related to the power supply or protection board? Or solder bridges, pinouts are close on the boards! I do have a replacement relay, but am not sure that is the best next step? I'm thinking that it will be replaced once I've figured out the current issue with the relay, along with the main filter caps. I haven't decided on the additional boards, but they should likely also be done. I've read on several posts that the blue Sanyo caps should be replaced as they can also cause issues, not sure if this would be part of the issue as the board? Neither the tuner nor the AF board has been touched. I'm thinking one thing at a time. I have an ESR on the way, should receive later today so I can test in the circuit. I'm hoping that it will be a useful tool. Probably not a replacement for pulling the transistors, but never know until you try.

Also, I am still learning how to properly read the schematics and block diagrams, so please be patient with me. I will do my best to answer questions. Any input would be appreciated. Sorry, for the long post, I want to be as clear as I can as to what has been done to the receiver. I'm hopeful, that I can figure this out this weekend and get her up and running. Oh, and all controls have been cleaned with DeOxit. Many thanks.
 
Register to hide this ad
Note: "Replaced the glass Zener diode with a new IN4148 Zener". A 1N4148 is a signal diode not a Zener Typo?

The inputs to the Protection circuit are from the Power supply and Power Amp, so lets check its pins with your meter.
Volume to minimum, with no input signal set Input to Aux. Off DBT if it has already passed DBT.
I used the wrong PCB schematic for these:
AWM-025 ProtectionPCB:
Pin 1, should be very close to 0vdc:
Pin 3, should be very close to 0vdc:
Pin 5, should be very close to 0vdc:
Pin 6, should be very close to 0vdc:
Pin 7, should be very close to 0vdc:
Pin 8, should be very close to 0vdc:
Pin 2, sb -13vdc
Pin 11, sb +31.5vdc
Pin 10, sb +31.5vdc
Measure dcv on pin 9:
Measure ACV on pin 12, sb about 7.5VAC:

 
Last edited:
Note: "Replaced the glass Zener diode with a new IN4148 Zener". A 1N4148 is a signal diode not a Zener Typo?

The inputs to the Protection circuit are from the Power supply and Power Amp, so lets check its pins with your meter.
Volume to minimum, with no input signal set Input to Aux. Off DBT if it has already passed DBT.
AWM-025 ProtectionPCB:
Pin 1, should be very close to 0vdc:
Pin 3, should be very close to 0vdc:
Pin 5, should be very close to 0vdc:
Pin 6, should be very close to 0vdc:
Pin 7, should be very close to 0vdc:
Pin 8, should be very close to 0vdc:
Pin 2, sb -13vdc
Pin 11, sb +31.5vdc
Pin 10, sb +31.5vdc
Measure dcv on pin 9:
Measure ACV on pin 12, sb about 7.5VAC:

Hi, thanks for the reply. I'll take the measurements later this today or tomorrow and report back. Thanks again for the quick reply.
 
Note: "Replaced the glass Zener diode with a new IN4148 Zener". A 1N4148 is a signal diode not a Zener Typo?

The inputs to the Protection circuit are from the Power supply and Power Amp, so lets check its pins with your meter.
Volume to minimum, with no input signal set Input to Aux. Off DBT if it has already passed DBT.
AWM-025 ProtectionPCB:
Pin 1, should be very close to 0vdc:
Pin 3, should be very close to 0vdc:
Pin 5, should be very close to 0vdc:
Pin 6, should be very close to 0vdc:
Pin 7, should be very close to 0vdc:
Pin 8, should be very close to 0vdc:
Pin 2, sb -13vdc
Pin 11, sb +31.5vdc
Pin 10, sb +31.5vdc
Measure dcv on pin 9:
Measure ACV on pin 12, sb about 7.5VAC:


Good Morning,

To your comment, yes, it was a typo regarding the 1N4148 diodes.

Meantime, I've taken the values per your prior message. I did the measurements on my protection PCB (I have board AWM-011, not the 25). I took the measurements with a negative probe to ground (chassis) and positive to the pins.

Here is what I got:


Pin 1, should be very close to 0vdc: .021
Pin 3, should be very close to 0vdc: .006
Pin 5, should be very close to 0vdc: .007
Pin 6, should be very close to 0vdc: OL
Pin 7, should be very close to 0vdc: .0000
Pin 8, should be very close to 0vdc: OL
Pin 2, sb -13vdc: .021
Pin 11, sb +31.5vdc: .0000
Pin 10, sb +31.5vdc: .012
Measure dcv on pin 9: .030
Measure ACV on pin 12, sb about 7.5VAC: .006

I believe that I've taken the measurements correctly, please let me know if you believe that there is a concern. (Note: I'm using a Klien MM600 DVM, I wasn't sure that the measurements were correct (rechecked them 3 times), so I changed the fuse to be sure and got the same readings with the new fuse). I'm assuming that with OL on pin 6 and pin 8 that this would cause the other expected values to be off? I look forward to your reply. Thanks again for the help.
 
OL means Over Limit. Your meter can read up to 1000 volts DC so Im thinking you were on the wrong range when making measurements, as none of them show correct readings. Were you on the V setting? If so, did you press the orange SEL button to switch to DC? Your meter is not designed for testing electronics equipment, it is more suited for household, HVAC and Industrial use. I read the User Manual and, when you select a range it defaults to the White symbol (AC on the V range) so you must press the SEL button to get DC (orange symbol).
 
I must apologize, I had to have been looking at the wrong schematic for the voltages I asked for in post #2. Let me try again with the correct schematic, for AWM-011.
 
On AWM-011, measure dcv:
Pin 2, sb 0vdc:
Pin 4, sb 0vdc:
Pin 6, sb -13vdc:
Pin 9, sb 0vdc:
Pin 10, sb 0vdc:
Pin 11, sb 0vdc:
Pin 12, sb 0vdc:
Pin 14, with relay pulled in sb about +8vdc, with relay not pulled in sb about +35vdc:
Pin 15, sb +35vdc:
Pin 16, sb +35vdc

Pin 17, sb about 8VAC:

Pins 7 and 13 should have continuity (0Ω) to ground (power off).
 
On AWM-011, measure dcv:
Pin 2, sb 0vdc:
Pin 4, sb 0vdc:
Pin 6, sb -13vdc:
Pin 9, sb 0vdc:
Pin 10, sb 0vdc:
Pin 11, sb 0vdc:
Pin 12, sb 0vdc:
Pin 14, with relay pulled in sb about +8vdc, with relay not pulled in sb about +35vdc:
Pin 15, sb +35vdc:
Pin 16, sb +35vdc

Pin 17, sb about 8VAC:

Pins 7 and 13 should have continuity (0Ω) to ground (power off).

Apologies, I was hoping to reply earlier today, but the honey-do list took priority. First off thanks for taking the time to look up the measurement values and for your comments on the dvm. BTW, what type of meter would you recommend? Ok, onto business. I'm hoping that these measurements make more sense. All in vdc, unless notated otherwise.

Pin 2, sb 0vdc: 0
Pin 4, sb 0vdc: 0
Pin 6, sb -13vdc: -13 (if I'm reading the dvm correctly, there is a large black bar that comes on underneath the DC voltage indicator, meaning negative? If yes, then the reading is correct.)
Pin 9, sb 0vdc: 0
Pin 10, sb 0vdc: 0
Pin 11, sb 0vdc: 0
Pin 12, sb 0vdc: 0
Pin 14, with relay pulled in sb about +8vdc, with relay not pulled in sb about +35vdc: 4
Pin 15, sb +35vdc: 19
Pin 16, sb +35vdc: 19

Pin 17, sb about 8VAC: 7vac

Pins 7 and 13 should have continuity (0Ω) to ground (power off)

Powered off both pin 7 and pin 13 read 0 ohms. The meter had a continuous beep, during reading. Audible continuity, nice.

Greatly appreciate the help. Looking forward to the next step.
 
If you are not on the DBT you have a power supply problem.
With black meter lead clipped to chassis, measure AC volts on pins 12 and 13 of the power supply AWR-011. Should be about 25vac.
Measure DC volts on pin 14, sb +35vdc.
Measure DC volts on pin 15, sb -35vdc.
 
If you are not on the DBT you have a power supply problem.
With black meter lead clipped to chassis, measure AC volts on pins 12 and 13 of the power supply AWR-011. Should be about 25vac.
Measure DC volts on pin 14, sb +35vdc.
Measure DC volts on pin 15, sb -35vdc.

Here are the measurements that I took with the black lead to chassis. Measured 26vac on pins 12 & 13. Measured 33 vdc on pin 14 and measured -33 vdc on pin 15. Shorted transistor?
 
Those measurements look OK, measure dcv on the + side of C1 (big 6800µF cap) and - side of C2 (other big 6800µF cap)
 
Those measurements look OK, measure dcv on the + side of C1 (big 6800µF cap) and - side of C2 (other big 6800µF cap)

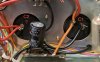
I'm not clear as to which cap is C1 and which is C2. It just shows the caps and their associated part number but doesn't give a specific location in the manual.

D36F4885-5972-46FA-85B2-0DEE63D4B1FB_1_201_a.jpeg


I'm also going on the assumption that I'm placing the black neg lead onto the - side of C2 and the red pos lead onto the + side of C1?
 
I'm not clear as to which cap is C1 and which is C2. It just shows the caps and their associated part number but doesn't give a specific location in the manual.

View attachment 2024040


I'm also going on the assumption that I'm placing the black neg lead onto the - side of C2 and the red pos lead onto the + side of C1?
should be on the schematic .. red is generally + and orange - . i say generally as i have seen it done the other way .

C2 is the negative 36v so if wires correct its orange . if it connects to - on the cap its deffo C2
 
Last edited:
should be on the schematic .. red is generally + and orange - . i say generally as i have seen it done the other way .

C2 is the negative 36v so if wires correct its orange . if it connects to - on the cap its deffo C2
Concur, that is exactly what I would have said.

I'm also going on the assumption that I'm placing the black neg lead onto the - side of C2 and the red pos lead onto the + side of C1?
Place the black meter lead on chassis ground, measure with red and your meter will correctly identify voltage polarity. You are making two measurements.
C1 is the positive supply filter (usually red wires), C2 is the negative supply filter (usually orange wires), your labels in your picture are backwards.
 
Concur, that is exactly what I would have said.

Place the black meter lead on chassis ground, measure with red and your meter will correctly identify voltage polarity. You are making two measurements.
C1 is the positive supply filter (usually red wires), C2 is the negative supply filter (usually orange wires), your labels in your picture are backwards.


Thanks for the clarification and direction. C1 measured 33vdc and C2 measured -33vdc
 
Those voltages are OK. What is the dcv on pin 7 of the AWR-011 power supply? Should be +36vdc:
This feeds the relay supply to the protection circuit, which was listed as 19v in post 9.
 
Back
Top Bottom