• The move to the new server is done. There are some software and database maintenance updates in process. This has us passing the hat around to help out. We appreciate any donations. Seriously, even a dollar helps. The payment page may be found here - https://www.audiokarma.org/support.html

Polishing a dust cover ~ what went wrong?

oconnorweb

Active Member
So I've got badly scratched / hazy Thorens TD 160 dust cover. I haven't been using it cause it looks that bad.

Did some research and seems that the headlight restore kits are popular choice for restoring dust covers.

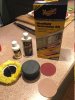
I went and bought the Meguiar's kit. I watched some videos and followed the instructions. Used the 2 different grit sand papers with water as suggested. Got a hazy film over the entire cover which is noted in the instructions and videos.

However, when I used the Plastx finishing polish with the yellow buffing pad with a battery powered drill, I was left with a hazy mess.

Before I start over, I thought there is someone out there that can give me some advise.

I didn't take a before picture; that was dumb.

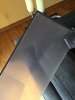
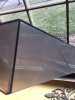
The photo with full haze is before the polishing. The others are post polish. It may be a bit hard to see but there is a lot of haze left that's looks plain bad.

Any help will be will be truly appreciated.
 

Attachments

  • IMG_7615.JPG
    IMG_7615.JPG
    65.9 KB · Views: 338
  • IMG_7619.JPG
    IMG_7619.JPG
    47.7 KB · Views: 317
  • IMG_7613.JPG
    IMG_7613.JPG
    52.9 KB · Views: 340
  • IMG_7618.JPG
    IMG_7618.JPG
    38.1 KB · Views: 338
  • IMG_7617.JPG
    IMG_7617.JPG
    47.3 KB · Views: 349
  • IMG_7616.JPG
    IMG_7616.JPG
    32.7 KB · Views: 363
Register to hide this ad
Try using no more sandpaper or elective buffer. It could be too aggressive at this point?

Work it for a half hourwith soft rag, plastx polish and elbow grease.. That got my Kenwood cover looking nice.
 
I'd say it simply needs more polishing. If you are near a hobby shop the Tamiya polishing compound "finish" is an extremely fine polish that works very well on clear plastics.

They have a 3 step polishing system. Course, fine and finish.
 
The reason I asked about the grit is because if you used a relatively low grit paper, you will have to work to a much higher grit before you can use the car polish.

You should be using 2000 or even 2500 before the polish. All polish is is a super high grit abrasive (~3,000 grit or even higher I think). You can't go from 800 grit to a car polish, it has to be done in gradual steps.

The ideal thing would have been not to use sandpaper at all and go directly to the car polish, unless the dustcover had severe scratches in which case starting at 800, 1200, up to 2000 and 2500. Car polish as the last step.

There is much elbow grease involved, but it turns out great.
 
Doesn't look like it's that bad off. I'd wet sand with 2000 grit and try again with the plast-x. Make sure your foam pad is clean. If that doesn't work, try a light polishing compound and then the plast-x. It may not be abrasive enough on its own to remove the sanding marks.
 
I'd say it simply needs more polishing. If you are near a hobby shop the Tamiya polishing compound "finish" is an extremely fine polish that works very well on clear plastics.

They have a 3 step polishing system. Course, fine and finish.

That sound suspiciously like, and probably is, rebranded Novus.

John
 
All -

Sorry for the delay - away today.

The kit has 2 pads; you start with 1000 grit and then go to 3000 grit. I did that; kept them wet;

So do I go back to one of those grits; or buy another grit?

Is it possible to damage the cover with no way to recover?

Really want to get this right.

Thanks all
 

Attachments

  • IMG_7620.JPG
    IMG_7620.JPG
    68.2 KB · Views: 60
Should be OK, you just have to keep going with the polish. Personally, I'd get a coupe grades of Novus. I've polished plastic parts that were cut on a milling machine to an optical finish, so you're already a lot closer! As said above, it probably wasn't necessary to sand, as they creates a huge amount of work. Dust covers are also fragile, so you can't go at it as aggressively as you might with headlights.
 
If the 3000 scratches the cover, you have finished using the 3000. If you can't tell you are using 3000, you need to use it some more.

To me it looks like you did the 1000 and 3000 just fine and gave up on the polish before it was done. You have a much higher grit number than 3000 in that polish and you have to remove all those 3000 grit scratches. That takes time. Each step is grinding off all the imperfections of the previous step before you can move on.
 
The acrylic used in dust covers is very soft. It is easy to go to far in a single spot, especially if using rotary equipment. If you must use power equipment, us an oscillating unit, rather than a rotary on. Keep moving. If you stop too long in one spot, you will not like what you get there. For final stage, polish used for polishing CDs and DVDs works very well.

Enjoy,
Rich P
 
looks like you are nearly there to me ...i would concentrate on an area first but being careful not to burn the plastic ..much heat can be generated and cause problems .
 
I should point out that I can live with the hairline scratches; It's the haziness I have to get rid of.... the scratches and haze are two separate issues?
 
try one corner by hand .. using a machine is in my opinion only to be used after doing the job by hand ... i am time served motor vehicle re finisher from the old school by the way .
ps rub in one direction only by hand . none of this rubbing in circles nonsense i see folk doing .
 
Find Rich Ps thread on polishing dust covers. It is a great "how to" thread right down to the finest details.
 
I use Novus #3, #2, then finally cleanup with #1. It takes a good 30 minutes to knock down an obvious scratch with #3 which equates to about 2 hours of elbow grease on #3 for the whole dust cover. I always grab a new rag when I go to #2. #2 polish goes much faster then the #3; about 30 minutes total. The #1 cleaner takes just seconds and again, I use a clean soft rag for this as well.

I was thinking about speeding up the process with wet sanding the heavy scratches first, but never have. I Just really work hard with the Novus #3 and the rest is a breeze. Great results with this product and never use any power polishers.
 
All -

Sorry for the delay - away today.

The kit has 2 pads; you start with 1000 grit and then go to 3000 grit. I did that; kept them wet;

So do I go back to one of those grits; or buy another grit?

Is it possible to damage the cover with no way to recover?

Really want to get this right.

Thanks all
Too much of a jump from 1000 to 3000, IMO.

Since you've taken sandpaper to it already, I would start over again as follows:

In straight line back/forth motion, using a flat pad to wrap the sandpaper on:

- 1000 grit
- 1500 grit
- 1800 grit
- 2000 grit
- 2500 grit
- 3000 grit
- Maguire's car rubbing compound
- Maguire's car polish

Wet sanding, mix a drop of dishwashing liquid for lubrication in the water.

Just take your time, do only the backside of the dust cover first. Do not put heavy downward pressure on the sandpaper pad. Let it glide with only the weight of your hand on it. You will start to feel suction, this means it's working. Keep rinsing the sandpaper with water and wipe off the cloudy stuff from the dust cover when the water gets cloudy. When you finish with the sandpaper, apply the compound the same way, back/forth as well as the final polish. You can then use a machine (orbital sander) to buff for final shine. Do not over buff as this creates heat.

If you like what you see, proceed with the rest of the cover.

Patience is a virtue, and you should see great results.

Good luck and would love to see the finished product.
try one corner by hand .. using a machine is in my opinion only to be used after doing the job by hand ... i am time served motor vehicle re finisher from the old school by the way .
ps rub in one direction only by hand . none of this rubbing in circles nonsense i see folk doing .

This ^ ^ ^ ^
 
Sounds reasonable. Damn. I wish I didn't do both sides simultaneously. That was stupid. One side to see the results then maybe the underside.

Ok now do I do the whole process below on the top only and then the underside top so to confirm I am removing the circular scratches and haze. Or, do I do the process on the whole outside and then underneath?

Also, is there a good place to get all those grits without having to buy a lot of paper?

Thanks.
 
Back
Top Bottom