FireGuruMN
Active Member
I got this pair of of Polk Monitor 10's on CL for $50.00 plus a rather long drive. But it was Fall and long drives are nice along the river in the Minnesota Fall. I was sort of just after the stands.
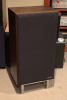
But I got them home and thought the drivers looked a whole lot like the drivers in my SDA-1's Sure enough these are pretty much SDA-1's with out the SDA option. And they sounded pretty nice.
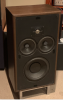
Now don't everyone scream REPLACE THE TWEETER at once. It will break the internet. I'll get to that.
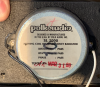
If anyone cares: the back:
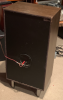
Big round speaker terminal plate. That's curious. Must have the crossover built into it. Well, actually it's more cool than that:
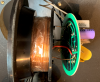
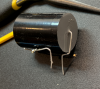
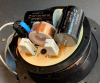
They built one of the inductors right into the plastic molding. Awesome. Reminds me of a book I read in my younger days, The Mote in Gods Eye or something like that. Aliens visit earth sorta thing but the aliens were all into making things server more than one purpose when they designed things. Like a structural column in a building would hold up the building but then it would be made out of bi-metal and also act as a thermostat. but I digress. . .
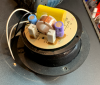
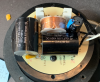
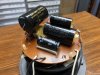
A couple of electrolytic caps and a big film cap. Just replace them all:
Parts total for both speakers (parts express numbers):
Qty 4 of 027-572 Solen 12uF 400V Polypropylene Capacitor (yes, one of the originals was electrolytic but if you go with film it will never need replacing and there is room.) I think both 12uf caps are in the audio path but it could be argued.
Qty 2 of 027-350 33uF 100V Electrolytic Non-Polarized Crossover Capacitor (shunt capacitor so I went with electrolytic. There is not much room for a big film cap in this case.) The original was 34uf but who is counting.
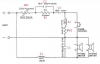
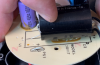
I personally pulled the PS1 safety guard out of my circuit and put in a jumper. Really it should be replace with a 0.5 ohm 5 watt resistor because the safety guard has some internal resistance. I ordered one but I am not a patient person. Jumper or resistor it's a personal choice but get that thing out somehow.
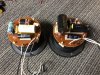
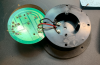
If you unsolder the L1 inductor lead you can open the assembly up like a clam shell:
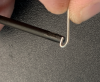
I bought this really cool wire bending tool on Etsy.

There is a variety of similar tools:

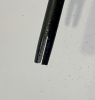
The end looks like this:
But I got them home and thought the drivers looked a whole lot like the drivers in my SDA-1's Sure enough these are pretty much SDA-1's with out the SDA option. And they sounded pretty nice.
Now don't everyone scream REPLACE THE TWEETER at once. It will break the internet. I'll get to that.
If anyone cares: the back:
Big round speaker terminal plate. That's curious. Must have the crossover built into it. Well, actually it's more cool than that:
They built one of the inductors right into the plastic molding. Awesome. Reminds me of a book I read in my younger days, The Mote in Gods Eye or something like that. Aliens visit earth sorta thing but the aliens were all into making things server more than one purpose when they designed things. Like a structural column in a building would hold up the building but then it would be made out of bi-metal and also act as a thermostat. but I digress. . .
A couple of electrolytic caps and a big film cap. Just replace them all:
Parts total for both speakers (parts express numbers):
Qty 4 of 027-572 Solen 12uF 400V Polypropylene Capacitor (yes, one of the originals was electrolytic but if you go with film it will never need replacing and there is room.) I think both 12uf caps are in the audio path but it could be argued.
Qty 2 of 027-350 33uF 100V Electrolytic Non-Polarized Crossover Capacitor (shunt capacitor so I went with electrolytic. There is not much room for a big film cap in this case.) The original was 34uf but who is counting.
I personally pulled the PS1 safety guard out of my circuit and put in a jumper. Really it should be replace with a 0.5 ohm 5 watt resistor because the safety guard has some internal resistance. I ordered one but I am not a patient person. Jumper or resistor it's a personal choice but get that thing out somehow.
If you unsolder the L1 inductor lead you can open the assembly up like a clam shell:
I bought this really cool wire bending tool on Etsy.
There is a variety of similar tools:
The end looks like this: