• The move to the new server is done. There are some software and database maintenance updates in process. This has us passing the hat around to help out. We appreciate any donations. Seriously, even a dollar helps. The payment page may be found here - https://www.audiokarma.org/support.html

Privacy fence project, input welcomed

roger2

.
Subscriber
My current project is an approximately 20' privacy fence. The 20' will be comprised of 10' and 6' sections and a 4' gate.

For anyone with knowledge or experience, here are some of the questions floating around in my mind at the moment :)

GATE: Is it common practice to custom to build the gate? I know that hardware is available for mounting, latching, and somewhere I have seen special tensioning hardware that is intended to keep the gate square, i.e. prevent drooping of the unsupported end. Does anyone have recommendations for, or warnings against, specific gate hardware?

HOLE DRILLING: I intend to use a powered post hole digger. The posts will be 4x4 treated lumber.

How large should the diameter of the hole be to set 4x4 post? Should I dig deep enough to put a few inches of gravel beneath the bottom of the post to assist with drainage? How deep should the hole be, or I suppose this might be dependent on my geographical location?

Any tips for operating the powered hole digger?


SETTING POSTS: Mix concrete first, or pour it in dry then apply water with a hose?


SECURING POSTS WHILE CONCRETE HARDENS: Would it be best to set each post independently? If so, how would I secure the position of the post while the concrete hardens?

Or might it be better to assemble each fence section (just the posts and cross pieces, not the slats) first, making it easier to keep things square? But if I did it this way, there would still need to be some way to secure the section while the concrete hardens.


I will be digging through google searches and likely many youtube videos searching for answers to these questions :rolleyes: And will be interested in input from AK's DIY gurus :biggrin:
 
Last edited:
Register to hide this ad
Just called my local tool rental establishment. Options for bit diameter for the powered diggers are 6", 8", and 10". My first thought is that 8" would be the way to go for a 4" x 4" post. Anyone disagree? Would 6" be big enough and/or is an 8" hole significantly more difficult to dig?
 
I've always used a manual post hole digger, and the holes generally end up around 7" +/-. I put gravel in the bottom, stick in the post, and support it plumb with stakes and 1x2's. The stakes are hammered in the ground and the 1x2's are attached from stake to fence post; do this on two sides at right angles. I then fill the hole with concrete making sure to have it crown (a domed top, if that makes sense) above the ground. This keeps water from pooling on top of the concrete. I've had good luck with filling the hole halfway with dry concrete, adding water, and stirring. Then, I do the same the rest of the way.
Are you building the fence in place, or are you using pre-made fence panels? I used the pre-made ones once. I had to reinforce them so much to not sag that I'd have been better off buying 2x4's and individual fence boards. My last one was a shadowbox fence with a flat 1x8 ripped down a bit with a 1x4" on each side. Doing it this way makes the fence really sturdy, keeps one from having to ensure every board's top lines up with the ones next to it, and it looks much nicer and finished. The same top treatment can be applied to a regular fence (non-shadowbox). I added a couple pics of a fence with the top as I described and one without. The fence with the bare top looks incomplete, to me
For gates, I've built my own with angled pieces that are intended to keep things straight, but they don't work well long-term. If I was doing it now, I'd use one of the metal gate frames that you attach the wood to. That should keep things a bit more square, flat, and not sagging. See below for an example:
596d93aed3dac9fca6cef3bd5f0a0e5f.jpg


b150dc3d77667a45a00649b76065e6e5.jpg

vs
SB7.jpg
 
I did not intend to get started today, other than going to Lowes just to see if they had "pickets" (as they are called apparently, I incorrectly have referred to them as slats, but will no longer call them that).

I was surprised to see that Lowes had almost no treated lumber. They had 5, 4"x4"x8' treated posts but two of them were mutilated and I didn't bother looking at the other three, as the dregs of a stack usually are not straight or likely have other flaws. There were lots of empty racks where the 2" treated of various widths and lengths would usually be. The guy said it was due to Covid. A nation wide shortage of treated lumber, is what he said. Lowes did have 6" wide by 12' cedar boards that could be cut and used for pickets. But the cedar was pricey, it would have cost about $400 for the pickets alone for my 20' of fence.

So I left there and headed to Menards, the only other option without driving about 30 miles to Indianapolis, thinking that I need to grab anything that looks half way decent. At Menards they had 6" wide by 6' pickets of treated lumber. The chemical treatments on those pickets looked weird, not evenly applied, and very green, as though it was mostly on the surface and not soaked in. And the boards were wet. I took 50 of them, most of what they had on hand. The ones I got are all decently straight, I eye-balled each one before putting them on the cart. I intend to paint the fence next year so I guess the questionable treatment application won't matter. I also got 5 good looking 4"x4"x8' posts at Menards.

Project has started sooner than I intended :)
 
Thank you @David_NC Good information. Good sample pics. Nice looking work!

I am not doing shadow box because I have existing fence here that I want to match the look of. Pickets are all on one side of the existing fence and it is white painted.

I have dug post holes in the past for temporary electrical service poles when I was an electrician. That was hard work for me then even though I was much younger. Makes my back hurt just thinking about it now, lol. So for this project I will rent one of the two-man powered diggers. My 15-year-younger brother will help me with the holes.

At Menards I saw some of the pre-made panels but they didn't look substantial. The pickets don't matter much, but the horizontal pieces they attach to will matter. And those pieces looked cheap and flimsy on the panels I saw. Also, I will have one 10' section of fence and will want the 3 posts for that section evenly spaced. The 8' wide panels would not be a good fit for that 10' section. So I am going to build it. Simple carpentry I can handle.

That metal gate frame looks nice. Do you know who sells those? I haven't yet had time to see what is available as far as gate hardware. I will be looking into that the next few days.

Good tip about crowning the top of the cement :thumbsup: So you fill the hole 1/2 way with cement, add water and stir. Do you wait for that to set-up before adding the 2nd half? And is there any sand or do you use pre-mixed cement that has sand in it?

And, one last question, what kind of stakes do you use to tie down the 1x2 braces?
 
Last edited:
- Do NOT use concrete below ground level to set posts. It will retain water and eat most treated wood quickly. I made that mistake, and got around 15 years before everything started wobbling as the posts rotted out. If anything, I'd consider a foot or two of paving sand that will pack tight and still allow drainage.

- Most local guvmints require you put the GOOD side out, so check first.

- Gates will sag as mentioned, but it's easy enough to keep that from happening. Run an appropriate gauge stranded metal cable from the top hinge side of the gate and the bottom latch side, using a turnbuckle to tension the wire.

- I use 6x6 posts at gates - the extra beef is a good thing, especially in high traffic areas. You also need to consider frost heave and leverage - putting three or four feet of post in the ground may seem to be a lot of extra work, but hey ... it's worth the effort if you want to do it right.

PS - home brew fencing adds a certain charm, and isn't much more complicated than buying pre-made sections.

fall-color-001.jpg
 
From my experience (little)

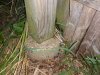
Water seal each board/post before you build. I went back after built and added one coated deck screw at each stringer/picket, lot's of wind here. Also used cardboard tube cement forms above ground level cement angled at top to keep the bottom of the posts up out of the wet ground and water shed off.

I did have to shorten the pickets at these bases, but no rot on the posts, can't say that for the picket bottoms.

Twelve or more year old post.

20200818_225358.jpg
 
Thank you @David_NC Good information. Good sample pics. Nice looking work!

I am not doing shadow box because I have existing fence here that I want to match the look of. Pickets are all on one side of the existing fence and it is white painted.

I have dug post holes in the past for temporary electrical service poles when I was an electrician. That was hard work for me then even though I was much younger. Makes my back hurt just thinking about it now, lol. So for this project I will rent one of the two-man powered diggers. My 15-year-younger brother will help me with the holes.

At Menards I saw some of the pre-made panels but they didn't look substantial. The pickets don't matter much, but the horizontal pieces they attach to will matter. And those pieces looked cheap and flimsy on the panels I saw. Also, I will have one 10' section of fence and will want the 3 posts for that section evenly spaced. The 8' wide panels would not be a good fit for that 10' section. So I am going to build it. Simple carpentry I can handle.

That metal gate frame looks nice. Do you know who sells those? I haven't yet had time to see what is available as far as gate hardware. I will be looking into that the next few days.

Good tip about crowning the top of the cement :thumbsup: So you fill the hole 1/2 way with cement, add water and stir. Do you wait for that to set-up before adding the 2nd half? And is there any sand or do you use pre-mixed cement that has sand in it?

And, one last question, what kind of stakes do you use to tie down the 1x2 braces?

The horizontals on the fence panels are crucial, and the pre-made ones I have used (once) and see were just as you described - flimsy. I've seen gate frames like that at Lowe's years ago, but they were a bit different from the one I posted but would def do the job. That's exactly how I did my posts - half concrete, water, stir, and then repeat without waiting. I filled my posts with concrete, but the gravel on the bottom provided drainage, as another post mentioned. I used bags of premixed concrete that can be used as I did or mixed with water and poured. For stakes, I used 1x2's about 18" long with an angled cut to go into the ground easier. I attached the stake to a longer 1x2 with a single screw. This allows movement as I plumb the post in one direction and then attach that longer piece to the 4x4 post with another screw. I did the same with the second stake 90 degrees from the first.
I won't say that this is the best way to do it, but it's worked on fences and decks in areas with lots of rain and wind (hurricanes), and the only issue I had is when a tree fell on the fence. The posts were still fine, but I had to replace a horizontal piece. My deck's posts were put in this way too in '88-89, and it's still fine.
 
Thanks again David. Well articulated and very helpful. I will have to see what scrap wood I have available for stakes...
 
@sKiZo

On the sand vs concrete, I don't doubt your experience. But the general consensus is for concrete. Please don't be offended if I go that way. not decided yet, and I have not had tome yet to do any outside searching, youtubing, etc

Good tip about the "good side" and the guvmint. That is something that I had given some thought to (not the guvmint, but which side to face which way). I think I can live with the bad side in :)

Will be a 4' gate, it will be about 5' high...do I need a 6x6 there? I did snag some good looking 4"x4"s...solid, very little splitting, knots etc

I was already thinking 3' deep...for no reason in particular, and 5' extending above ground. The fence will only be about 5'2" high. If I can get a bit that will drill 36", with 6" of river rocks at the bottom...what do you think about that?
 
@Beatnik

What do you suggest for sealing? I intend to paint the exposed wood next summer, so I don't think I would want to seal that. But the underground part...maybe

Thanks for the pic...nice work!
 
A good rule of thumb: Never let wood contact concrete if you want it to last. If you are dead set on concrete, there are plastic "sleeves" available that go on the posts (below grade). I have never done privacy fencing. But, I have hand-dug thousands of post holes while fencing pastures, I always just used the dirt from the hole and a tamper. My old Grandpa always said that you should "tamp" 1 and 1/2 times the dirt removed back into the hole. Most of those old fences are still in use after 45 years. We always used Hedge posts, though.
 
@Beatnik

What do you suggest for sealing? I intend to paint the exposed wood next summer, so I don't think I would want to seal that. But the underground part...maybe

Thanks for the pic...nice work!

I used Thompson's water seal.

One stretch of fence here is at least an 18 year old original contractor new home grade that I've kept up best I can by replacing parts as needed.

The treated landscape timber post have been replaced from rotting at the base and breaking off. The first I did not seal and it's warped, the sealed ones have stayed straight.

20200819_094032_HDR.jpg

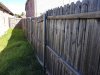
The left side fence was replaced with metal posts and fence panels maybe 8 years ago by a fence co. It's a mess.

20200819_094210_HDR.jpg

The back was replaced with metal posts and individual pickets by a fence co maybe 10 years ago. It's a mess.

20200819_094225_HDR.jpg

So there's something to think on.

If I was able mine would all be like I said in my first post.
 
If you are dead set on concrete, there are plastic "sleeves" available that go on the posts (below grade).

Wasn't aware something like that was available. Be handy even if the posts crack or twist as I figure you could just pry the post out of the socket and slip a new one in ... :thumbsup:
 
If you can find some Hedge posts, they will last up to 100 years without any rotting at all. Even in standing water. But, after they season, they are as hard as steel.
 
@sKiZo Is that your yard? That is a beautiful picture. The fence looks great, but the landscaping, the colors and all of it kind of blends together nicely.
 
@sKiZo Is that your yard? That is a beautiful picture. The fence looks great, but the landscaping, the colors and all of it kind of blends together nicely.

Yup ... but what can I say ... the yard has good days, and it has bad days, eh ...

BoxElderDown-014.jpg
 
I watched a few youtube videos on post-setting and came away with a couple ideas to consider:

1) one suggestion was to set the end posts first and allow the concrete to set-up. Then with those two in place, two lines could be run, one low and the other high, and that would make it easier to align the remaining posts.

2) the other suggestion that I found interesting was to use quick set cement instead of standard cement.


I would be afraid that the quick-set might set too quickly though. I want to have enough time to do a "foundation reveal" (term from one of the videos) with a piece of the cardboard forming tube, to look similar to the first pic Beatnick posted.


(definitely leaning towards concrete...sorry sKiZo :eek::oops:)
 
Last edited:
I am conducting an experiment on a section of mine(the old PT 4x4's had rotted at/below ground level). So this time, I painted the bottom halfs of the 4x4's with bondo epoxy to keep moisture from wicking up the posts. Then placed post in concrete. Time will tell!
 
Well, I definitely plan to have gravel underneath mine. And the tops will be crowned and raised a couple inches above grade. And if the cement does not form a tight seal to the wood where it emerges, that could always be caulked to prevent water from entering there. I am considering the sealing mentioned earlier for below grade.

But something to seal the end grain is a good thought.
 
Back
Top Bottom