• Please note that Audiokarma will be offline briefly for updates early on Monday morning, September 28th.

re-foaming a recently re-foamed JBL 4410

kuene

New Member
Hi all. I picked up a pair of extremely clean JBL 4410s. These cabinets are incredibly well built and that walnut is just beautiful. Everything is peachy save for 2 things: 1) they are not the mirrored image proper pair, they are either two lefts or two rights - not a big deal for my application (just bugs me). And 2) the previous/original owner very recently refoamed one of the original surround that had disintegrated.

The problem is: he glued the new foam onto the outside, or front lip of the cone, instead of the inside. Frankly, I can't tell the difference but I know this is wrong. I'm going to refoam the other woofer (original foam surround) but I can't bring myself to doing it wrong just to match. So I want to do both.

Before I start to dismantle this brand new foam job - is there anything I should be aware of given how new the glue and setup is? Old surrounds and old glue are normally expected in these jobs, so I wanted to be extra cautious not to damage the cone, if it's the case that newer glue (supplied with foam kits) is more stubborn, or needs different solvents/help.

Also - is it necessary to remove the enter dust cap? the instructions that came with one foam kit don't show that step and yet they seem like very thorough instructions otherwise.

One final curiosity - just in general with refoams: Is it a big no-no to use a mild heat gun to help with the removal of the foam/adhesive? I use heat to remove all kinds of adhesives and stickers in many other applications, but I am wondering if it's just a bad idea with drivers involved?

Thanks for any tips or guidance.
 
Last edited:
Register to hide this ad
I'd refoam the old speaker correctly and see if you hear a difference between the 2. My guess is there is a difference, but it can't be heard. Plus, it could look worse after you remove it than it does now.

As far as getting the new foam off, that all depends on the adhesive used. I would try getting if off dry first...exacto blade, guitar pick, finger nail.
Heat could be a good option, depending on the adhesive. I can't see where it would ruin the cone as long as you are gentle and careful.


just my 2 cents.
 
Hmm. I want them to look the same almost more than some indiscernible micro difference in how the woofer sounds. do you think the PO ruined the visual aspect of the cones because I would now be exposing the lip that is currently under the glue? if he used proper supplied glue - does that stuff usually come all the way off? I've never used that kind of glue so I don't know how it reacts or what the residue situation is.
 
Are they paper cones ? If so, there will probably be glue stain. Again, depends on the adhesive.
Experiment on the basket edge of the foam..see what will soften that glue.
 
They are indeed paper cones. I also worry about the visible damage/staining once I remove this new surround.

So the previous owner gave me the remaining speaker surround, with glue, paperwork, etc (from the Kit he used). These are specific surrounds for the JBL 4410 (invoice paperwork included) from a place called Springfield Speakers. In the kit's detailed instructions, they specifically address the front-side/back-side application. They say even if the original surrounds were glued to back side, these are design to work on front and NOT to do back. They are explicit in that it won't impact the operation of the drivers. So it looks like he followed the instructions well, and frankly he did a nice clean job. Is anyone aware of Springfield Speakers and are they a known/decent outfit?
 
They are indeed paper cones. I also worry about the visible damage/staining once I remove this new surround.

Well the cone is already "stained" with the foam on the front, which on it's own looks terrible. So it's really not going to get any worse IMO.

These are specific surrounds for the JBL 4410 (invoice paperwork included) from a place called Springfield Speakers. In the kit's detailed instructions, they specifically address the front-side/back-side application. They say even if the original surrounds were glued to back side, these are design to work on front and NOT to do back. They are explicit in that it won't impact the operation of the drivers.

The idea that it doesn't matter is simply incorrect. It absolutely matters. Putting the foam on the front means that the resting position of the voice coil relative to the voice coil gap has been changed. As excursion increases, distortion increases dramatically once the voice coil begins to leave the magnetic gap (XMax). This will occur sooner now due to the improper foam installation. Also, the maximum physical limit of cone excursion, known as XMech, is when the bottom of the voice coil comes into physical contact with the pole piece of the magnet at the bottom of the voice coil gap. You will know if this occurs as you will hear a loud heart-stopping POP from the woofer. This will now occur sooner because the voice coil has been shifted closer to the pole piece due to the improper foam installation.

It might seem like it wouldn't matter, because it's just a small shift, but XMax and XMech are measured in millimeters... it matters.

Shady shops love to say that it doesn't matter, but in reality they just put it on the front because it's easier for them. If they got a kit that actually needs to be installed on the front (sounds like BS to me), then all that means is that they got the wrong kit, because installing the foam on the rear is the only correct way to do it.
 
Well the cone is already "stained" with the foam on the front, which on it's own looks terrible. So it's really not going to get any worse IMO.

Well this is arguably not true - as the speaker currently looks very clean and nice, even though it is technically incorrect. So yes, it can get much worse, in terms of pure appearance. What I’m worried about in terms of visuals is seeing gross glue visuals all around the rim of this nice driver.

In any case , it is the “correct” repair kit they sell for 4410s - but clearly this shop is at odds with some perspectives and obviously I would prefer not to be in this predicament.
But it does sound pretty damn great across all volume ranges. Huge clean bass. What to do…..
 
MEK will remove the glue with no problem and not affect the cones. Been using it for 20 years based on recommendation from a good friend in Tulsa that's done this for a living for over 30 years. Use a syringe to apply is easiest.
 
MEK will remove the glue with no problem and not affect the cones. Been using it for 20 years based on recommendation from a good friend in Tulsa that's done this for a living for over 30 years. Use a syringe to apply is easiest.

thank you. Good recommendation for useful product to have handy on my bench. When I look for it, can I assume the correct stuff has the full name Methyl Ethyl Ketone?
 
thank you. Good recommendation for useful product to have handy on my bench. When I look for it, can I assume the correct stuff has the full name Methyl Ethyl Ketone?


Yep. That's the stuff. The newer version they are selling now is more of a toned down version of the original. I guess too many people huffing it over the last umpteen years (probably the same group that eat Tide pods and sniffing canned air...lol).
 
@Chris Brown is correct, and it's really not a "perspective" as much as it is an engineering fact that everything is designed to be put together a certain way, JBL designs most of their speakers for a rear-attached surround, and even though the surround might not affect it **much**, it certainly is not correct.

The larger effect IMO will be value, JBL speakers with the surround incorrectly attached to the front are difficult to sell in the vintage market, and take a hard hit in prices. Were it mine I'd look at the value of the 4410, whether I can find a replacement woofer for a reasonable price, and dig into the existing one to see if it can be repaired correctly.
 
thank you. Good recommendation for useful product to have handy on my bench. When I look for it, can I assume the correct stuff has the full name Methyl Ethyl Ketone?

Full warning - I use MEK and similar solvents when I clean up speakers before doing resurrounds.
Note - MEK is VERY TOXIC - ALWAYS use it OUTDOORS where you have PLENTY of ventilation!!
I have a screened in back porch I do such work on - so its seasonal for me ...
 
Last edited:
yeah - its just so annoying that this previous owner happened to buy a kit from this particular outfit. i realize and agree its not an equally valid perspective that front mounting is fine, and that JBL has good reason to specify back mounted. I'm just pointing out that this supplier maintains their "own" perspective and there are likely others out there. It's a shame because the PO did a nice job, just followed bad guidance.

I bought a new kit from a different supplier and will replace the other speaker's original foam correctly, from the back side. My dilemma is that I really want to avoid further damage the cone/driver by trying to re-do, especially since I haven't ever refoamed a driver. I have done quite a few delicate repair jobs, including replacing ferrofluid in old KEF tweeters, etc - but never a refoam.

I'm at the point where I'd almost just rather spend the money for a local professional to do it right. I plan on keeping these for a little while but I want them to be correct. Is there a good/appropriate way through this forum to find independents or shops to to this kind of work?

Edit: after watching a few more videos I'm confident I can refoam. I'm waiting on a kit from Simply Speakers - i liked their video on the JBL surrounds. I think the main thing is just how clean looking can I get this cone edge looking. i think I need to find an old trash paper cone to practice with glue/mek/alcohol.
 
Last edited:
One thing to keep in mind is that there is actually no such thing as an "official" refoam kit, from any source. The only repair JBL themselves ever authorized in the case of failed surround foam was a full re-cone, where the cone, spider, and voice coil are replaced in addition to the foam. That's overkill in 99% of cases of course, but they held firm to that.

So every refoam kit available is an aftermarket approximation, but some have been proven to be more faithful to the original designs than others.
 
If you search carefully and knowledgeably you might find some bargains on unmolested 127H-1s in need of new surrounds, like these.
 
If you search carefully and knowledgeably you might find some bargains on unmolested 127H-1s in need of new surrounds, like these.

thanks for all this. I’ve come to believe after a lot of critical listening and swapping over past few days that while this incorrectly refoamed driver sounds good enough for my ears - it will bother me from a visual and original designed standpoint. I simply love these speakers! Love em so much I already bought another pair of (correctly refoamed) replacements/backups today. This way I’ll attempt the re-refoam but not be out of hand. I wish I had seen this listing, I’ll still keep my eye on it - thanks for the tip. These are keepers for me so I don’t mind investing in parts for longevity. The condition of the cabinets is incredible - the wood just needs oil. The original plastic protectors were still on controls. They suit my style on several visual and functional levels. I don’t even mind that I have two left (or two right?) speakers.
Thanks to all of you for all the knowledge and help so far.
 
It may be annoying to see the glued on front surround, so do yourself the favor and Leave the grill on it ;)

thanks for all this. I’ve come to believe after a lot of critical listening and swapping over past few days that while this incorrectly refoamed driver sounds good enough for my ears - it will bother me from a visual and original designed standpoint. I simply love these speakers! Love em so much I already bought another pair of (correctly refoamed) replacements/backups today. This way I’ll attempt the re-refoam but not be out of hand. I wish I had seen this listing, I’ll still keep my eye on it - thanks for the tip. These are keepers for me so I don’t mind investing in parts for longevity. The condition of the cabinets is incredible - the wood just needs oil. The original plastic protectors were still on controls. They suit my style on several visual and functional levels. I don’t even mind that I have two left (or two right?) speakers.
Thanks to all of you for all the knowledge and help so far.
 
Update and some progress with pics.

In the short term, I solved my problem with brute force (and some money) and just picked up a second pair of nicely re-foamed, great condition 127H-1 drivers. My 4410s are looking and sounding great.

Now I turned to refoaming the incorrectly foamed woofer (and it's original condition sister). I picked up some MEK, and had some alcohol and a heat gun on hand.

As I suspected, the very fresh but fully cured glue on the surrounds and front of cone was not going to come off like 30 year old adhesive. Here is where I made a bit of a mistake/did a little damage before I changed course. I applied a little MEK with a syringe trying to get penetration under the cone (from back side of cone). It did work - separated that bit quite quickly in fact, but it also appeared to lift off a bit of the paint coating on the edge of cone. I immediately put down any more solvents and slowed down. Instead I went ahead just warming up the rim, carefully, with a low setting from my heat gun. I was able to carefully pull the surround away from the cone this way with no further damage - the adhesive basically stayed behind on the cone.

I then used an alternating combination of MEK and alcohol around the edge of the cone (had to clean both front AND back surfaces). I used these disposable Dupont paper/cloth wipes (designed/marketed for aircraft maintenance) that doesn't rip or shed fibers. This paper-towel substitute is great for many jobs given their durability and how they don't scratch surfaces or leave behind fibers. Ultimately I was able to clean all of the adhesive from the front (and rear) edges of the cone, taking with it some black paint of course, but nothing that crazy. I cleaned the basket rim, and the back sides of the dense foam front gasket segments with mostly heat and goo-gone and alcohol, was tired of the MEK fumes and didn't really need that power. I was luckily able to salvage the 4 foam gasket pieces, they look good from front/exposed side, although they are pretty chewed up on the back.

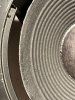
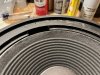
So, my cone is clean, but does have a little weakening/thinning from all of this stress (this is the second refoam in probably a month.) Here is what most of it looks like:
IMG_6554.jpeg IMG_6549.jpeg

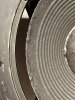
And here is the section, a couple inches of edge, that was damaged initially - you can see the black/gray acoustic paint material damaged/lifted:

IMG_6550.jpeg IMG_6553.jpeg

Now, I think I could just do the refoam and given that this area is not all that structurally damaged, and will be backed by the foam on the reverse side - it would function ok. But i don't love the look obviously, and I do worry that this damage could get worse through time/vibration, etc. I also feel like the entire edge/rim of this cone has been through hell and back - mostly survived, but does look a little roughed up and weakened/thinner because it lost some coating mass.

Any ideas on things to treat the edge with? Either locally to this area pictured, or in my preference, something that I run around the entire circumference in order to have a cleaner even look while also shoring up and stiffening the weak/frazzled edges. I read about some things on the forums - elmers glue, some paints, etc. Just not sure if anybody has experience. This poor driver is obviously no longer pristine - but I think its in decent shape and I want to be very careful. Thanks all.
 
Last edited:
Back
Top Bottom