• The move to the new server is done. There are some software and database maintenance updates in process. This has us passing the hat around to help out. We appreciate any donations. Seriously, even a dollar helps. The payment page may be found here - https://www.audiokarma.org/support.html

Rehabbing a Scott 299C Amplifier

Joel Graff

New Member
Just recently pulled out a Scott 299C amplifier that I salvaged from a house a couple years ago. Poking around online, I'm finding lots of great resources and schematics. I've ordered replacement capacitors and plan on restuffing the can caps. Is there any experience (documented or otherwise) on restuffing cans for this amp? I know some cans can be difficult / impossible to do without risking significant damage, though I've done it once before, fairly successfully.

With that in mind, I'm also interested in any other caveats / components that need to be addressed. Other than replacing the caps and the selenium rectifier and cleaning / addressing aesthetic issues, I've nothing on my to-do list...
 
Last edited:
Register to hide this ad
First, Welcome to AK!
I'm surprised no one has been along to encourage you on your quest.
As I recall the 299c is roughly equivalent to the LK 72 kit amp and I think a search of the site may yield some useful info regarding restoration.
I did a resto on an LK 72 a few years back and was pretty happy with the results. I don't recall all the mods off hand but basically replaced all the electroytic caps with some increase in values. I think I used JJs for the main filter caps and did a restuff on the bias/heater supply. I added pots to give balance and bias adjustments on each channel.
There are threads here covering all that and more and I believe there is a schematic covering all the work I performed. (Not my schematic)
Others will be along soon, I'm sure.
 
Pull up my thread on stuffing can caps and read it.
I know that you could perform the task, but if you can order new ones and they're affordable, you should save yourself the headache and the time and just order them.
Stuffing them takes time, at least one parts order, and involves sharp edges and toxic chemicals.
Theres a good chance that they'll rattle around in the can once finished.
I wrote that thread and I rarely use that method.
 
Pull up my thread on stuffing can caps and read it.
I know that you could perform the task, but if you can order new ones and they're affordable, you should save yourself the headache and the time and just order them.
Stuffing them takes time, at least one parts order, and involves sharp edges and toxic chemicals.
Theres a good chance that they'll rattle around in the can once finished.
I wrote that thread and I rarely use that method.

I've already ordered the parts :). As for rattling - I would wrap the caps anyway. So, unless the cans are particularly difficult to open / gut (which is what I was most curious to know), I'm more concerned about reassembly. It looks like riveting them back in place would require more disassembly than I'm up for or leave me with having to epoxy them in place... which makes me wonder if it's worth the effort at all. So I'll probably just recap from underneath and disconnect the cans.

I did look at Hayseed Hamfest's offerings, but at nearly $200 for a new set of cans vs ~$10 for replacement electrolytics, it's kinda hard to justify at this point. Still, I'll look up your thread anyway - there's a variety of approaches I've seen to restuffing...
 
First, Welcome to AK!
I'm surprised no one has been along to encourage you on your quest.
As I recall the 299c is roughly equivalent to the LK 72 kit amp and I think a search of the site may yield some useful info regarding restoration.
I did a resto on an LK 72 a few years back and was pretty happy with the results. I don't recall all the mods off hand but basically replaced all the electroytic caps with some increase in values. I think I used JJs for the main filter caps and did a restuff on the bias/heater supply. I added pots to give balance and bias adjustments on each channel.
There are threads here covering all that and more and I believe there is a schematic covering all the work I performed. (Not my schematic)
Others will be along soon, I'm sure.


I'll see if I can find anything on the LK. I did find schematics for my version of the 299C and I've been going through and checking components apart from caps, since I don't have Mr. Carlson's tester or an old school tester to test the older non-electrolytics, though.. I've seen a number of posts on mods, but being largely unschooled in vintage audio tech, it's a bit over my head atm. I mostly work on 8-bit machines from the 70's and 80's.
 
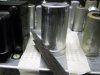
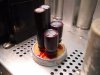
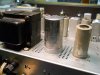
Call me a nut but I rather enjoy stuffing cans! 99% of the time I'm able to cut the can at the flange and assemble replacement caps of my choice. The zen part of it is assembling the caps so that they fit the can. As you've already noted, you can save a lot of time purchasing already assembled cans but spend a lot of money. Or, you can stuff and customize your cap selection PLUS spend the money saved elsewhere. For me, time spent on my stuff is free and justifies every beer I have during work stoppages :rolleyes:

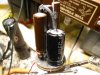
Below is a small selection of my stuffing efforts. Admittedly, it's not for everone, but it works for me.

Good luck!
 

Attachments

  • DSCN1757.JPG
    DSCN1757.JPG
    76.9 KB · Views: 57
  • DSCN1758.JPG
    DSCN1758.JPG
    74.3 KB · Views: 53
  • DSCN1759.JPG
    DSCN1759.JPG
    93 KB · Views: 58
  • DSCN2405.JPG
    DSCN2405.JPG
    102 KB · Views: 54
Call me a nut but I rather enjoy stuffing cans! 99% of the time I'm able to cut the can at the flange and assemble replacement caps of my choice. The zen part of it is assembling the caps so that they fit the can. As you've already noted, you can save a lot of time purchasing already assembled cans but spend a lot of money. Or, you can stuff and customize your cap selection PLUS spend the money saved elsewhere. For me, time spent on my stuff is free and justifies every beer I have during work stoppages :rolleyes:

Below is a small selection of my stuffing efforts. Admittedly, it's not for everone, but it works for me.

Good luck!
I've done one and it went well - I kinda get why people like doing it. :) I see in one pick you grounded the top of the can? and another has a diode in line it seems - I take it these were circuit-specific mods? Or precautionary / good practice mods?
 
very doubtful there is enough room underneath to do this.

I restuffed the 8 (!) cans on my Scott 399 and it worked fine. Just time consuming.

How did you reattach them to the chassis? Or did you leave them in place? I'm looking at drilling out the rivets before restuffing them, though I suppose it's more common just to cut the can in place... As for room underneath, the two in the center will be tricky, but I could see making something work, especically since the older, larger caps will be gone and I can move components a bit once they no longer need to be tied to the can tabs. But we shall see. I may regret it.
 
No, no diodes. What you’re probably looking at is a small clip of insulation to ensure lead isolation. And the “grounded” cap is actually a high voltage axial. I couldn’t source a radial that met the voltage requirements of the circuit so I used the Miec and extended the lead. Done.
 
No, no diodes. What you’re probably looking at is a small clip of insulation to ensure lead isolation. And the “grounded” cap is actually a high voltage axial. I couldn’t source a radial that met the voltage requirements of the circuit so I used the Miec and extended the lead. Done.
Gotcha. That makes sense.
 
It will be easier to work on the can if it is removed from the amp. That said it can be frustrating to get them out of the amp cleanly and not break any tabs. The desoldering from the chassis, when that is how they are installed, can be a pain. I have a couple of large old hi watt soldering irons to help with this. Sometimes I also remove as much of the chassis connection as possible by just cutting into the solder with some flush cut side cutters. I use an Xacto type razor saw at the top of the flange, similar to the pic above, to get a fine narrow cut. I glue back together with JB weld. The dark gray color looks ok and with a little acetone wipe once together not much shows on the outside.
Have fun,
John
 
How did you reattach them to the chassis? Or did you leave them in place? I'm looking at drilling out the rivets before restuffing them, though I suppose it's more common just to cut the can in place...

I didn't need to drill out rivets, I just desoldered everything and twisted the twist tabs on the bottom of the can caps straight so the cans could be removed.
I cut the can apart with a tubing cutter as close to the flange as I could get. The cans are now about 1/8" shorter than they were...
 
I didn't need to drill out rivets, I just desoldered everything and twisted the twist tabs on the bottom of the can caps straight so the cans could be removed.
I cut the can apart with a tubing cutter as close to the flange as I could get. The cans are now about 1/8" shorter than they were...
Just tried that on one can. I managed to pull it, but not before losing a couple grounding tabs. I'll replace them with a couple small screws through the grounding ring...
 
That's the snag with the twisted tab locks. It's pretty easy to snap them off. If a can is mounted to an insulator ring, I would drill the rivets before trying to untwist the tabs. Just my preference.
 
Pull up my thread on stuffing can caps and read it.
I know that you could perform the task, but if you can order new ones and they're affordable, you should save yourself the headache and the time and just order them.
Stuffing them takes time, at least one parts order, and involves sharp edges and toxic chemicals.
Theres a good chance that they'll rattle around in the can once finished.
I wrote that thread and I rarely use that method.

I followed this method and found it not too difficult. It results in a stock appearance. You'll need a heat gun to heat up the old can to make it easier to pull out the old guts.
 
I have restored several HH Scott tube amplifiers. The most important filter is the first one after the 5AR4/GZ34. Over the years I have been fortunate enough to collect several NOS FP style electrolytic capacitors. I use them for parts. As you mentioned, it is just about impossible to remove the capacitor by straightening the twist lugs.

I cut open the NOS can and harvest the steel mounting ring. On the original can, I carefully pry up the flange and extract the foil using a heat gun. Then, as others do, I put new capacitors inside with a new mounting steel ring. Amazingly, most manufacturers user the same exact dimensions.

Some versions os Scott amplifiers use a four-section capacitor as both downstream B+ filtering and cathode bypass. Since those two bypass sections are low voltage, I often use individual axial lead capacitors right on the tube socket. You also need to relocate the associated resistor. This gives you plenty of room inside of the can for two capacitors instead of four. Another option is to use a clamp mounted modem two-section capacitor instead of stuffing the original can and relocating the bypass capacitors at the tube socket.

Please know that the LK-72 and 299C came in various versions. Some have subtle differences. There are at least 7 varieties of 299C! Some late 299C versions resemble the 299D very much; outputs along the back outboard of the output transformers.

Bias, balance adjustments are quite a variety!
 
I have restored several HH Scott tube amplifiers. The most important filter is the first one after the 5AR4/GZ34. Over the years I have been fortunate enough to collect several NOS FP style electrolytic capacitors. I use them for parts. As you mentioned, it is just about impossible to remove the capacitor by straightening the twist lugs.

I cut open the NOS can and harvest the steel mounting ring. On the original can, I carefully pry up the flange and extract the foil using a heat gun. Then, as others do, I put new capacitors inside with a new mounting steel ring. Amazingly, most manufacturers user the same exact dimensions.

Some versions os Scott amplifiers use a four-section capacitor as both downstream B+ filtering and cathode bypass. Since those two bypass sections are low voltage, I often use individual axial lead capacitors right on the tube socket. You also need to relocate the associated resistor. This gives you plenty of room inside of the can for two capacitors instead of four. Another option is to use a clamp mounted modem two-section capacitor instead of stuffing the original can and relocating the bypass capacitors at the tube socket.

Please know that the LK-72 and 299C came in various versions. Some have subtle differences. There are at least 7 varieties of 299C! Some late 299C versions resemble the 299D very much; outputs along the back outboard of the output transformers.

Bias, balance adjustments are quite a variety!

Thanks for the tips. Mine follows the 233 schematic - it took a bit to sort out which version I had. The challenge in salvaging the ground rings has me rethinking restuffing. It seems to me that with a little rearranging, there's still room to add the capacitors underneath and just disconnect the cans entirely. Not sure how I'll proceed just yet, though. Apart from the ground ring issue, I don't mind restuffing cans.
 
Thanks for the tips. Mine follows the 233 schematic - it took a bit to sort out which version I had. The challenge in salvaging the ground rings has me rethinking restuffing. It seems to me that with a little rearranging, there's still room to add the capacitors underneath and just disconnect the cans entirely. Not sure how I'll proceed just yet, though. Apart from the ground ring issue, I don't mind restuffing cans.
If your 299C is built like the 233, I think you'll find that the Hayseed Hamfest 3 can capacitor option costing $116 has the same size caps as yours.
It listed as fitting the 222C model, but the caps are the same values as the 233.
It's still a lot more than the $10 cost of the individual caps you bought, but I thought I'd point out that it's less than the $200 estimate that you were working with.
Good luck with your project !
 
Back
Top Bottom