• The move to the new server is done. There are some software and database maintenance updates in process. This has us passing the hat around to help out. We appreciate any donations. Seriously, even a dollar helps. The payment page may be found here - https://www.audiokarma.org/support.html

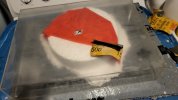
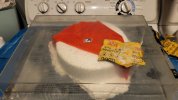
Removing scratches from dust cover.

fishstics

New Member
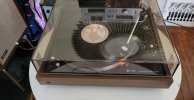
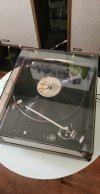
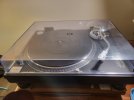
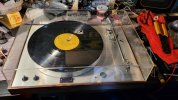
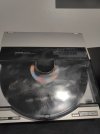
A few months ago I got this Technics SL-7 from an estate sale, ladies dad passed and she was clearing out his house and sold me it for 80 bucks. It wasn't perfect, RCA cables needed replacing and the original Stylus was dulled out but I have that all sorted out now. Main problem now is the dust cover is looking pretty sorry.


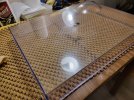
It looks like someone tried sanding down the cover back to new again, at first I thought maybe some polisher would do the trick but looks like it did basically nothing, anyone got any suggestions?
 

Attachments

  • IMG20240126143150.jpg
    IMG20240126143150.jpg
    71.8 KB · Views: 44
Register to hide this ad

 
My audio tech is also an old school car guy/wrencher and whenever he gets a TT with scuffed/scratched cover he goes with what he knows car polish
 
all of them are plastic polish, but the turtle has a sealer wipe to protect the surface after polished thats IMO a good idea.
(No afiliation)
AG.
 
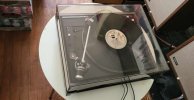
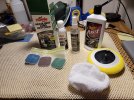
Having never polished a dust cover. I had this Turtle Wax Lens Restorer kit. It has four different grit sandpaper pads. Directions had me use each pad, wet straight line sanding 90° to each previous pad. First two grits will turn cover white. You may wonder, what have I done.
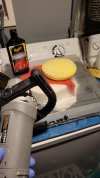
Finished with drill attachment pad/ cotton cover from Harbor Freight and Plastx.
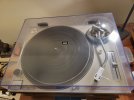
I eliminated some major gouges and scratches. It was in rough shape. A crack and dings still there. Some inside scratches are still there. Inside is difficult to sand and polish. A slight cloudiness remains. Maybe need more buffing. It's a world better than at start.

Edit: I did have a pillow supporting inside of cover while working on it.

20240127_224023.jpg20240127_223947.jpg
20231101_165755.jpg20231101_171455.jpg
 
Last edited:
Having never polished a dust cover. I had this Turtle Wax Lens Restorer kit. It has four different grit sandpaper pads. Directions had me use each pad, wet straight line sanding 90° to each previous pad. Finished with drill attachment pad/ cotton cover from Harbor Freight and Plastx.
I eliminated some major scratches. A crack and dings still there. A slight cloudiness remains. Maybe need more buffing.
View attachment 3101568View attachment 3101569
Compound stage was missed. Then plastic polish.
 
Mothers ultimate is great. I actually use all mother products and a rotary buffer. The 7" buffer is key to pro results. The drill not so much. Ideally random orbit.
 
I have a 9" random auto polisher. But was worried it would be too much stress on plastic.

Unlike most TTs. I can still buy new dustcover for SL1200.
 
I have a 9" random auto polisher. But was worried it would be too much stress on plastic.

Unlike most TTs. I can still buy new dustcover fL1200.

Help keep the weight of the polisher off the cover and let the pad do all the work. I do not allow the weight of the polisher onto the cover.


20240127_235024.jpg

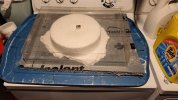
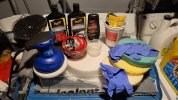
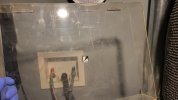
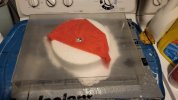
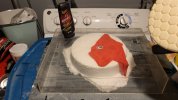
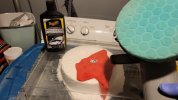
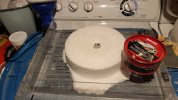
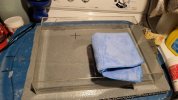
This is my polishing station. Aka my laundry room (Canada -40C the wife takes pity on me and lets me work inside rather than the detached garage) and my wet sanding and polishing rig. It is super high- tech: Rubbermaid lid to catch soap water residue a foam insulation pannel to keep the lid from wandering during the sanding and polishing stage and a thick piece of Styrofoam to help support the lid in the middle. I use it 2 or 3 times a week.
 
Last edited:
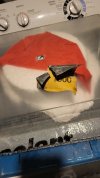
20240128_005911.jpg20240128_010921.jpg20240128_011514.jpg20240127_172116.jpg

This process took 1hr and 15 min. As is common there will be a bit of a touch up to do and I still need to do a few rough areas on the front and rear pannels, but overall the job could be finished in about 2 to 2.5 hours using this method. Im tired and it is late. If you decide to apply wax, it will take a while to get the dusty particles to go away, but they eventually will. Take care around the logo. I find scotch tape hold up best. I rework the area around the logo by hand with the polishes.

The sides and underside are a bit of a risk / reward with a polisher because if the polisher slips you can make a burn make via the edge of the polisher. Proceed with caution.

Peace.
 
Last edited:
Back
Top Bottom