• The move to the new server is done. There are some software and database maintenance updates in process. This has us passing the hat around to help out. We appreciate any donations. Seriously, even a dollar helps. The payment page may be found here - https://www.audiokarma.org/support.html

Rewiring Rega RB250 Tonearm

MisterDK

Addicted Member
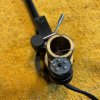
Hey boys and girls, have any of you had experience rewiring the RB-250 arm? I’ve picked up an NAD version RB-250 that’s had the plastic plug pulled out of the bottom, pulling the fine wires off. I’ll first try to resolder ‘em but if that fails, may want to rewire the arm..
I understand the the RB-250 is one that I may not want to pull the bearings out of and have a thought..
Aside from aesthetic reasons, would it hurt anything to drill a tiny hole in the arm tube and run new wires right out the top or side, near the bearings? While this may sound nuts, why wouldn’t that work well?
If that just sounds foolish - please help me out.. :)
IMG_5660.jpeg IMG_5661.jpeg
 
Register to hide this ad
I have soldered new wires to the old ones and pulled them trough on other tonearms. Just did a project carbon that way.
Just make sure the diameter of the solder connection is as narrow as possible. Id pull one wire
at a time.
I can't see the front end of the arm is but you could try pulling from either end depending on which seems easier. Id think pulling from the bottom and soldering at the tops would be best.

Athanasios
 
I have soldered new wires to the old ones and pulled them trough on other tonearms. Just did a project carbon that way.
Just make sure the diameter of the solder connection is as narrow as possible. Id pull one wire
at a time.
I can't see the front end of the arm is but you could try pulling from either end depending on which seems easier. Id think pulling from the bottom and soldering at the tops would be best.

Athanasios

Thanks, Athanasios.

I may have been lucky… Looks like there was just (barely) enough wire for me to strip a tiny bit of insulation and tin the ends.. And I resoldered them! Think I got them all in the correct spots and they seem to be soldered cleanly enough. Everything checks out with my meter - no opens, no shorts.. I put the plug back in place, tightened the setscrew and added a tiny bit of epoxy fillet between the plug and arm edge so hopefully, it won’t pull out again…

I’ll test it with a cartridge when I get the chance. This arm (with wires pulled out) was thrown in with a table I recently bought. Hoping to use it on something. :)

Duane
 
Instead of drilling holes, just remove the bearings that are on the side of the tonearm pipe.

This will allow you to remove the tonearm pipe and you'll see the hole that is already there.

On reassembly you'll have to recalibrate the bearing tightness, of course.
 
Instead of drilling holes, just remove the bearings that are on the side of the tonearm pipe.

This will allow you to remove the tonearm pipe and you'll see the hole that is already there.

On reassembly you'll have to recalibrate the bearing tightness, of course.
I’ve read that I shouldn’t remove bearings on the RB250 arm but it’s OK on the RB300. Is that not the case?
 
Be careful removing the brass screws holding the vertical bearings if you choose to do so. Been there, done that.
 
No need to mess with the bearings, but upon completion it's a good idea to swing the arm back and forth to loosen and position the wires that pass through the pivot hole for maximum free movement, otherwise, binding might occur that will impede free movement leading to tracking issues.

Also, if it's within budget, consider a continuous loom Incognito style as it offers a worthwhile upgrade over the very mediocre jointed wires that Rega installs.
 
No need to mess with the bearings, but upon completion it's a good idea to swing the arm back and forth to loosen and position the wires that pass through the pivot hole for maximum free movement, otherwise, binding might occur that will impede free movement leading to tracking issues.

Also, if it's within budget, consider a continuous loom Incognito style as it offers a worthwhile upgrade over the very mediocre jointed wires that Rega installs.
Good advice, a continuous loom is the way to go.
 
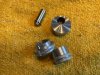
Another Rega arm question.. This one’s a NAD RB-250 which I’m guessing had been “ugraded” with a stainless steel counterweight stub and larger, underslung weight. The stub easily unscrews and I’m wondering if I should use a tiny drop of Loctite or maybe just some Teflon thread tape to keep it in place..(?). Also, it has knurled aluminum nuts for changing VTA and tightening by hand. Assuming these are aftermarket parts, anyone know who made / sold ‘em and how the VTA nuts position?

Thanks for the help. :)

IMG_5665.jpeg
 
No need to mess with the bearings,.

Which rewiring method are you suggesting? solder new wires to the old wires and pull them through?

Genuine question, because I had found a PDF where this procedure (or something similar) is described and it looked far more difficult than disassembling the arm (bearings etc)
 
Which rewiring method are you suggesting? solder new wires to the old wires and pull them through?

Genuine question, because I had found a PDF where this procedure (or something similar) is described and it looked far more difficult than disassembling the arm (bearings etc)
Yes, solder and pull through. Disassembling the bearing means reassembling with great precision. How many can do that, or would if it can be avoided?
 
Another Rega arm question.. This one’s a NAD RB-250 which I’m guessing had been “ugraded” with a stainless steel counterweight stub and larger, underslung weight. The stub easily unscrews and I’m wondering if I should use a tiny drop of Loctite or maybe just some Teflon thread tape to keep it in place..(?). Also, it has knurled aluminum nuts for changing VTA and tightening by hand. Assuming these are aftermarket parts, anyone know who made / sold ‘em and how the VTA nuts position?

Thanks for the help. :)

View attachment 2907015
The CW and stub are maybe Espressimo, the adjuster maybe Michell....
 
The CW and stub are maybe Espressimo, the adjuster maybe Michell....
Looking at their products - counterweight may be an Expressimo Audio “heavyweight”. The VTA adjuster and locking nut do look like current products from Michell..
Thanks!
 
Yes, solder and pull through. Disassembling the bearing means reassembling with great precision. How many can do that, or would if it can be avoided?

I can do it. Now, it's a tedious process to be completely happy with the calibration, but on the other hand it would make the recabling FAR easier.

Note: On RB250 or RB101/110, dismounting the bearings is not so difficult because there is no VTF adjuster/VTF spring; on RB3xx (and better) tonearms then it would be more involved.

It's a tradeoff, i think.
 
And to prevent it from loosening?
Good question! Strong thumbs? It's why I subscribe to the threaded bolt and insert means of attaching the end stub. Arm grounding has to be done a little differently but that's not hard to do.
 
I can do it. Now, it's a tedious process to be completely happy with the calibration, but on the other hand it would make the recabling FAR easier.

Note: On RB250 or RB101/110, dismounting the bearings is not so difficult because there is no VTF adjuster/VTF spring; on RB3xx (and better) tonearms then it would be more involved.

It's a tradeoff, i think.
If you can make the precision bearing adjustments I congratulate you. However easier it may be to perform the rewire with the arm in pieces it is still no trivial task, and adding a precision bearing adjustment to the workload, without skills or experience, to the uninitiated, is not what I would advise.
 
Back
Top Bottom