

You are using an out of date browser. It may not display this or other websites correctly.
You should upgrade or use an alternative browser.
You should upgrade or use an alternative browser.
Sansui 9090 wood cabinet specifications
- Thread starter jervz
- Start date

JosieDog2
Active Member
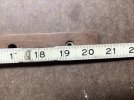
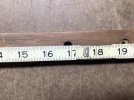
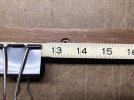
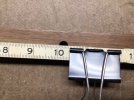
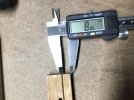
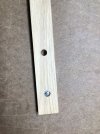
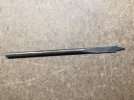
I can only post 10 pics at a time. See next post for others. If you have a planer and table saw, you can make your own. Hope these are helpful. I use a 3/8 paddle bit for both type holes. I am in the process of making these trim pieces out of solid oak. The originals were made from plywood. They usually chipped and sometimes the veneer did not hold up. Finding originals are hard to find and are not in good shape if you do find one.
Attachments
-
 IMG_0609.jpeg139.2 KB · Views: 13
 -
 IMG_0638.jpeg131.6 KB · Views: 13
 -
 IMG_0637.jpeg162.4 KB · Views: 10
 -
 IMG_0636.jpeg149.8 KB · Views: 12
 -
 IMG_0635.jpeg143.8 KB · Views: 11
 -
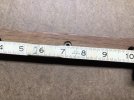 IMG_0640.jpeg134.7 KB · Views: 12
 -
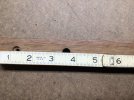 IMG_0639.jpeg158.4 KB · Views: 12
 -
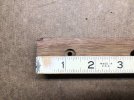 IMG_0632.jpeg138.9 KB · Views: 13
 -
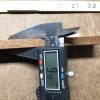 IMG_0612.jpeg118.5 KB · Views: 16
 -
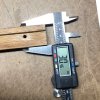 IMG_0613.jpeg182.8 KB · Views: 13

ImWolf
Active Member
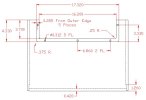
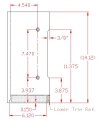
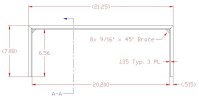
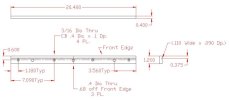
One of my 9090's has an ugly cabinet, so I'll be doing some reading on how to try and restore that one a bit. In the mean time, I had taken a lot of notes in case I ended up making a new cabinet instead, and I spent some time tonight translating all those notes into working drawings. (along with some additional notes). I'll try to figure out how to add these files to the Sansui section of the forum... (unless a nice mod comes along and does that for me) :b
Attachments


ImWolf
Active Member
Sansui 9090 Cabinet Notes / Observations
Raised bosses on chassis sides are 20.20 across, which govern side fit of cabinet.
Faceplate is 20.48 wide x 6.30 high. (.135 deep recess cuts around front edges should provide .015 clearances to faceplate sides).
Cabinet rests down on faceplate and rear plate of chassis, with the .42 wide recess cut governing forward positioning. The height difference between the faceplate and rear plate on the chassis is actually closer to .190, which is why cabinets won’t be level on close inspection. However, faceplate is also out of perpendicular (to table) on samples.
It appears as though Sansui decided to maintain the .135 depth of recess cuts on the sides and top piece so that the 15° bevel would be aesthetically pleasing, and not shim at the rear chassis plate so that the front edge of the side pieces would also remain closer to parallel to the faceplate? Instead, they drilled much larger holes in the side pieces than would normally be required for screw clearances.
The (3mm) shims which are stapled to the side piece recess cuts measure 1.0 x 5.75 inches on a sample, and were accurately positioned .150 off the front, and 6.12 off the .42 wide top recess cut as shown.
The ledge along the top of the faceplate which the .42 edge sits against is .28 farther back than the back side of the “wings” on either end of the faceplate, and this should be very consistent in manufacturing. Therefore, placing the shims at .150 off the front of the cabinet sides provides only .010 clearance to those “wings”, if that. (there’s that perpendicular issue also). These same shims leave about .180 clearance for the lower trim piece.
It appears as though the 1.26 wide recess cut was made along the entire height of the side pieces simply to generate clearance for that 1.20 wide lower trim piece, and then shimmed to help eliminate dust entry or light leak? In any case, an alternative would be to simply make the .135 deep recess cuts .20 wide instead, and then router cut at the bottom also .135 deep staying no more than 6.27 off the .42 top cut, and 1.25 wide to clear the lower trim piece. This would eliminate the need of a shim piece.
Regarding the lower trim piece, the original Sansui part has all 7 holes centered on the 1.20 width. However, the 3 thru holes are to access screws on the bottom of the chassis, and they are actually about 2mm farther from the front edge. Also, on some photo’s it appeared as though the original part had a V groove to locate over the (.06 x .06) rib along the bottom of the chassis. A saw blade cut worked fine for me. However thick the .40 dimension ends up being on a new part, be sure that the M3 x 10mm screws don’t stick out of the part more than 2mm. (see blind holes on bottom of chassis).
Assuming you are making a new cabinet, then you must have the top vent grill on hand. Check the dimensions of your grill piece to ensure these drawing dimensions are a match.
I would also recommend that after you have completed the top piece of your new cabinet with the .135 x .42 cut, that you place it on the chassis over hanging on either side, and check the actual height distance from the inside to the side holes in the chassis. They will probably not be the same distance at the front and rear holes. You could then also place a square against the edge of your top piece and confirm the horizontal hole locations as well.
It might also be a good idea to make the side piece 3/8" relief (lift) cuts at least 1/8" taller? The current design steers a user to pick up only the wood cabinet directly, which means the 50 lbs of receiver is being lifted by the 4 little M4 side screws. If this cut was higher, peoples finger tips would gravitate to actually picking the unit up with their hands under the metal chassis.
Last edited:

Sounds2good
Member
Such good detail bordering on OCD! Excellent info and even revealing how Sansui "cut corners" for bean counters cost no doubt!
Thanx, Guys!
Thanx, Guys!