• The move to the new server is done. There are some software and database maintenance updates in process. This has us passing the hat around to help out. We appreciate any donations. Seriously, even a dollar helps. The payment page may be found here - https://www.audiokarma.org/support.html

Sansui B-2301L / Sansui C-2301 restoration

Bumpalump

Well-Known Member
Hello, in this topic i will show you process of the restoration those separates, one of the best from past years, direct competition for the top of the line Technics, Sony, Accuphase
20230308_110946.jpg
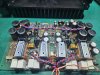
We will start from power amplifier
20230308_112045.jpg
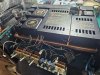
Some photo from the bottom
20230308_112310.jpg
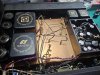
1st I removed right power amp module, its really huge, also i like the connections design, everything can be easily disconnected
20230308_113001.jpg
Premium U-Con by-pass capacitors
20230308_113237.jpg
Really huge and solid emmiter resistors
20230308_113240.jpg
Will be lots of desoldering and soldering
20230308_113645.jpg
 
Register to hide this ad
One module unscrewed
20230308_165429.jpg
Capacitors removed
20230308_170321.jpg
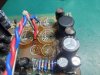
Lots of glue here
20230308_170324.jpg
Its a long way to remove glue from epoxy boards
20230308_171944.jpg
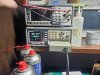
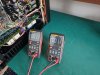
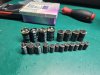
Capacitors measurments 470uF 63V
20230308_172420.jpg

20230308_172450.jpg
They are fine

Another capacitors measurments 470uF 50V
20230308_174015.jpg

They are all fine, so will be installed again
20230308_174055.jpg
New thermal grease, resoldering, and one board is ready
Some parts required cleaning
20230308_184111.jpg
Second board had more glue
20230308_184303.jpg
 
Last edited:
If you feel this post doesnt belong, you can get the mods to delete it.
Just a few curious questions.
Were there issues/problems with these units or are they being done just for refresh/preventative maintainance?
Are they JDM or international voltage? I see Lots of Japan only versions out there lately, not many of the other. There is a JDM set forsale here locally. (Ontario, Canada) the guy wants a crazy amount of $$$ for them.
Love your work and postings.
 
Bumpalump:

Thanks for sharing.

The 2301L I rec'd suffered from very, very poor packing and due to the weight of the transformer and the rough handling, it required a complete redo of the framing that holds all the fiddly bits together (That has been done, but requires a final coat of paint.). I do not see any signs of that on this 2301L which is great.

I took the approach of Hyperion for the 2301L he worked and replaced all the electrolytics on the boards. And, when the old ones were measured, they all were in spec.

That is my experience overall in the limited work I have done on the 80s Sansui pieces I have - the electrolytic capacitors all measured fine, but I replaced them anyway. I believe the common wisdom of people with way, way more experience than I is that the electrolytics are part of a multi-decade Preventive Maintenance effort and that works for me.

I would be very interested to see what the distortion measurements are for this beast. Is that something you anticipate doing?
 
@DB-7
Main problem is the scratchy controls, rest is just preventative maintenance (glue, measuring capacitors, resoldering)
@JSMATT

In low/mid grade eqippment i usually change the capacitors, in top of the line i preffer to stay with originals, i can make measurments since my analyzer allow to make measurments with floating ground
 
Last edited:
Time for controls cleaning
20230310_101111.jpg
Before
20230310_101543.jpg
After
20230310_101614.jpg
A lot of Riken premium resistors here
20230310_102635.jpg
Flat amp board
20230310_110113.jpg
Glue removed, capacitors measured
20230310_111356.jpg
Power amp offset before adjustment
20230310_112230.jpg
Flat amp + power amp before adjustment
20230310_112235.jpg
Flat amp + power amp after adjustment
20230310_112546.jpg
Lamp replacing
20230310_114525.jpg
 
Last edited:
Lets start with preamplifier
20230310_100719.jpg
I allways like to read those descriptions
20230310_100908.jpg

20230310_100906.jpg
Top view
20230310_100903.jpg
Undercover
20230310_102247.jpg
Line amplifier removed
20230310_104830.jpg
Board removed
20230310_103458.jpg
Most time consuming, glue removing
20230310_110811.jpg
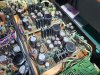
Capacitors were really bad, not surprised, much heat in this enclosure, some of them already replaced, together with new relay
20230310_122623.jpg
After few hours its ready
20230310_123806.jpg
 
Now, the phono stage
20230310_123825.jpg
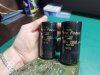
Capacitors near dead
20230310_124815.jpg
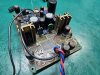
Glue removed, some parts required replacing like zener diode and one 82nF capacitor
20230310_132455.jpg
Board completed
20230310_151514.jpg
Now, adjustments of the one side
20230310_141228.jpg

20230310_141323.jpg
Parts replaced from both phono boards
20230310_150030.jpg
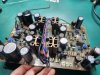
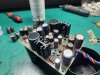
Second line amplifier board during repair
20230310_151500.jpg

20230310_151504.jpg
All the parst replaced from both line amplifier boards
20230310_171743.jpg
 
Last edited:
Woah, those electrolytics seem huge, for the phono preamp? Does it run at really high voltage? Maybe it's just a camera lense effect...

Anyway, nice work!

Another newbie Q: don't phono preamps usually have a few more poly caps in them? I think I only see 1 poly cap in there?
 
Woah, those electrolytics seem huge, for the phono preamp? Does it run at really high voltage? Maybe it's just a camera lense effect...

Anyway, nice work!

Another newbie Q: don't phono preamps usually have a few more poly caps in them? I think I only see 1 poly cap in there?
This amplifier is a little different then what you (we) are used to. The big cap (C-22) that you see in the picture with 82000 on it is a polystyrene cap from 82000 pF. The capacitors you see with nice belly and the transparent top are also polystyrene. This was filled with the latest and best components available at that time, X-balanced ( alpha) circuit topology in the phono and control amp stages!
 
A lot of time and TLC to get the tons of glue off of that board ("Second line amplifier board during repair"). Looks like al the legs you lifted were not adversely affected by the glue tho.

Am curious as to why you disassembled the rotary db switches on the back of the power amp. Did you have poor readings or 'simply' take advantage of the state of disassembly to clean them?
 
That picture! - that's exactly what I had to do when I did one of these. It was simply not possible to make a proper job of cleaning the glue off without lifting those components. The glue had touched the leads of so many, in most cases not doing them too much harm. Cleaning the glue off is so very important, drastic measures are often needed.

index.php


Great picture. :thumbsup:
 
A lot of time and TLC to get the tons of glue off of that board ("Second line amplifier board during repair"). Looks like al the legs you lifted were not adversely affected by the glue tho.

Am curious as to why you disassembled the rotary db switches on the back of the power amp. Did you have poor readings or 'simply' take advantage of the state of disassembly to clean them?
I lifted legs to not expose them with so much heat during glue removing

Switches were screatchy, but anyway, i allways disassembly every controls and clean them
 
Back
Top Bottom