• The move to the new server is done. There are some software and database maintenance updates in process. This has us passing the hat around to help out. We appreciate any donations. Seriously, even a dollar helps. The payment page may be found here - https://www.audiokarma.org/support.html

Sansui SP-X8000 (First recap/resto project)

BobEDigital

New Member
Hey All,

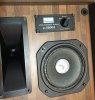
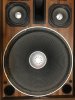
First time, long time. I've got a pair of Sansui SP-X8000's I'm looking to breathe new life into. I found a collector that was offloading a fair amount of gear for various reasons so I cleaned him out over the course of a few months. For Sansui, I was able to get my hands on a Sansui 7070 receiver--minty other than a few bulb changes--which I hooked up to a pair of SP-X7000's. I then went back and grabbed a G-4500 Pure Power receiver and the SP-X8000's in question. Everything else in the group performed beyond my expectations, but these speakers... they just sound kinda... muddy? I understand the design leaves a little to be desired by shoving such a massive sub in such a small enclosure, but I'm just certain there is more to be had from these monolith's of the 70's. I'm attaching a good amount of photos in hopes of getting some pretty concise and direct help. As the subject line explains this is ny first recapping and I just want to make sure I don't screw up too badly. In order to receive concise answers I suppose I should supply concise questions, so without further ado:

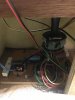
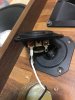
•You will see in the pictures some of the wires were'nt even connected to the posts on the speakers, with one tied in a knot making me think this was done purposefully. Is that correct? Why wouldn't this kind of thing be handled within the crossover so one could just hook all of the wires up in a logical fashion?
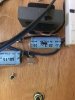
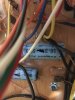
•When replacing the caps one should match the values exactly, yes? I'm assuming this as I plan on putting all of the original assembly parts back into play; had I switched components it seems reasonable to research different caps.
•Are these caps electrolytic? If they aren't is there really any use in changing them?
•You may notice the horn tweeter has scotch tape around the driver section. Any guesses why?
•What's a good process to check these speakers individually to see if they are in good working order?
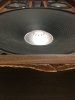
•Anybody out there have a great trick for getting those dust caps pulled out? They're plastic-like material so I'm pretty nervous about messing with them too much.
•If a guy wanted to get crazy and repair/relaminate the cabinets does anybody know a good thread they can point me to with info on that?

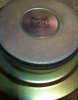
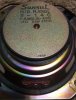
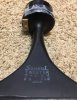
I'm going to post one more time so I can upload the speaker stamps, too.

I really enjoy using this community as a resource and hope one day I can have some form of input or help. Thanks a bunch!
 

Attachments

  • IMG_0001.JPG
    IMG_0001.JPG
    88.4 KB · Views: 103
  • IMG_0016.JPG
    IMG_0016.JPG
    55 KB · Views: 103
  • IMG_0018.JPG
    IMG_0018.JPG
    67.4 KB · Views: 99
  • IMG_0007.JPG
    IMG_0007.JPG
    62.7 KB · Views: 91
  • IMG_0024.JPG
    IMG_0024.JPG
    57.3 KB · Views: 91
  • IMG_0003.JPG
    IMG_0003.JPG
    33.8 KB · Views: 103
  • IMG_0020.JPG
    IMG_0020.JPG
    38.2 KB · Views: 118
  • IMG_0014.JPG
    IMG_0014.JPG
    57.4 KB · Views: 117
  • IMG_0026.JPG
    IMG_0026.JPG
    64.4 KB · Views: 105
Register to hide this ad
Oh yeah, the caps. And speaker stamps - here you go!
 

Attachments

  • IMG_0011.JPG
    IMG_0011.JPG
    54.6 KB · Views: 132
  • IMG_0015.JPG
    IMG_0015.JPG
    43.1 KB · Views: 116
  • IMG_0009.JPG
    IMG_0009.JPG
    47.5 KB · Views: 108
  • IMG_0008.JPG
    IMG_0008.JPG
    38.7 KB · Views: 108
  • IMG_0004.JPG
    IMG_0004.JPG
    69.7 KB · Views: 120
  • IMG_0025.JPG
    IMG_0025.JPG
    64.2 KB · Views: 115
  • IMG_0019.JPG
    IMG_0019.JPG
    78.4 KB · Views: 104
  • IMG_0005.JPG
    IMG_0005.JPG
    73.3 KB · Views: 98
  • IMG_0021.JPG
    IMG_0021.JPG
    64.6 KB · Views: 101
  • IMG_0017.JPG
    IMG_0017.JPG
    64.7 KB · Views: 115
•You will see in the pictures some of the wires were'nt even connected to the posts on the speakers, with one tied in a knot making me think this was done purposefully. Is that correct? Why wouldn't this kind of thing be handled within the crossover so one could just hook all of the wires up in a logical fashion?

As long as all the drivers were connected and playing, it may be that the crossover was built by the manuf. for more than one model of speaker and some leads weren't used. I'd be carefully checking drivers in both speakers to make sure that's factory.

•When replacing the caps one should match the values exactly, yes? I'm assuming this as I plan on putting all of the original assembly parts back into play; had I switched components it seems reasonable to research different caps.

Within 10% is close enough, but you can parallel caps to add capacitance if you need to.

•Are these caps electrolytic? If they aren't is there really any use in changing them?

Yes, and YES. Electrolytics dry out over time and drift. Film caps last better and sound better IMO. Use film caps for anything up to about 15 uf. 15 and up, nonpolar electrolytics work fine and are smaller (films get huge at larger sizes and get very expensive). Dayton 5% metallized polyprop from Parts Express, or other brands you'll see mentioned at AK.

•You may notice the horn tweeter has scotch tape around the driver section. Any guesses why?

Nope!

•What's a good process to check these speakers individually to see if they are in good working order?

Play them and hold a cardboard tube up to each driver to make sure it's playing.

•Anybody out there have a great trick for getting those dust caps pulled out? They're plastic-like material so I'm pretty nervous about messing with them too much.

Vacuum cleaner hose held in your fist with your fingers forming the actual lip that will touch the dust cap. That's my preferred method anyway.

•If a guy wanted to get crazy and repair/relaminate the cabinets does anybody know a good thread they can point me to with info on that?

Look up speaker restoration threads by Dr. Biggles. There are others too. Just read around in Speakers.
 
As for the dust caps, you can also use a needle to hook into them and pull them outward.
I would work hard at the vacuum method first, though.
 
•Anybody out there have a great trick for getting those dust caps pulled out? They're plastic-like material so I'm pretty nervous about messing with them too much.

Vacuum cleaner hose held in your fist with your fingers forming the actual lip that will touch the dust cap. That's my preferred method anyway.

I have also done that, but using a cardboard tube and lung power - if you're concerned about damaging the caps, you can better control the amount of suction.
 
I have a central vac with a sliding collar near the end of the hose that opens or closes a vent to reduce the suction. Very handy for this kind of work.
 
Got the replacement gear in and immediately got to work. That crossover board was quite difficult to get out and took a lot of patience paired with a steady hand. I rebuilt one speaker and left the other with original components to compare them channel to channel. Not sure how much of a difference it would really make, but I felt it wise to run the system in mono for this set of listening 'tests.' I wasn't quite sure what to expect - or even how to quantify the results. None of that ended up mattering because the difference was stark. For the total of around $80 in parts and a few hours of (semi) enjoyable work I'm very happy with the results. The one overall critique of the design is the massive woofer that isn't paired with enough cabinet space. It's fairly boomy, but in kind of an odd way. I may add some batting in an attempt to punch it up a bit. And although the woofer is mismatched, in my estimation, the frequency response is pretty rad. Some of the lowest, cleanest, woofer excursion I've seen outside of car audio. I don't have the correct equipment to check, but I'd imagine it goes right down to 17-18 Hz. Remember, this is all in my limited experience. I hope to keep finding projects like this to continue climbing the ladder without having to pay full market value with the leverage of trading. I've got a few more days of fine tuning and I'll be back with some pretty jarring before and after pics.
 
Welcome, Bob-

Sorry I can't help you with your Sansui speakers, but I wanted to commend you on your well-written posts. Good pics, excellent descriptions. I don't know how long it will take you to degenerate to the level of most of us here, but you've made a good first impression! ;)

GeeDeeEmm
 
Got the replacement gear in and immediately got to work. That crossover board was quite difficult to get out and took a lot of patience paired with a steady hand. I rebuilt one speaker and left the other with original components to compare them channel to channel. Not sure how much of a difference it would really make, but I felt it wise to run the system in mono for this set of listening 'tests.' I wasn't quite sure what to expect - or even how to quantify the results. None of that ended up mattering because the difference was stark. For the total of around $80 in parts and a few hours of (semi) enjoyable work I'm very happy with the results. The one overall critique of the design is the massive woofer that isn't paired with enough cabinet space. It's fairly boomy, but in kind of an odd way. I may add some batting in an attempt to punch it up a bit. And although the woofer is mismatched, in my estimation, the frequency response is pretty rad. Some of the lowest, cleanest, woofer excursion I've seen outside of car audio. I don't have the correct equipment to check, but I'd imagine it goes right down to 17-18 Hz. Remember, this is all in my limited experience. I hope to keep finding projects like this to continue climbing the ladder without having to pay full market value with the leverage of trading. I've got a few more days of fine tuning and I'll be back with some pretty jarring before and after pics.
The SPX 8000 (I have the 7700) sounds good at moderate to low volume. You can feel the presence of the bass moving air at a volume that lets you have a conversation if you raise the volume, as in a listening session, the SPX (all except the SPX 6000) falls apart, and the sound becomes exhausting to listen. I met the SPX lineup in 1978 (I was in 10th grade) when I was a salesperson for a hi-fi store then I missed the sensation and bought a pair of SPX 7700 15 years ago. (I also got a couple of Technics SB 7000a, but those aspired to be musical back in 1976). The SPX 6000, the smallest of the family, is only a three-way speaker with a 10" woofer, and it sounds balanced way beyond its class. A high volume will tire you, but it will happen way later than the SPX 7700. It is not spectacular to accompany you in a conversation, but it will keep its composure and sound much more organized at a high volume. But it is less spectacular, and I will not seek it to add to my collection. For HIFI listening, I will have to go for modern speakers. There are very few old guards that can hide the flaws of the old design and technology during an extended listening session.
 
Hello: My father inherited my brother these same speakers, it works nice in my mothers large living room, but the bass is a bit muddy.
I wonder if you have a diagram of the crossover, and wondering how could i improove it, did you have to modify the crossover? since apparently the woofer is pushed to 1000 hz, i wonder if i could cut the woofer to 300 hz, and replace the midranges to something that could go from 300 hz to the crossover point on the midrange? it would help me a lot if you have a diagram of the crossover. as i want to gift my brother some drivers or the crossover upgrade, but can\t find it anywhere, or the values used for the 5 ohm woofer.
Thanks a Lot in advance, Cheers!
Renzo
 
Back
Top Bottom