• The move to the new server is done. There are some software and database maintenance updates in process. This has us passing the hat around to help out. We appreciate any donations. Seriously, even a dollar helps. The payment page may be found here - https://www.audiokarma.org/support.html

Sansui Turntable - Particularly XR-Q11

mootej

Active Member
With retirement and, in the interest of getting a nice long "winter" project, I bid a on a "broken" XR-Q9 and got outbid. :(

So, as a consolation prize, I bought a reasonably priced non-functioning XP-99 from the reverb site. After installing a little 3 inch belt and sanding down the dust cover with some 120 grit, all that's left is to fine-sand and polish the cover. And install the replacement stylus on the AT-3100S with a new stylus ATN-3100XE from DaCapo. Maybe get or make a head amp or a step up transformer for the MC cartridge. All things I wanted to figure out but not really the winter project I had imagined...:(

So then comes a non-functioning XR-Q11 for a reasonable enough price.

Service manual is a little lacking. Here's where I could use some initial help from all of you Sansui turntable lovers! Probably a lot more later and thanks in advance, but starters:

1. Missing four screws for the bottom cover - here's what I measure for a similar screw from another location that seems to work:
2.93mm thread od / 2.43mm id 1.17mm pitch, presumably type PT plastic self threading (high angle pitch to hold in plastic) most likely an M3 PT type probably 10mm long button cap phillips black.

2. Legs entirely missing - screw that works from another location are 3.92mm/2.94mm 1.43mm pitch PT type most likely M4 PT type 10mm long button cap phillips black. Listed as Sansui #51628900...

OK these two screws I think I found from China on Ebay (probably also Mcmaster although only the correct pitch in Torx, not phillips and only in SS, not black). Short story, I'm probably good there on #1 and #2.

3. What else for the legs? Service Manual lists 55122210 leg, 55221100 felt mat and 51832400 felt washer. Anybody have any pictures or measurements that might help me reproduce?

4. Three screws that hold down the motor mount from the top in the center. They look like machine screw holes. I measure the holes, id 3.51mm (probably M4?), need 8.2mm, most likely 10mm long but the pitch looks like 3 or 4 threads in 6.18mm deep hole or 1.5 to 2mm pitch. That's way off from the std 0.5 or 0.7mm for an M4. Maybe 8-32? Doubt it. Can anyone give me a hint on these?

5. Also, no cartridge holder - manual lists part no. 60, 13022300 cartridge spacer and 13010800 cartridge assembly. I get the basics but, anybody provide pictures and/or measurements so that I might reproduce in either plastic or sheet of maybe thin hobby plywood? Especially thickness...
upload_2022-11-24_19-47-51.png

And yet to come, cracks in the dust cover. Scratches are easy, cracks, no clue yet. Non-functioning auto cue. Saw a nice thread on that. At least the motor runs! Way cool speed sensor LED's! Who knows what else.

I still wouldn't mind dumping the CPU ROM's as well (mentioned in a previous post), but it's secondary for the moment...apparently CPU failures are not that common.

Thanks in advance, any of you that have a XR-Q9 or XR-Q11.upload_2022-11-24_19-47-51.png
 
Register to hide this ad
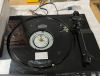
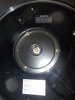
Well, maybe it's missing more than just the screws...this is what I have:
upload_2022-11-25_15-20-34.png

Here's a picture of an XR-Q9 I found online:
upload_2022-11-25_15-22-38.png

Am I missing screws and a center cover? Can anyone pull their platen and take me a picture of their Q11 and maybe pull one of those center screws and take a picture?
 
Give me a little bit to dig one out of storage, and I should be able to get you the dimensions you need as well as verify whether or not you're missing a cover.
 
Thanks Sansuiman, I knew you would be the man! Take your time, with the cracked dust cover and the other missing parts, I have a discussion going on getting a parts-only QR-X9 that is in pretty rough shape. This project is beginning to look like it's gonna require an organ donor...
 
Ok. Here's what I have so far. There is a black metal cover and screws that mount over the motor. Pic attached (excuse the dust, has heen in storage 10+ years). Will have to get screw specs posted later.

Picture of foot - all four identical - attached, (ignore rectangular piece, was there to keep the foot from rolling off) Dimensions of exposed part of foot are .5" tall, 1.625" diameter. Self adhesive felt ring on bottom "Stem" that goes up inside body is 1.75" long, inner end is .5625 (9/16") diameter. Attaches with self tapping screw shown. Can't find my digital caliper right now, so can't get good dimensions on the screw.

Cartridge spacer (upper most part of callout #60 posted above) I'll need to measure in mm, or to 32nds of an inch, so will have to dig out my precision rulers or find the caliper to do that one.
20221126_193553.jpg 20221126_193954.jpg
 

Attachments

  • 20221126_194006.jpg
    20221126_194006.jpg
    143.6 KB · Views: 18
... Non-functioning auto cue...

I am a little familiar with the XR-Q9, but not the 11. I have seen some good images of the mechanism on the XR-Q11 and I think I grasp the similarities to the 9. If so, the cue clutch would be a suspect. Close observation of the mechanism in action could reveal that. There is a thread regarding repair of the XR-Q9 mechanism: https://audiokarma.org/forums/index.php?threads/sansui-xr-q9-turntable-restoration.882029/ That may provide a little insight. There are other helpful threads specific to the Q11, like this: https://audiokarma.org/forums/index.php?threads/repair-of-sansui-xr-q11-cueing-mechanism.246920/

I was hoping that @Sansuiman would contribute. He seems to have a good understanding of these.
 
Great pics and measurements, thx Sansuiman. Priceless! Screw for the foot should be M4-10 PT type (which is pitch 1.4), I found one elsewhere on the unit and tried it in that location. It was perfect both thread and depth. I'll start figuring out how to fabricate these parts if I can't get a donor turntable. I might need to finally set up the inherited hobby lathe and get it working. Doh, can't believe it's missing the motor cover...

For the metal cover, I estimated the diameters at outer edge -137mm 100mm 30mm 20mm - inner hole dia, height of the raised part ~14mm and thickness of the metal at 2mm. Looks like steel and probably helps with shielding the motor coils. Still not sure about those screws.

Hey, Watthour, thx for the links. I have been playing around a little with the mechanism. The small belt to the micromotor was hardened and loose. I replaced that and I'm getting the gears to spin, so that's a start. Unfortunately, since the main spindle motor is not screwed in, it's a little hap-hazard-ly to be turning the unit over. I might wire that in till I get the right screws. The whole tone-arm mechanism really needs a good cleaning, lubrication and probably some rubber rejuvenator. Slow and steady wins the race.:angel:

I'll keep posting progress...

Found this in one of the service manuals:
upload_2022-11-26_22-18-0.png
 
@Watthour, the XR-Q11 is essentially just an XR-Q9 with some add-ons to facilitate the track programming feature. Principally, these are the addition of track selection buttons on the control panel (all existing features of XR-Q9 user interface are retained unchanged), a rather clunky looking optical sensor attached as an extension of the headshell to determine the start and stop point of each track (up to a limit of 7) by IR emitter/receiver pair, and the needed logic and firmware to implement said functionality. There is also a three position sensor sensitivity switch (lo/med/hi) hidden on the front under hang of the plinth to tweak the track sensing capability. Pic attached for your reference.

IMG_20221126_223352_HDR.jpg

This is all in an attempt at CD player-like selective track programming on a turntable, first seen on the BSR Accutrac line In the late 70's. A pretty slick - if largely superfluous - idea, provided it can be made to work. I imagine it works well enough, provided one is playing albums pressed on conventional black vinyl.

Translucent colors, and picture discs are probably challenging to this system and thus more likely to choke for lack of ability to "see" the surface of the record properly to ascertain leadin/leadout bands between tracks. So far I've not had the pleasure of testing it, as it's use is predicated on the other automatic functions (ala XR-Q9) being operational.

So, everything in your excellent effort at repairing the cueing and tonearm transport mech on the Q9 is directly applicable to the Q11, as the balance of the design is shared between the two models. I surmise this was a way for Sansui to capitalize on what was already a very costly episode in R&D with the Q9, by adding some gee-whiz factor that needed minimal extra effort to an already existing model sharing 99% of the design and parts content.

@mootej,

If you think you may take a crack at 3D printing - or lathe turning - new legs, I'd certainly be willing to lend you one a while for accurate modelling as an aid towards such an effort. It isn't a terribly complex part - nor is it a particularly high quality foot, as higher end turntables go - as it is just molded ABS with a felt ring on the bottom, and no height adjustment for levelling purposes. Very little (well, probably nil really) in isolating properties, unlike other highly regarded Sansui TT's such as the SR-838 and 929.
 
Last edited:
Now the backstory. I walk in to Tech HiFi in Livonia, Michigan in 1977 to get my very first stereo system as I go off to college. I see the Accutrac which is way above my paygrade! I settle for the lowest price Technics SL-20 to go along with the Marantz 2215B and a couple of homemade coaxial speakers. Years later, I'm watching one of my favorite Columbo episodes with the Accutrac at the heart of a murder. I eventually inherit the Sansui system, a QRX-6500 and start to put together the all-Sansui system. I discover the XR-Q11! So this is not just a project, it's the fulfillment of a turntable-starved adolescence :smoke:.

Here was Accutrac's marketing slogan: "Its mother was a turntable, its father was a computer." This XR-Q11 is a true engineering marvel with a 4-bit computer and all the related sensors and input. Overdesigned? Sure, but who knew at the time? It looked like we would be putting computers in everything. :rflmao:

Thx for the offer, I may take you up on borrowing or measuring or just plain advice. Looks like Sansui put more isolation into the upper part of this table, though I admit, I'm still trying to figure out the scheme with the three big springs and the three long screws labelled "shipping" screws in the service manual.
 
Heh. I must've entirely missed that episode of Columbo. I had no idea there was an episode that featured the Accutrac. I do remember one in which he caught a magician on finding evidence of a letter he had typed on an IBM Selectric II with the correctible carbon film ribbon (he read and recreated the letter by unspooling the used part of the ribbon and "seeing" what was typed, thus enabling the creation of copies of said letter).

Having owned two different Accutrac models myself about 20 years ago, I can tell you they aren't much to get excited about in actual use. To call them average in build quality would be generous, the main draw was the gimmick of programmable playback. And the ultrasonic remote control with the "robot head" receiver. I can certainly see where they would've been awe inspring at the time they were introduced, though. That said, the XR-Q11 is an all around superior effort in comparison.
 
Incidentally, if anyone might bed interested in repairing one of these, there is a video online which explicitly demonstrates exactly what to we DO NOT WANT TO DO in great detail.


From my limited experience in maintaining electromechanical equipment since 1978, there are some notable errors in general practice and improper assumptions made, among other failures. It's so easy to rip this video to shreds that it's barely worth the effort. Suffice it to say that the best thing it demonstrates is that anyone with a video camera can post anything, regardless of whether there is an value, validity, or virtue.

As some of you may have assumed, this kind of "information" really annoys me, and whereas I normally just let go of it and move along, I felt compelled to identify it for what it is.
 
What a tosser. Yes it is a complicated design, and moreso than it might have been due to limitations of available tech in 1979, but that video is just a lot of bitching out of frustration. And the comments predictably brought out the typical know-nothings and their "sansewage is all garbage" remarks to pile on. Yeah sure, it's all junk, which is why it commmands decent resale prices and runs neck and neck for ongoing popularity with Pioneer and Marantz (who never, ever once had a design problem on any of their products).

There doesn't exist a single well known brand in audio gear that hasn't had a mis-step or two in either over (or under) designing something. I can fault Sansui for trying too hard to meet certain technical objectives on the XR-Q line by pushing the envelope of what was possible at the time, but the fact is that when these models work, they do exactly what was intended by the design. Moreover, they are stout, overall well built (and most certainly not done cheaply in any case) so much of his - and many of the commenters - criticisms are unfounded.

If one understands what the objective was here - to make a full auto TT on which the tonearm was fully isolated from the tonearm transport mech once playback was underway, it makes sense. And he bags needlessly on the speed control circuit design, which virtually never fails on these, so why complain about it?

Since I'm already clearly not just doing a knee-jerk blanket defense of the design, the one part I'll concede was outright junk are the hinges for the dustcover. Made with a partly plastic body that is meant to keep the internal balancing spring in place, and due to the weight of the cover, always blew the end of the spring out the back of the hinge once the plastic got brittle with age. Yeah, they could've done a lot better with that.
 
Last edited:
Many manufacturers economized, but examples of those designs have lasted a lot longer than what was probably the original intent. Plastic hardware was not really uncommon, and even that has examples which have stood the test of time.

I may have seemed harsh, but I just couldn't watch that video (twice!) and listen to the perpetual complaining instead of conjecture on ways to improve it.
 
Your criticism was justified. I've watched other videos from the same tech and he doesn't typically piss and moan like that, but this one was a stinker. What rubbed me the wrong way even more than the video was further down into the comments where he (among others) made clearly stupid and unjustified blanket statements about Sansui being junk, which is self evidently untrue.

Do come on now, as a tech who works on this stuff routinely, he knows better than that. One bad experience, and he indicts the whole brand? Just a gross exaggeration, and it comes off a childish and bitter.

But, that kind of stuff gets eaten up in large quantities by trolls online. Some people love to trash talk for its own sake, and this was a perfect example of the effect.
 
I've watched plenty of this guys vids. He really is a whiner, almost every vid has negative vibes. Not sure why I continue to watch, maybe it's like a train wreck , just can't look away.

He did a vid on his own personal 9090 "DB". I noticed it was not a DB model, and added a comment just to let him know. He went off on me, friggin know it all.
 
Maybe I was too charitable then. I haven't watched a lot of his stuff, but probably several others on his channel over the last 18-24 months, and none struck me as being nearly so obnoxious as the XR-Q9 video @Watthour linked. I'm not going to binge watch his content just to find out, in any case.

I can only imagine customer impressions of me if I carried on like that while rebuilding a tub and shower valve, setting a toilet or installing a water heater. But then I generally enjoy my work (even the calls that don't go smoothly generally don't phase me to a point of getting visibly frustrated in front of a customer). Maybe that's how this guy really is, or maybe it's partly a put on, as with the contrived drama of reality TV shows. Gotta stir the pot to keep getting attention, after all.
 
...I noticed it was not a DB model, and added a comment just to let him know. He went off on me, friggin know it all.

I can see why. That's a little uppity, isn't it? Showing off by demonstrating that you are actually literate and everything? I can see where you might tweak someone's sensitivities. After all, it's not like there's some kind of magical button to be pushed that allows someone to edit or re-dub the content of a video... ;)


Hopefully we get some good feedback from @mootej and can help get that problem resolved.
 
Well, the one good thing about that video, the byline made me figure there would be some inexpensive units out there since they are the "Turntable from Hell." After all, who could possibly want one? Sure, I'll take one cheap. Luv a challenge...

So on to the hinges. Yes both plastic parts broken...
upload_2022-11-28_20-32-14.png

Got a fix-it kit on ebay. Two choices, one was 3d printed, the other was supposedly injection molded ABS. I went with the injection molded ones.

Cut off the end of the flattened hinge rod on the old hinge. Be careful of the metal part of the hinge but not the plastic, the plastic part will be tossed.
upload_2022-11-28_20-36-12.png

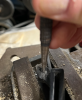
Knock the hinge pin out with a drift...
upload_2022-11-28_20-37-27.png

Take apart the old hinge, install the spring, the new plastic half-hinge and the new pin (skip the washers, they don't fit). Rest the spring. All, well, half new working hinges, :banana: Till they break next time... would love to find all metal. Somebody says they are out there for one of the other turntables but they did not know which one. It's not the XP-99 which appear to be all metal. They don't fit.
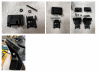
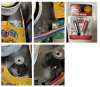
upload_2022-11-28_20-45-0.png

Oh yeah, fixed this too....
upload_2022-11-28_20-56-45.png
upload_2022-11-28_20-53-49.png

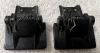
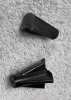
These couple of pieces fell off. They hold the bottom in place, well, once I get screws. Luv JB Weld:
 
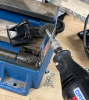
Also working on the XP-99 cover in preparation for doing the XR-Q11 cover. Scary but believe it or not, this works. Well, anyway, I tried this on a scrap piece of plexi and it worked. The XP-99 had a couple of pretty deep scratches, probably 1 to 2 mm deep. Got a Dewalt random orbital sander, then different grits: dry 120, 240, then wet 320, 400, 600, 800, 1000, 2000, 3000, then Novus 3,2,1 then Meguiar's Plast-X.
upload_2022-11-28_21-12-50.png
upload_2022-11-28_21-16-12.png
 
Back
Top Bottom