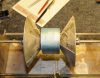
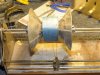
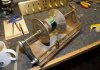
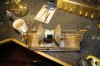
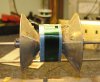
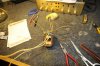
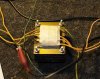
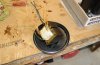
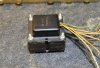
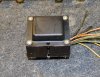
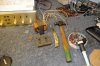
Some pictures of winding the new filament coil. The change in wire color is because I grabbed the wrong spool initially and wound wire that was .027 in diameter which was way to large to fit in the E's.



It's very simple. You have to dig the wood wedges out, then the coil is loose in the iron stack. The E's and I's are laid back and forth. Set the transformer on an edge, start with the first layer, take an old pocket knife or safety razor blade and put the edge by the crease between the first layer and the rest of the core, and tap with a small hammer. The first layer will start to pop off. Work it very carefully off so you don't bend it. I like to maintain original orientation where possible, so I reverse stack therm as I take them off so they are in original order. You will gradually get to where you just have a coil of wire. Only varnish is holding the stack together.Useful?
This is amazing.
Here I thought I was hot stuff because I know how to remove the bell housing and soak a buzzing power transformer in varnish, then repaper it, put in some wood wedges, and bake the varnish dry before reassembly.
This is amazing and interesting stuff to me.
Question about the 4th photo in post #24. In that photo the coil is not in the laminations.
How do you disassemble the laminations to put remove the coil and put the coil back in?
Nice pile of stuff you listen to by the way. Nothing like a Citation.Useful?
This is amazing.
Here I thought I was hot stuff because I know how to remove the bell housing and soak a buzzing power transformer in varnish, then repaper it, put in some wood wedges, and bake the varnish dry before reassembly.
This is amazing and interesting stuff to me.
Question about the 4th photo in post #24. In that photo the coil is not in the laminations.
How do you disassemble the laminations to put remove the coil and put the coil back in?
One "E" and one "I" make "one" layer. If you look at the pictures of the core sitting there, The core is actually two pieces for each layer, one "E" with an "I" connecting the 3 horizontal legs of the "E". I don't have a picture unfortunately, if you start taking one apart you will see the E's and I's pretty quick.Thanks for the compliment. Yeah, this gear is fun.
I'm not seeing what you're saying but I'm fully confident that if I try it I'll figure it out after I've wrecked the first one. E's and I's?
If you do it again, can you take a picture of how you wedge them off please?
Probably because you have done it, it's obvious. Probably because I haven't done it, it's impossible. Are the laminations different shapes with E shaped pieces and I shaped pieces that interleave?
There's some kind of optical illusion that makes the laminations look like they're solid single pieces and you'd have to cut them to remove them from the coil.
See enclosed drawing.Thanks for the compliment. Yeah, this gear is fun.
I'm not seeing what you're saying but I'm fully confident that if I try it I'll figure it out after I've wrecked the first one. E's and I's?
If you do it again, can you take a picture of how you wedge them off please?
Probably because you have done it, it's obvious. Probably because I haven't done it, it's impossible. Are the laminations different shapes with E shaped pieces and I shaped pieces that interleave?
There's some kind of optical illusion that makes the laminations look like they're solid single pieces and you'd have to cut them to remove them from the coil.
Some pictures of winding the new filament coil. A couple are a different color because I laced up the wrong spool by accident and ended up wrapping wire that was much larger than the original and it didn't fit.

Magnet wire is available anywhere. Paper is just any low acid paper. Masking tape. I use a micrometer to measure wire diameter. The ARRL manuals from the 40's, 50's, 60's and 70's has all the information you need about wire gauge and how to wind transformers. The hardcore amatuer radio people wind their own transformers a lot. You can make a winder. I showed a picture at the beginning of my home made one. It works very well, in some ways better than the purchased units.That leads me to a couple of questions,
Where are you getting the materials needed to do this from? (the wire and so fourth)
Also, I see that you used a different gauge wire, however what are you using to measure the gauge of the original magnet wire with?
You can make your own bobbin with some white glue and copy paper. Cut the wood core to the size of the transformer core, drill a hole through it, mount it in a winder, and wrap paper coated with white glue on one side around the wood core. When it's dry, knock the wood out and you have a custom bobbin. This way you can make the bobbin a lot thinner and get more wraps.Holy moley... I need to get myself a winder. Edcor sells bells, laminations, and bobbins. Time to put the knowledge gleaned from Electromechanical Energy Conversion class to good practise!
Cut the wood core to the size of the transformer core
Depending on size, i like to make the wood mockup in three pieces or three layers, if you will. That way, when I'm done wrapping paper and glue to make the bobbin I can drive the middle piece out and the two outer ones will collapse. It's easy and doesn't wreck the bobbin you just made. Be aware that the glue saturated paper will shrink slightly when dry so you want to make the wood form slightly larger, not a lot, but a bit. You can experiment, they are easy to make. If the form is too small simply wrap some paper on it before you start your bobbin. Standard paper is about .004". If you're doing this you need a dial caliper or a micrometer to measure wire and paper so you can fit everything back together.Some excellent advice!
You'll have to explain this one again... So, I'd measure the dimensions of the core and cut two chocks of wood to the same size?
Magnet wire is available anywhere. Paper is just any low acid paper. Masking tape. I use a micrometer to measure wire diameter. The ARRL manuals from the 40's, 50's, 60's and 70's has all the information you need about wire gauge and how to wind transformers.
The hardcore amatuer radio people wind their own transformers a lot. You can make a winder. I showed a picture at the beginning of my home made one. It works very well, in some ways better than the purchased units.