likestoparty
New Member
Good evening! Just wanted to share some snaps of a rapid Sonab OA12 restoration I'm undertaking. This is my second journey into rehabbing Sonabs, my first project being a set of OD11 cubes that I mistook as a couple of throwaway bookshelves and as the three-week restoration went on I grew to regard them as the second most impressive speakers I have encountered behind the Mirage M5si.
The thing the Carlsson designs and the Mirages have in common is they all manipulate the soundstage naturally, utilizing the walls and the sonic reflection thereupon to rebound identical copies of the sounds vectored straight for your head, but juuuuust a split second later. I believe the appreciation of this effect is probably a polarizing issue. In my experience of using the Mirages to demonstrate restored amplifiers to buyers and their reaction to the spread of the sound, the guys who positively MUST insist upon auditioning in an anechoic chamber are driven wild by it. It turns them into monsters! Anyway, I come from a live and studio musician's point of view and I whole heartedly believe this reflective approach rehydrates the two-dimensionality of single-point microphone recording by placing that voice in your environment and scattering it around just as a person standing in the center of a room would scatter their voice in all directions. Shooting twin stereo beams out of conventional speakers has become somewhat boring since discovering the Sonabs.
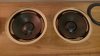
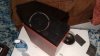
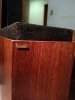
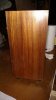
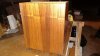
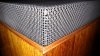
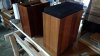
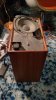
Which brings us to this ratty, filthy, storage rot infected, but foundationally immaculate set of OA12s. Wood is unscathed although the cabinetry corners are in need of glue-und-square. The fragile wire mesh speaker grilles are straight as an arrow, something that took an eon to get perfectly bent back to shape on the much worse off OD11s. And there was a layer of silt a quarter inch deep burying the foamrotten *original* Sonab stamped woofers. Clear sign of loooong term storage.
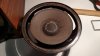
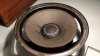
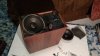
Early basket strip-down. This shows why I go overboard and take baskets down to bare before refoaming, rust commonly collects under the micro fractures in the glue/paint bond from all that frigging woofing back and forth millions of times, add in 20 years of sitting still in a dark and moist Seattle climate and whammo! Rust under the adhesive. It's iron, it isn't going to rust through, but it's shitty etiquette to slap a new foamie on there and resell it as restored.
Far from completely clean, but these two started in similar states:
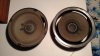
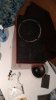
Test fitting the replacement rubber:

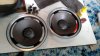
OK,_damn close to paint, still a bit of fine sanding on the rim to polish it up for the paint job. These woofers are much more visually exposed being mounted on top so I really wanted to concentrate on a mirror smooth shine. After carefully dusting and dry-buffing the paper cones, I sealed the upper surface with light clear wood glue to bring out the blacks of the paper and dry to a strikingly smooth glow without stiffening the cone.
And now a reminder of where we started from!

That's the end of day one. I went off to bed and imagined what color the baskets should be: black as new, pastel Sweden blue like the tweeter configuration selector on top, gold because it's regal and looks great sandwiched around black and dark woodgrain, orange, yellow? It was a very primary-color time in human art history when these were styled.
The thing the Carlsson designs and the Mirages have in common is they all manipulate the soundstage naturally, utilizing the walls and the sonic reflection thereupon to rebound identical copies of the sounds vectored straight for your head, but juuuuust a split second later. I believe the appreciation of this effect is probably a polarizing issue. In my experience of using the Mirages to demonstrate restored amplifiers to buyers and their reaction to the spread of the sound, the guys who positively MUST insist upon auditioning in an anechoic chamber are driven wild by it. It turns them into monsters! Anyway, I come from a live and studio musician's point of view and I whole heartedly believe this reflective approach rehydrates the two-dimensionality of single-point microphone recording by placing that voice in your environment and scattering it around just as a person standing in the center of a room would scatter their voice in all directions. Shooting twin stereo beams out of conventional speakers has become somewhat boring since discovering the Sonabs.
Which brings us to this ratty, filthy, storage rot infected, but foundationally immaculate set of OA12s. Wood is unscathed although the cabinetry corners are in need of glue-und-square. The fragile wire mesh speaker grilles are straight as an arrow, something that took an eon to get perfectly bent back to shape on the much worse off OD11s. And there was a layer of silt a quarter inch deep burying the foamrotten *original* Sonab stamped woofers. Clear sign of loooong term storage.
Early basket strip-down. This shows why I go overboard and take baskets down to bare before refoaming, rust commonly collects under the micro fractures in the glue/paint bond from all that frigging woofing back and forth millions of times, add in 20 years of sitting still in a dark and moist Seattle climate and whammo! Rust under the adhesive. It's iron, it isn't going to rust through, but it's shitty etiquette to slap a new foamie on there and resell it as restored.
Far from completely clean, but these two started in similar states:
Test fitting the replacement rubber:
OK,_damn close to paint, still a bit of fine sanding on the rim to polish it up for the paint job. These woofers are much more visually exposed being mounted on top so I really wanted to concentrate on a mirror smooth shine. After carefully dusting and dry-buffing the paper cones, I sealed the upper surface with light clear wood glue to bring out the blacks of the paper and dry to a strikingly smooth glow without stiffening the cone.
And now a reminder of where we started from!
That's the end of day one. I went off to bed and imagined what color the baskets should be: black as new, pastel Sweden blue like the tweeter configuration selector on top, gold because it's regal and looks great sandwiched around black and dark woodgrain, orange, yellow? It was a very primary-color time in human art history when these were styled.