• The move to the new server is done. There are some software and database maintenance updates in process. This has us passing the hat around to help out. We appreciate any donations. Seriously, even a dollar helps. The payment page may be found here - https://www.audiokarma.org/support.html

Sony STR-7055 LED Conversion

David_NC

Super Member
I'm not usually a fan of LED 'upgrades' on vintage receivers. Too often, colored bulbs are used that just don't look right - intense violet or hot pink on a Technics, indigo or green on a Pioneer SX-xx80, etc. I know LED's have much better color quality now, at least the warm whites, so I figured it'd be worth a try on this Sony. This model uses 12 volt festoon bulbs, so there's nothing unique about them. The only issue is that the lighting runs on a separate secondary off the transformer, so I'd need LED's that run on AC. The issue is that most of the ones I've found are directional in light output and are bulky enough to not fit in the holders. If only I could use standard (DC) LED's...

The answer appears to be a bridge rectifier and whatever 12 V led I want. Amazon to the rescue! A pack of 20 rectifiers and a pack with 4 LED bulbs was around $17.
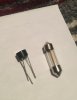
Bulb & Rectifier.jpg

Next, I just need to figure out where to mount the rectifier. It's tiny, at least, which should make it a bit easier. Here, the two larger blue wires come from the transformer to a lighting terminal strip:
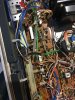
Original Wiring.JPG

Simply snipping the blue wires where they attach to the terminal strip was the first step.
Wires to Cut.JPG

A bit of solder and heatshrink, and the rectifier is ready to be attached to the terminal strip. Sony uses black for one of the wires running to each dial light, so it was easy to designate one as negative and one positive. Next, simply attach the leads from the rectifier to the terminal strip paying attention to the polarity. Due to its small size, it's easy to attach and not in the way of anything.
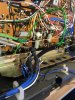
Rectifier Installed.JPG

So, do the LED's work:
LED Working.JPG

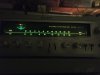
Time to reassemble it all and see how it looks:
Dial Lights.JPG

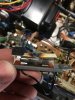
I'd say this was a success. For reference, the meter bulb is still incandescent, and the LED's seem to match it in brightness well enough. The main reason I wanted to switch to LED's is that I needed to replace them with something anyway, it seemed like a fun little project, and the incandescent bulbs run really hot:
Original Bulb & Paper.JPG
 
Last edited:
Register to hide this ad
What value is the rectifier? I ask because I may be getting an str-6065 that has a couple lamps out. From what I gather, it has a couple different types of lamps
 
What value is the rectifier? I ask because I may be getting an str-6065 that has a couple lamps out. From what I gather, it has a couple different types of lamps
The rectifiers are 2 amp / 1000 volts, which should be enough for any receiver's lighting, if using LED's. I believe the actual dial lights are the same. I used these. Both models have different lights for the pointer illumination and the stereo light than those for the dial lights; I believe these two are 'grain of wheat' bulbs. The tuning meter's bulb is working, and I haven't changed it. It appears to be different, maybe a glass fuse style bulb, but doesn't get hot enough to melt damage anything like the dial lights do. I haven't seen the insides of 6065; hopefully it'll have a terminal strip similar to the 7055. Good luck with it and post pics! It'd be nice to have some LED conversion posts for others to follow.
 
I'm not usually a fan of LED 'upgrades' on vintage receivers. Too often, colored bulbs are used that just don't look right - intense violet or hot pink on a Technics, indigo or green on a Pioneer SX-xx80, etc. I know LED's have much better color quality now, at least the warm whites, so I figured it'd be worth a try on this Sony. This model uses 12 volt festoon bulbs, so there's nothing unique about them. The only issue is that the lighting runs on a separate secondary off the transformer, so I'd need LED's that run on AC. The issue is that most of the ones I've found are directional in light output and are bulky enough to not fit in the holders. If only I could use standard (DC) LED's...

The answer appears to be a bridge rectifier and whatever 12 V led I want. Amazon to the rescue! A pack of 20 rectifiers and one with 4 bulbs was around $17.
View attachment 1790332

Next, I just need to figure out where to mount the rectifier. It's tiny, at least, which should make it a bit easier. Here, the two larger blue wires come from the transformer to a lighting terminal strip:
View attachment 1790333

Simply snipping the blue wires where they attach to the terminal strip was the first step.
View attachment 1790347

A bit of solder and heatshrink, and the rectifier is ready to be attached to the terminal strip. Sony uses black for one of the wires running to each dial light, so it was easy to designate one as negative and one positive. Next, simply attach the leads from the rectifier to the terminal strip paying attention to the polarity. Due to its small size, it's easy to attach and not in the way of anything.
View attachment 1790338

So, do the LED's work:
View attachment 1790343

Time to reassemble it all and see how it looks:
View attachment 1790341

I'd say this was a success. For reference, the meter bulb is still incandescent, and the LED's seem to match it in brightness well enough. The main reason I wanted to switch to LED's is that I needed to replace them with something, it seemed like a fun little project, and the incandescent bulbs run really hot:
View attachment 1790350

Nice write-up! Thanks for sharing.

Oftentimes on the STR-60XX'x and STR-70XX's, the green paint on the edge of the dial glass fades or falls off. As a result, the green tint can appear washed out a bit. I've had success restoring the color by repainting the edges with craft paint as discussed in this thread:
https://audiokarma.org/forums/index.php?threads/sony-str-7065-burned-dial-lamps.554938/.
 
Nice write-up! Thanks for sharing.

Oftentimes on the STR-60XX'x and STR-70XX's, the green paint on the edge of the dial glass fades or falls off. As a result, the green tint can appear washed out a bit. I've had success restoring the color by repainting the edges with craft paint as discussed in this thread:
https://audiokarma.org/forums/index.php?threads/sony-str-7065-burned-dial-lamps.554938/.
Thanks! I thought about doing that and still might (I didn't have any of the glass paint handy last night). I did cut pieces of green plastic drink bottle to use as a green filter for each bulb, and it seems to have done a bit. I'm not sure how green the display should be; it looks uneven in the pic I posted, but I don't recall it looking like that in person.
One thing I will note: I've read that one can replace the bulbs from the back of the dial / inside of the receiver. I was able to work them out that way, but the new ones are a tiny bit larger and didn't fit trying to get them back in. Ultimately, it was far easier to remove the front panel, reinstall the bulb holders from the back, and pop in the new LED's from the front. Note that these are DC LED's and have polarity. I'd recommend making sure all are inserted the correct way before closing it back up.
Some of the covers for the lever switches were really tight, and I didn't think they'd come off. I wrapped them in a couple layers of painter's tape and used standard pliers to pull them off... kinda like how they snatch out teeth in movies! ;) They came off really easily that way with no damage.
 
The rectifiers are 2 amp / 1000 volts, which should be enough for any receiver's lighting, if using LED's. I believe the actual dial lights are the same. I used these. Both models have different lights for the pointer illumination and the stereo light than those for the dial lights; I believe these two are 'grain of wheat' bulbs. The tuning meter's bulb is working, and I haven't changed it. It appears to be different, maybe a glass fuse style bulb, but doesn't get hot enough to melt damage anything like the dial lights do. I haven't seen the insides of 6065; hopefully it'll have a terminal strip similar to the 7055. Good luck with it and post pics! It'd be nice to have some LED conversion posts for others to follow.

Thanks, haven't opened it up yet but they appear to be pretty much the same design wise, I've constructed LEDs for use in AC circuits using anti-parallel configuration and haven't noticed any flicker, Currently working on a Realistic STA-84 right now which needs axial bulbs for the dial(wish they could all use the same bulbs, you have to have million different ones) Anyway, the Sony is next on the to do list, just want to have my ducks in order before I have at it - very nice receiver
 
Last edited:
.....One thing I will note: I've read that one can replace the bulbs from the back of the dial / inside of the receiver. I was able to work them out that way, but the new ones are a tiny bit larger and didn't fit trying to get them back in. Ultimately, it was far easier to remove the front panel, reinstall the bulb holders from the back, and pop in the new LED's from the front.
I've always removed the front panel and then the two clips holding the glass dial in place. To free the glass dial, you may need to use a sharp exacto blade to separate the glass from the rubber spacers. Once the glass is removed, you can easily access the bulbs. You can also very carefully clean the backside of the glass. To be safe, don't scrub or run under water. I use q-tips and carefully clean around the lettering.

Note that these are DC LED's and have polarity. I'd recommend making sure all are inserted the correct way before closing it back up.
Some of the covers for the lever switches were really tight, and I didn't think they'd come off. I wrapped them in a couple layers of painter's tape and used standard pliers to pull them off... kinda like how they snatch out teeth in movies! ;) They came off really easily that way with no damage.
I've had good luck gently heating the switch covers with a hair dryer for 30 seconds or so. Seems to loosen up the friction fit and the covers will usually pull right off (no yanking required).
 
I've always removed the front panel and then the two clips holding the glass dial in place. To free the glass dial, you may need to use a sharp exacto blade to separate the glass from the rubber spacers. Once the glass is removed, you can easily access the bulbs. You can also very carefully clean the backside of the glass. To be safe, don't scrub or run under water. I use q-tips and carefully clean around the lettering.


I've had good luck gently heating the switch covers with a hair dryer for 30 seconds or so. Seems to loosen up the friction fit and the covers will usually pull right off (no yanking required).
Which glass are you referring to - the glass with the station numbers, etc that's actually lighted or the glass that's attached to the front panel? On this model at least, there's really no reason to remove any of the glass that I can see, and it will not help in accessing the bulbs. Simply remove the front panel with glass intact, and there's a bulb at each end of the dial. You simply pull out the old bulb and pop in a new one. The nice thing about this setup is that there's no text on the actual front glass - the glass that typically gets dusty.
Meh. Yanking them off is far more rewarding.;) I thought about heating them, which I would have done, if they hadn't come off ('yanking' is not correct but was intended to be funny. I actually pulled them off easily with pliers).
 
Which glass are you referring to - the glass with the station numbers, etc that's actually lighted or the glass that's attached to the front panel? On this model at least, there's really no reason to remove any of the glass that I can see, and it will not help in accessing the bulbs. Simply remove the front panel with glass intact, and there's a bulb at each end of the dial. You simply pull out the old bulb and pop in a new one. The nice thing about this setup is that there's no text on the actual front glass - the glass that typically gets dusty.
Meh. Yanking them off is far more rewarding.;) I thought about heating them, which I would have done, if they hadn't come off ('yanking' is not correct but was intended to be funny. I actually pulled them off easily with pliers).

I was referring to the glass with the station numbers. I never owned a 7055 and didn't realize it had two glass panels. The lower models in the series just have one piece of glass. Glad to hear it was easy to get the bulbs in and out.
 
Back
Top Bottom