You are using an out of date browser. It may not display this or other websites correctly.
You should upgrade or use an alternative browser.
You should upgrade or use an alternative browser.
Speaker refinishing and refurbishing: Post your experiences and photos here.
- Thread starter Njord Noatun
- Start date


spartanmanor
Lunatic Member
shrinkboy said:i have a pair of ADS L-810's that have a crushed corner. how do ya rebuild 'em?
Are you going to veneer them?

thedelihaus
Nocturnal transmissions
My crushed corner experiments are going to be tried out with either wood putty, or bondo, and lots of shaping...

OMI
Super Member
How bad are the crushed courners??? I had one courner done in and used some 2 part Elmers stuff as I remember (it was reccommended). See here:
http://audiokarma.org/forums/showthread.php?t=61599&highlight=omi+infinity
http://audiokarma.org/forums/showthread.php?t=61599&highlight=omi+infinity


Kuja
Active Member
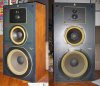
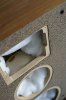
My new AR 98 LS looked like this when they arrived. They were really beaten up - the photo is actually better.

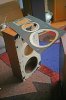
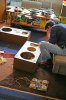
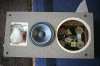
Taking them apart.

Ugly plastic front "sticker" is peeled off.

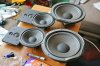
Drivers are refoamed again, with better surrounds.

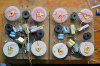
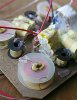
Original xovers...

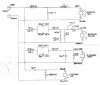
Xover schematics (actually, from later 98 LSI model)
...I removed the Shelf/Floor switch - I don't need it and it would compromise the sound.

Detail of new LSI version xover.
I replaced all old capacitors in the xover with polypropylene (ICEL, made in Italy, PHC type).
I also replaced the original wiring with Van den Hul SCS 12 cables (http://www.vandenhul.com/cable/scs-12.htm).
For the tweeters I used double runs of teflon insulated pure silver wire.
To get the required capacitance values, I used multiple lower value capacitors (with specific ratios of values), connected in paralel.
This should additionally improve the sound.

Restored enclosure. Veneer is sanded and lacquered.

The front plastic "sticker" is replaced with soft granular 50% cork / 50% rubber material.

...

And here they are!!!


Taking them apart.
Ugly plastic front "sticker" is peeled off.
Drivers are refoamed again, with better surrounds.
Original xovers...
Xover schematics (actually, from later 98 LSI model)
...I removed the Shelf/Floor switch - I don't need it and it would compromise the sound.
Detail of new LSI version xover.
I replaced all old capacitors in the xover with polypropylene (ICEL, made in Italy, PHC type).
I also replaced the original wiring with Van den Hul SCS 12 cables (http://www.vandenhul.com/cable/scs-12.htm).
For the tweeters I used double runs of teflon insulated pure silver wire.
To get the required capacitance values, I used multiple lower value capacitors (with specific ratios of values), connected in paralel.
This should additionally improve the sound.
Restored enclosure. Veneer is sanded and lacquered.
The front plastic "sticker" is replaced with soft granular 50% cork / 50% rubber material.
...
And here they are!!!
Attachments
Last edited:
Kuja
Active Member
I made a mistake and I double posted - I can't figure out how to delete this one! There is no delete button... or there is?
Attachments

Last edited:

cheon57
budding technician
:scratch2: Been there,done that a couple times.:yes: If you find the delete button, LET ME KNOW TOO!!Kuja said:I made a mistake and I double posted - I can't figure out how to delete this one! There is no delete button... or there is?

It used to be easy; that functionality was removed, I am not sure for what reason, in one of the recent server "upgrades".cheon57 said:If you find the delete button, LET ME KNOW TOO!!
The only way I know of now is to beg Admins to do it for you - seems a little cumbersome.
Rgds,

PioneerGuy75
Certified Lurker
Njord Noatun said:(do not use polyurethane, varnish, or lacquer - ever!). Once oil is fully cured (at least 72 hours), lightly burnish the cabinets with Fine (# 0000) steel wool for that ultra-fine, hand-rubbed, satin finish.
Rgds,
If I may ask, Why no poly etc? I like the look of a freshly oiled cabinet but like the sheen of several coats of poly.
Can poly harm veneer?
I am sure there are many opinions on this, but here is mine: Poly/varnish/lacquer is a surface treatment. As such, it needs to be removed if you ever need to work on that wood surface again: Removing it is hard, filthy, smelly work, and ultimately so hard to do that you may either ruin the wood surfaces, corners, or edges, or it may be economically unfeasible. In short, if a lacquered unit develops cracks, bubbles, deep scratches or dents, or the wood gets sun-bleached, dis-colored or water stained, you are pretty much SOL: With an oil finish, you just reapply oil, and the cabinet is "as good as new" 20 minutes later. When so many speaker cabinets still look great after 20, 30 or 40 years, it is because none of the owners ever decided to apply a surface finish.PioneerGuy75 said:If I may ask, Why no poly etc?
Besides, vintage speaker cabinets were never, or rarely, lacquered - so if you want to stay true to the original piece, oil is the way to go. If you like high sheen, try oil with a wax application (e.g., Minwax, beeswax, etc.).
IMHO, my $0.02.
Rgds,

absolon
Super Member
You're correct about surface forming finishes being tough to repair with two exceptions. Both shellac and nitrocellulose lacquer will reactivate the previous coat of same and will "melt" in. Shellac probably isn't durable enough for a speaker finish but NC lacquer is. NC does have to be sprayed. Both finishes are strippable with their respective thinners and the thinners can be used in an unobtrusive spot to determine if that indeed was what was used.
Speakers look great:thmbsp:
Speakers look great:thmbsp:


pmsummer
simul justus et peccator
PioneerGuy75 said:If I may ask, Why no poly etc? I like the look of a freshly oiled cabinet but like the sheen of several coats of poly.
Can poly harm veneer?
Poly/Lacq/Varnish=West Coast/Pacific Rim Sound
Oil=East Coast/North Atlantic Sound
Vinyl=WalMart Sound


lukiedog
Super Member
Dynaco A-35 Howard's Restore A Finish
Previously posted photos here:
http://audiokarma.org/forums/showthread.php?t=74472
This is not in the league of some of the other work posted here, but for those not wanting to do too much work, I found this might be one of the better approaches. Howard's Restore A Finish does a good job of sprucing up the tired looking finishes on the oldies. Basically, you pick the proper one for the wood you are working on (ie walnut, oak, neutral, etc) and rub with steel wool soaked in the stuff (use nitrile gloves and googles, please). Took less than an hour per speaker. The instructions say to follow up with their "Feed and Wax" product, I have not done that yet, but due to this post, I'm getting inspired to jump back on it.
What do the experts think about this approach? Is it wise to follow up with the wax? Any other tips when using this product?
My only concern when doing this project was after immediately finishing it, the scratches stood out quite a bit, but as time went on and I guess the stuff dried or was absorbed, they blended in quite nicely. Using this approach, you don't do any sanding nor scratch removal (like raising the wood) that might disturb the finish, as you are not "re-finishing" but restoring, so you don't want to disturb the existing finish.
Previously posted photos here:
http://audiokarma.org/forums/showthread.php?t=74472
This is not in the league of some of the other work posted here, but for those not wanting to do too much work, I found this might be one of the better approaches. Howard's Restore A Finish does a good job of sprucing up the tired looking finishes on the oldies. Basically, you pick the proper one for the wood you are working on (ie walnut, oak, neutral, etc) and rub with steel wool soaked in the stuff (use nitrile gloves and googles, please). Took less than an hour per speaker. The instructions say to follow up with their "Feed and Wax" product, I have not done that yet, but due to this post, I'm getting inspired to jump back on it.
What do the experts think about this approach? Is it wise to follow up with the wax? Any other tips when using this product?
My only concern when doing this project was after immediately finishing it, the scratches stood out quite a bit, but as time went on and I guess the stuff dried or was absorbed, they blended in quite nicely. Using this approach, you don't do any sanding nor scratch removal (like raising the wood) that might disturb the finish, as you are not "re-finishing" but restoring, so you don't want to disturb the existing finish.

Hillman
Don't Start No ****
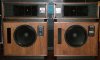
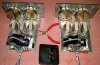
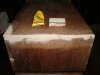
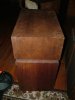
Here are my latest Altec Model 19 additions. Some of you have seen these pictures already and I like to show them off. Picked them up trashed for $450.00 and the guy delivered them for free. I Re-veneered the cabinets, rebuilt the X-overs. Had the LF drivers re-coned and the HF drivers re-magnetized, Great Plains Audio did a great job. They are worth every penny I spent on them.
Attachments


Filmboydoug
Nikko Freako
Hillman said:Here are my latest Altec Model 19 additions.
Very nicely done! Almost hard to believe they are the same speakers. :thmbsp:

Wow -- you guys are good! I've done a few, and they're OK, but some of the work you guys have done is pretty much amazing. Love those model 19s, Hillman. :thmbsp:
Links to the Altec LF-2 coffee table subwoofer that I did -- finish was pretty trashed. Some Watco cherry and it looks pretty good now.
http://audiokarma.org/forums/attachment.php?attachmentid=22779&d=1155286415
http://audiokarma.org/forums/attachment.php?attachmentid=31594&d=1164340615
Links to the Altec LF-2 coffee table subwoofer that I did -- finish was pretty trashed. Some Watco cherry and it looks pretty good now.
http://audiokarma.org/forums/attachment.php?attachmentid=22779&d=1155286415
http://audiokarma.org/forums/attachment.php?attachmentid=31594&d=1164340615

onepixel
.
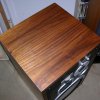
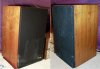
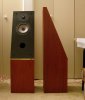
ebay photo (before) of the HPM-100s I got for $67.50 and the after when I was through with them. After photo of the Thiel 04a in a darker red.