

You are using an out of date browser. It may not display this or other websites correctly.
You should upgrade or use an alternative browser.
You should upgrade or use an alternative browser.
Speaker relays
- Thread starter Hyperion
- Start date
-
- Tags
- speaker relays


restorer-john
Addicted Member
Harsh language makes me feel better - but still doesn't get the cover off.
Enter the fabulous multi-use guitar pick. No technician should be without a selection at his immediate disposal.
Step 1, use a thin pair of picks, they push in without any damage and place them each side next to the dreaded clip of doom.
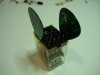
Step 2, Bring picks to this position against the death clip.
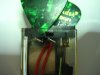
Step 3, Twist the pick a tiny bit and slide it over the clip and between the evil clip and the case.
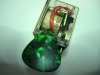
Step 4, Grab the pins with some longnose pliers and slide out the relay!
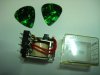
Rejoice in the feeling of triumph over that nasty little clip designed by OMRON to frustrate us. Survey the completely undamaged clear case and pour yourself a drink.

Last edited:

Some observations on relays. In the Omron numbering system, if an AU appears, such as MY4 02 AU DC24, the contacts are gold plated. (The 02 indicates pcb pins). None of the commercially available replacement relays have gold plated contacts. I've never tested the resistance but maintaining the original gold plating would have some value.
Early on I recommended sand paper but quickly realized that it would modify the profile of the contacts. Now I use strips of plain white paper soaked in deoxit D5. Gently squeeze the contact closed with the paper between them then draw the paper out. The paper provides enough abrasiveness to aid the D5 in cleaning the contact surface without modifying the surface.
I've never looked at them with a magnifier but I'm guessing the contact surfaces are probably not flat. They are likely to have a slight curve to them. The curve would help ensure adequate contact. Flat contact would have to be perfectly aligned to get full contact, otherwise they may contact just an edge.
One good way to pit the contacts is to turn the amp on or off with the volume turn up high. This is more of an issue with receivers that are mostly used for radio or amps mostly used with tuners. Since tuners are usually putting an audio signal through the amp, the contacts are more likely to arc at high volume. Turn it down before you turn it off.
Lastly, the trick to getting the relay covers off is to use simple to make "cover shuckers" in most cases you can get the cover off without removing the relay.
- Pete
Early on I recommended sand paper but quickly realized that it would modify the profile of the contacts. Now I use strips of plain white paper soaked in deoxit D5. Gently squeeze the contact closed with the paper between them then draw the paper out. The paper provides enough abrasiveness to aid the D5 in cleaning the contact surface without modifying the surface.
I've never looked at them with a magnifier but I'm guessing the contact surfaces are probably not flat. They are likely to have a slight curve to them. The curve would help ensure adequate contact. Flat contact would have to be perfectly aligned to get full contact, otherwise they may contact just an edge.
One good way to pit the contacts is to turn the amp on or off with the volume turn up high. This is more of an issue with receivers that are mostly used for radio or amps mostly used with tuners. Since tuners are usually putting an audio signal through the amp, the contacts are more likely to arc at high volume. Turn it down before you turn it off.
Lastly, the trick to getting the relay covers off is to use simple to make "cover shuckers" in most cases you can get the cover off without removing the relay.
- Pete
restorer-john
Addicted Member
I always remove relays- it only takes a 20-30 seconds and then you can truly inspect the contacts under magnification. You can't really make a judgement on contact condition when the relay is surrounded by caps and heatsinks, buried in the PSU section.

Rejoice in the feeling of triumph over that nasty little clip designed by MORON to frustrate us.
There, I fixed that for you
restorer-john
Addicted Member
OMG, that is brilliant! MORON to OMRON never saw that one.

Should there be a Sticky listing relay subs?
I think that would be very useful.

I guess we would need a list of Sansui models with today's part numbers listed for the installed relays. (rather than the other way round?)
Last edited:

smurfer77
Super Member
I think that would be very useful.
I guess we would need a list of Sansui models with today's part numbers listed for the installed relays. (rather than the other way round?)
Yes, I think it makes sense to make the primary search variable the sansui model or sansui part number. It could be tempting to list it the other way around starting with modern part number and list of sansui models but for some models there will notes on how to mod the part to work for that amp ???? Who is the resident relay expert?
I am thinking of one of those threads where everyone can contribute but the thread starter will arrange all info into an edited first post as things progress. [edit: you know what, I will just start a thread now, and take on the job]
Last edited:
Enter the fabulous multi-use guitar pick. No technician should be without a selection at his immediate disposal.
Step 1, use a thin pair of picks, they push in without any damage and place them each side next to the dreaded clip of doom.
View attachment 1097075
Step 2, Bring picks to this position against the death clip.
View attachment 1097076
Step 3, Twist the pick a tiny bit and slide it over the clip and between the evil clip and the case.
View attachment 1097078
Step 4, Grab the pins with some longnose pliers and slide out the relay!
View attachment 1097084
Rejoice in the feeling of triumph over that nasty little clip designed by OMRON to frustrate us. Survey the completely undamaged clear case and pour yourself a drink.
To pop the cover in situ I use a pick set. Pratt-Read ones are a good balance between cost and functionality. The Harbor Freight ones are ****. Snap-on are great but I can't justify the price.