• The move to the new server is done. There are some software and database maintenance updates in process. This has us passing the hat around to help out. We appreciate any donations. Seriously, even a dollar helps. The payment page may be found here - https://www.audiokarma.org/support.html

Starting ADS 1290 Refurbishment

wildheritage

New Member
Hi Everyone, Well I finally started the my long awaited project with my 1290s that I bought 6 months ago. I have all the drivers removed, everything labeled and ready to ship tweeters, mids and crossovers to Richard So. I've learned so much from all of you on this forum, and now that I am in the thick of it, I could use some expert advice on removing the current finish using chemicals, sandpaper or whatever the recommendations might be. I'd also be interested in any finishing recommendations. All details are welcome.
Thanks in advance!
 
Register to hide this ad
A bit of data for your consideration: I used one of the soy-based liquid stippers. It worked exactly as advertised. Every bit of the lacquer came off in one application. The problem is that the moisture caused some swelling in a few seams and I wound up having to clean the joints, glue them back together and re-veneer. If I had it to do over again, I'd carefully sand off all of the lacquer by hand.
Of course, my L-780's aren't as big as the 1290's.

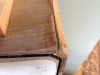
Photo_12_DamagedCorner.gif
 
I'll definitely post pics tomorrow. I have plenty so far. The grills are OK, may just need a little flattening and cleaning.
Porkloin, I'll take your advice and sand. Any recommendations on the grit to start with and then proceeding to a fine smooth baby bottom finish?

Thanks for all replies.
 
I'd position myself in front of a bit of entertainment just to quell the boredom and start out with 320. Save the "baby bottom" for the coating, if you're clear coating. If you're color changing, you should look into dyes, as opposed to stains. If you've got an outbuilding and spray equipment, consider lacquer again. Take a look at @GD70 's amp cabinet work.

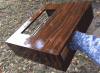
Glenn's Photobucket links may be obsolete as I can't seem to make them work at my end, so here's a copy I had.

LacqueredCase.gif
 
I used brush on polyurethane, but only because it was wintertime and I don't have an outbuilding to spray lacquer in.
 
Start with 220 grit and a power palm sander. Go slow and sand evenly, not focus on one area, then move to the next.
The veneer in not very thick, this is why to go slow and don't put a lot of pressure on the surface while sanding.
I restored a set of 1590's with Rosewood veneer and used Watco's Danish oil, natural color. It needed 4-5 applications, and they look gorgeous!
Have fun and post pics as you progress.
Glenn
 
I'd position myself in front of a bit of entertainment just to quell the boredom and start out with 320. Save the "baby bottom" for the coating, if you're clear coating. If you're color changing, you should look into dyes, as opposed to stains. If you've got an outbuilding and spray equipment, consider lacquer again. Take a look at @GD70 's amp cabinet work.

Glenn's Photobucket links may be obsolete as I can't seem to make them work at my end, so here's a copy I had.

View attachment 997264
Photobucket has screwed many of us making pics un viewable.
Thanks for posting the cabinet pic Porkloin!
I'll post a couple oh the 1590's when I can.
 
I'll definitely post pics tomorrow. I have plenty so far. The grills are OK, may just need a little flattening and cleaning.
Porkloin, I'll take your advice and sand. Any recommendations on the grit to start with and then proceeding to a fine smooth baby bottom finish?
Thanks for all replies.
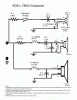
A bit of information for your 780's that I was never able to find online, so I had to chart the crossover by actually examining it.
L780CrossoveREDUCEDr.gif
 
Start with 220 grit and a power palm sander. Go slow and sand evenly, not focus on one area, then move to the next.
The veneer in not very thick, this is why to go slow and don't put a lot of pressure on the surface while sanding.
I restored a set of 1590's with Rosewood veneer and used Watco's Danish oil, natural color. It needed 4-5 applications, and they look gorgeous!
Have fun and post pics as you progress.
Glenn
You're a braver soul than I. That factory veneer is too easy to burn through.
 
Looking forward to your results wh. And your choice of finish.
On my AR3's I did all the dirty work and got them stripped down and cleaned up then took them to a local furniture refinisher to apply the lacquer. But I love the look and feel of the oil and Glenn's results with those rosewood 1590's are hard to ignore.
 
Start with 220 grit and a power palm sander. Go slow and sand evenly, not focus on one area, then move to the next.
The veneer in not very thick, this is why to go slow and don't put a lot of pressure on the surface while sanding.
I restored a set of 1590's with Rosewood veneer and used Watco's Danish oil, natural color. It needed 4-5 applications, and they look gorgeous!
Have fun and post pics as you progress.
Glenn


220 on a palm sander is what I always use, too. You have to be careful when a fresh sheet is installed, as it will cut rather quickly, but once a few passes are made, the grit begins to fill with sanding dust and you can sand away with little concern. Once the initial sanding it done, I switch to 320 grit and finish by hand with a sanding block. This has worked perfectly for brush-on finishes. For spray-on finishes, I'd finish sand with a finer grit.

The key, of course, is multiple coats with sanding between each coat. This is absolutely essential if you intend to use a glossy finish.

GeeDeeEmm
 
Here's a few pics of Mikes Rosewood 1590's I refinishing for reference.
The tops needed to be re-veneered because of the chip damage.
Where I started and finished. I now want Rosewood veneered speakers!IMG_2555.jpg IMG_2663.jpg IMG_2566.jpg IMG_2583.jpg IMG_2559.jpg IMG_2701.jpg IMG_2681.jpg IMG_2710.jpg IMG_2712.jpg
Glenn
 

Attachments

  • IMG_2714.jpg
    IMG_2714.jpg
    56.6 KB · Views: 7
Here's a few pics of Mikes Rosewood 1590's I refinishing for reference.
The tops needed to be re-veneered because of the chip damage.
Where I started and finished. I now want Rosewood veneered speakers!View attachment 998064 View attachment 998065 View attachment 998066 View attachment 998067 View attachment 998068 View attachment 998069 View attachment 998070 View attachment 998071 View attachment 998072
Glenn
Those are gorgeous, Glen! Great job, buddy.

GeeDeeEmm
 
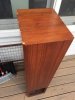
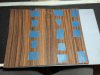
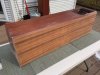
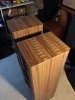
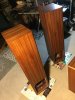
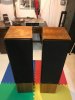
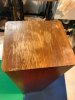
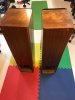
Here are some pics of my starting point and initial tear down. The drivers will ship on Tuesday. Anyone know where I can get some replacement woofer gaskets? On my way to HD for the sandpaper.
IMG_2133.JPG IMG_2134.JPG IMG_2157.JPG IMG_2158.JPG
 
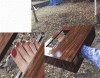
BTW thanks for sharing the pics of re-finishing. Extremely impressive. I love the use of a human foot fixture to apply the clear coats. Looks like an added bonus to cover the toenails at the same time.
 
Back
Top Bottom