• The move to the new server is done. There are some software and database maintenance updates in process. This has us passing the hat around to help out. We appreciate any donations. Seriously, even a dollar helps. The payment page may be found here - https://www.audiokarma.org/support.html

Switches and pots cleaning, first try

GrisPato

Super Member
After reading threads from in my case audioKarma member Kale, being amazed about how far he takes the restoration process and recently by Bumpalump I decided I will have to learn this side of the game too.
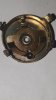
Because I can not just go taking apart mostly unreplaceable potentiometers and switches I have to start small.20210504_200107.jpg
 
Register to hide this ad
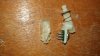
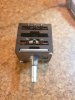
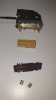
This is a switch from a Sansui tuner I took apart for some spare parts like screws, rectifiers, transistors and the boards for my son to practice his soldering.
So now I can use it to start my adventure into switches and pots disassembly for cleaning (they have to go back assembled again!)
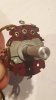
Was relatively simple to disassemble this one. But because I never have seen a switch from the inside it was still educational.

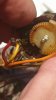
16201532468986839985831654091091.jpg

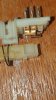
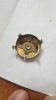
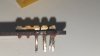
There are this extremely fragile little copper clamps ( I bended one when I took the slider of gently but not gently enough )

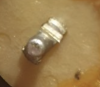
16201534432942144097166032261964.jpg

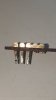
End this little pin creates the lock for both positions.
 
If you're interested in seeing the difference between a deoxited and a disassembled switch or pot you should watch this video.
https://www.audiokarma.org/forums/i...gain-cleaning-potentiometers-switches.906279/
Ofcourse not all switches or pots look like this. The switch I disassembled from the Sansui tuner was around 35 years in service and was amazingly clean but I can be pretty sure that when the switch or potentiometer is dropping a channel it will look something like what you see in the video.
Ofcourse for example Kale's threads shows a similar situation.
If anyone has some tips on disassembly of switches and pots I would love to hear it. Advice on the right tool, etc
 
Last edited:
I use a pencil type eraser to clean and shine the contact bars, and I use a relay contact burnishing tool, and deoxit to clean the actual spring contacts. (GC 9338 - Burnishing Tool - Standard Width .250" - Removes Oxide / Corrosion USA)
 
I use a pencil type eraser to clean and shine the contact bars, and I use a relay contact burnishing tool, and deoxit to clean the actual spring contacts. (GC 9338 - Burnishing Tool - Standard Width .250" - Removes Oxide / Corrosion USA)
Thanks for that. I do remember reading about using pencil eraser once. The burnishing tool looks good to
 
Can use some help!
I decided just to do it. Started with the volumepot of my au 417.
Now I am stuck what to do.
Started with desoldering some wires.

Pot volume au417.jpg

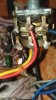
It certainly needs a good cleaning. I think the amp spend most of it years in a garage. Is full with a thin layer of black grease, like it was vaporised on all surfaces inside.
Than I opened top and bottom to see what would come off.

20210507_202813.jpg20210507_202832.jpg

16204142223036018910901383380672.jpg

Is there someone who knows if the white plastic disc is removable? Can I separate the shaft from the threaded tube with the shield?
Any help appreciated.
 
Last edited:
I "Think", the shaft is held in place as a pot assembly by the splayed out shaft end.
As to how it can be pushed back safely inwards to make it smaller so the white plastic Wiper disc can be removed for complete disassembly and cleaning from the shaft will be the tricky part,...... so it can then all be reassembled securely.


+++ as its a Loudness type Volume Pot, from the pictures, these may be rare to replace if it all goes wrong.
 

Attachments

  • Screenshot 2021-05-08 at 10.08.03.png
    Screenshot 2021-05-08 at 10.08.03.png
    118.7 KB · Views: 24
the shaft is held in place as a pot assembly by the splayed out shaft end.
That's wat I am thinking to. Only because there is this on the bottom with tabs to hold it to the bottom fiberboard with the plastic disc in between I thought it doesn't need the rivet.16204680923747328197185087186677.jpg

The same with the metal stem holder on top. I watched some videos, mostly from guitar pots where you can just slide it of. My guess is that this is a double pot, so in between the two is something holding it.
Watching a thread from Bumpalump, he shaves of the outside of the river and tightens it with a small M bolt. But he has equipment for drilling the hole and making the thread in a precise manner that I don't have.
as its a Loudness type Volume Pot, from the pictures, these may be rare to replace if it all goes wrong.
Your right about that. Is the reason I am so careful. Otherwise I would have just used some more force to see if I could get it of.
Thanks for the help.
 
May be the option here to take is as you have the back off, try cleaning the pot of the gum as is by passing some thinning fluid, then re-lubricate and re-assemble...
Bumpalump, has an exceptional .. full mechanical/electronic engineering workshop goodies we can only aspire to.
 
@Bumpalump
Thanks for the response. I was going to go that way already. Looking to get me a colomdrill to be able to get the hole straight, and the tapping of the thread.
I really want to learn this. After watching your video about the switches and pots that where "cleaned" I am convinced you are right about this being the only way to clean them properly, especially for keeping them in good condition for another 10-15 years. But is really good to get the reassurance that it is possible, even imagining you started that way too.
 
Pick your battles carefully when doing this stuff many times better and not perfect is something you need to accept and be happy with it versus breaking something by pushing it and being screwed. After many years one begins to better evaluate risks versus rewards.
 
Pick your battles carefully when doing this stuff many times better and not perfect is something you need to accept and be happy with it versus breaking something by pushing it and being screwed. After many years one begins to better evaluate risks versus rewards.
Wise words. Non the less I have always been a person that avoided risks and regularly ended up with empty hands so learned after many years that if you want something you will have to be willing to take risk.
I am still going to move slowly and with patience keeping your advice in the back of my mind.
 
Here my first real step into this venture.
I started with the volumepot of my AU-D907 that I'm currently restoring because it made/makes a terrible sound when you turn it. So assuming there is a good chance it's dead anyway I disassembled it.

20210829_212553.jpg

There are two screws that hold everything together. After unscrewing them just the bottom cap came off. There was a rubber ring on top of a starlock shaft retainer that is holding everything together. Took that of and found out that was the easy part. Had no idea how they call something like that in the Netherlands and after finding them it appeared that small sizes (1,5-2 mm) are really rare.
Found one shop, selling them for €44 for 50!?
So ordered some from China ( 100pc for €2) and will have to see how that ends.
After you have got the retainer of it's actually pretty simple. Just be sure to not damage anything. So easy does it.
And ofcourse pictures and order.

20210829_212650.jpg

20210829_213026.jpg

The little yellow brown pieces came out. I think they broke of of a part that's next to the shaft behind the stopplate.
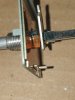
1630336783430780531863715314280.jpg

16303368720032932281995710921913.jpg

I hope that was the reason for the squeaky sound when I turned the pot.
Anybody out there that knows what it is for?

 
The broken rubber part you mention is a "rotation limiting part"
You need to put a new rubber part here, if you wont do that, potentiometer will exceed its rotation angle which is limited for 300 degree
Thanks for sharing your knowledge , much appreciated. I would have not found that out on myself.
I assume a new part should be fitted to the T shaped little plate on the frontplate?
 
Friend of a good colleague helped me out with the tools.

20210901_210353.jpg

Made the job a lot easier
So cleaned the contact points and the carbon.
Assembly is easy, measures well: within 0.2% between left and right channel.

20210901_210404.jpg

And the squaeky sound is gone. Probably went of the carbon track because of the broken rotation limiter.
Have to say, not to difficult, just the shaft retainer needs the right tool.
And when it's with a rivet even more tools.
Next up are some switches
 
First switch disassembly. Have to be honest. I had no idea what to expect, so decided to take on our of my AU217.
Bought this one, one channel out, to use in my workplace. Did not get to it yet because I got distracted by his big brothers.

16308705955268306977950100302834.jpg

Killed a solderpad. So realising the risk of taking these of to disassemble is not just in the switch!

16308706814108181084520317491319.jpg

I can refine my solderpad repair skills in the process :confused:
Then the switch, just open it up from the bottom. You have to bend some bended little pins straight and then with care take the little PCB out.
One side it was easy to bend them straight the other side did not want to give any grip. I ended up bending the whole side plate a fraction of a mm and then it came out.

16308709590042479067358599615369.jpg

Now cleaning and reassembly.
 
Then the sliding contacts. Really fragile and you have to push them on.
1630872131391258275405189392074.jpg

And ofcourse I dropped one on the floor. Told myself before to work in the middle of the table. I started there but ended up on the edge .
Luckely found it in a second and was not damaged.
 
Back
Top Bottom