Wyatt Weeks
Member
Looking for some general advice on this project:
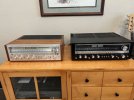
If you don't want the background, skip this paragraph. I thought I was done rebuilding receivers after rebuilding my SX-1050 (thread), but I was innocently browsing FB marketplace one day and found a newly listed SX-5590 in my area. I went to look at it and it was cosmetically perfect and was being sold by the granddaughter whose grandfather had bought it overseas in the service. Functionally, when hooked up to the HPM-100's that she was also selling (I didn't buy - couldn't afford both!) there was a little scratchyness in a few of the controls, but that was it, she was working. I bought it and paid real money for it, but got a good deal I think. I got it home and hooked it up to my Yamaha NS-890's (Japan only model - non-monitor version of the NS-1000's) and it sounds great. worked the controls several times and the scratchiness went away. the only issue I could detect was some clipping in the left channel when approaching 12'oclock on the volume knob, which is LOUD! so I listened and thought for a few weeks about what I was going to do with it. I decided I was going to at least do the protection board and the power supply boards. But I'm a little rusty, as it's been a couple of years since I've been in a unit. So I decided I'm gonna do an sx-737 to warm up. I'm no pro and just began teaching myself how to do this right before COVID. I've rebuilt probably 8 or 9 pioneer SX units. Then, I ordered a kit from Ben via that big auction site. not cheap, but as I found, worth the time savings in coming up with a BOM myself, and the kit was super complete and thorough. Using the instructions he includes, I barely even referenced the service manual or any mouser data sheets while doing the rebuild. the sx-737 rebuild turned out nicely and I gave it to my brother for Christmas.
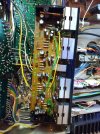
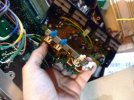
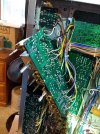
So, back to the SX-5590... I decided to tear into it. IBest I can tell, first time any of the screws were even removed from the unit. Totally original inside. I checked PS voltages and rebuilt the two PS boards and the protection board - stopping and testing and getting voltages between boards. They changed little. I used Ben's kit for the sx-1250 and it's been spot on so-far. Here's what I ended up with (PS voltages):
Pin Volts
1 48.4 VAC
2 48.4. VAC
3. 68.4 VAC
4. 68.4. VAC
5 19.4. VAC
6 19.4. VAC
7. 0
8 23.5. VDC
9 85.7. VDC
10 -87.5 VDC
11 8.1 VAC
12. 8.1. VAC
13. 35.3. VDC

So I'm really thinking about replacing the filter caps and leaving the rest of this unit alone. (though I'm not looking forward to tackling the different screw size problem on the big blue filter caps). This unit is so clean and probably used relatively little, that I question myself in what kind of benefits I'd really get from doing the rest of the boards. What would you guys do if this were your own personal 'grail' unit (especially those of you that have serviced a 1250 or two) ? Would you button it up and leave the rest alone, or continue and install the rest of the kit? Thanks in advance for any advice.
If you don't want the background, skip this paragraph. I thought I was done rebuilding receivers after rebuilding my SX-1050 (thread), but I was innocently browsing FB marketplace one day and found a newly listed SX-5590 in my area. I went to look at it and it was cosmetically perfect and was being sold by the granddaughter whose grandfather had bought it overseas in the service. Functionally, when hooked up to the HPM-100's that she was also selling (I didn't buy - couldn't afford both!) there was a little scratchyness in a few of the controls, but that was it, she was working. I bought it and paid real money for it, but got a good deal I think. I got it home and hooked it up to my Yamaha NS-890's (Japan only model - non-monitor version of the NS-1000's) and it sounds great. worked the controls several times and the scratchiness went away. the only issue I could detect was some clipping in the left channel when approaching 12'oclock on the volume knob, which is LOUD! so I listened and thought for a few weeks about what I was going to do with it. I decided I was going to at least do the protection board and the power supply boards. But I'm a little rusty, as it's been a couple of years since I've been in a unit. So I decided I'm gonna do an sx-737 to warm up. I'm no pro and just began teaching myself how to do this right before COVID. I've rebuilt probably 8 or 9 pioneer SX units. Then, I ordered a kit from Ben via that big auction site. not cheap, but as I found, worth the time savings in coming up with a BOM myself, and the kit was super complete and thorough. Using the instructions he includes, I barely even referenced the service manual or any mouser data sheets while doing the rebuild. the sx-737 rebuild turned out nicely and I gave it to my brother for Christmas.
So, back to the SX-5590... I decided to tear into it. IBest I can tell, first time any of the screws were even removed from the unit. Totally original inside. I checked PS voltages and rebuilt the two PS boards and the protection board - stopping and testing and getting voltages between boards. They changed little. I used Ben's kit for the sx-1250 and it's been spot on so-far. Here's what I ended up with (PS voltages):
Pin Volts
1 48.4 VAC
2 48.4. VAC
3. 68.4 VAC
4. 68.4. VAC
5 19.4. VAC
6 19.4. VAC
7. 0
8 23.5. VDC
9 85.7. VDC
10 -87.5 VDC
11 8.1 VAC
12. 8.1. VAC
13. 35.3. VDC
So I'm really thinking about replacing the filter caps and leaving the rest of this unit alone. (though I'm not looking forward to tackling the different screw size problem on the big blue filter caps). This unit is so clean and probably used relatively little, that I question myself in what kind of benefits I'd really get from doing the rest of the boards. What would you guys do if this were your own personal 'grail' unit (especially those of you that have serviced a 1250 or two) ? Would you button it up and leave the rest alone, or continue and install the rest of the kit? Thanks in advance for any advice.
Last edited: