


aidanhunter
Active Member
Mission Accomplsihed
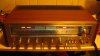
I know it's been quite some time, but I finally got around to ordering the parts in October and installed them over Thanksgiving and Christmas break. This thing is a BEAST now! I put it through some major torture tests with some loud, "bassy" electronic music and four speakers (Ohm Model D and Pioneer CS-77A) and it handled everything like a champ. Heck, my ears had a harder time handling the volume than the receiver! If I had an instrument that could measure the power output, I'd use it. But, I'm a poor college kid and this is my second project ever. I'll buy one of those fancy meters one of these days.
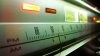
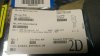
Throughout the project I had no errors at all and nothing went horribly wrong. I triple checked every transistor I installed and made sure I knew what each pin was for each transistor. I've attached a picture showing my method for success. I look up the data sheet, draw the transistor on the package, and label the pins. I think everyone should do this, if they don't already. It decreases the potential for error by a very large magnitude. My biggest scare was when I went to test the unit after replacing Q5-8 on the amp board. There was no sound at all coming from the FM radio, which was what I had been using as a test source the entire time. Turns out I had turned FM muting on and it wasn't centered on a station. I was very relieved to find out I didn't screw something up!
Also, I did notice a few errors in the service manual. If I remembered exactly what they were, I'd post it here, but I didn't take notes. The errors were mostly found in the drawings of the boards, like there being two "C2" 's present on one board or a transistor's pins being labeled in the wrong configuration. All I can say for this is go with what's printed on the actual board. I trusted that before I trusted the manual drawings and it was a good move.
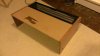
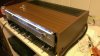
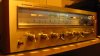
Upon completion of the insides of the receiver, I noticed the peeling wood vinyl laminate on the face plate and case and couldn't help but go the extra mile and fix that too. I did some research, tried Home Depot and Lowes, and the best solution to fix it is definitely something similar to contact paper. However, I did not like how the contact paper at Lowes and Home Depot looked. It was quite ugly and would have looked awful on the receiver. The guy at Home Depot ended up directing me to Parts-Express.com where they sell Dayton Audio wood vinyl laminate. It's expensive and so is shipping, but it's worth it. It was very easy to install too. Before the installation, I peeled off as much of the old laminate as I could. This created a nice clean surface for the new stuff to stick to. I was expecting to have to redo certain sections, but I was very careful and ended up only having to redo one side of the face plate. The stuff is very easy to work with and even easier to cut. After I finished that, I did a meticulous cleaning of the controls with some white vinegar. If there's a better way to clean these silver-faced receivers, I'd like to know. The vinegar did well with removing dirt, but I'd like the thing to really shine. I may try the mothers aluminum polish I have at my apartment at school. Normally you use that on a car, but hey, maybe it'll make the face plate on this thing look awesome. Someone please stop me now if they know the polish will destroy it haha.
I thank everyone who helped me initially with this, with special thanks directed to Mark for the semiconductor and pot list. Merry Christmas, everyone!
I know it's been quite some time, but I finally got around to ordering the parts in October and installed them over Thanksgiving and Christmas break. This thing is a BEAST now! I put it through some major torture tests with some loud, "bassy" electronic music and four speakers (Ohm Model D and Pioneer CS-77A) and it handled everything like a champ. Heck, my ears had a harder time handling the volume than the receiver! If I had an instrument that could measure the power output, I'd use it. But, I'm a poor college kid and this is my second project ever. I'll buy one of those fancy meters one of these days.
Throughout the project I had no errors at all and nothing went horribly wrong. I triple checked every transistor I installed and made sure I knew what each pin was for each transistor. I've attached a picture showing my method for success. I look up the data sheet, draw the transistor on the package, and label the pins. I think everyone should do this, if they don't already. It decreases the potential for error by a very large magnitude. My biggest scare was when I went to test the unit after replacing Q5-8 on the amp board. There was no sound at all coming from the FM radio, which was what I had been using as a test source the entire time. Turns out I had turned FM muting on and it wasn't centered on a station. I was very relieved to find out I didn't screw something up!
Also, I did notice a few errors in the service manual. If I remembered exactly what they were, I'd post it here, but I didn't take notes. The errors were mostly found in the drawings of the boards, like there being two "C2" 's present on one board or a transistor's pins being labeled in the wrong configuration. All I can say for this is go with what's printed on the actual board. I trusted that before I trusted the manual drawings and it was a good move.
Upon completion of the insides of the receiver, I noticed the peeling wood vinyl laminate on the face plate and case and couldn't help but go the extra mile and fix that too. I did some research, tried Home Depot and Lowes, and the best solution to fix it is definitely something similar to contact paper. However, I did not like how the contact paper at Lowes and Home Depot looked. It was quite ugly and would have looked awful on the receiver. The guy at Home Depot ended up directing me to Parts-Express.com where they sell Dayton Audio wood vinyl laminate. It's expensive and so is shipping, but it's worth it. It was very easy to install too. Before the installation, I peeled off as much of the old laminate as I could. This created a nice clean surface for the new stuff to stick to. I was expecting to have to redo certain sections, but I was very careful and ended up only having to redo one side of the face plate. The stuff is very easy to work with and even easier to cut. After I finished that, I did a meticulous cleaning of the controls with some white vinegar. If there's a better way to clean these silver-faced receivers, I'd like to know. The vinegar did well with removing dirt, but I'd like the thing to really shine. I may try the mothers aluminum polish I have at my apartment at school. Normally you use that on a car, but hey, maybe it'll make the face plate on this thing look awesome. Someone please stop me now if they know the polish will destroy it haha.
I thank everyone who helped me initially with this, with special thanks directed to Mark for the semiconductor and pot list. Merry Christmas, everyone!
Attachments
Last edited:


