• The move to the new server is done. There are some software and database maintenance updates in process. This has us passing the hat around to help out. We appreciate any donations. Seriously, even a dollar helps. The payment page may be found here - https://www.audiokarma.org/support.html

SX-880 with protection issues

dustmaker

Active Member
Ι’m repairing a SX-880 going into protection. I’ve already replaced the two caps and transistors in the protection circuit that often go bad. That fixed the initial problem and the unit now works but only when volume is below 1/4. Unit works with both 8ohm and 4ohm speakers until it trips.

I’ve recapped most of the main board but still have to do a bunch of little ones that will require me to remove the faceplate. The only transistors replaced are the two in the protection circuit. Everything in this unit was original.

Not sure if this is normal but the following parts run hot after 30 min warm up:
Q11 - 165°
Q13 - 130°
Q26 - 135°
C410 140° Located near pin 60
 
Last edited:
Register to hide this ad
Additional info after further testing.

Relay trips consistently when I go beyond 1/4 of the volume dial and the signal meter approaches half way
It trips with no load on the speakers connections
It trips with 8 ohm dummy load connected
It trips with dummy load connected to one speaker connection only or both
It trips when on AM, FM, Aux (1K input signal at 3 volts)
It trips with balance all the way to left, balanced, and all the way to right
It trips on mono, stereo, loudness on or off, filters on or off

after reading numerous posts from MTF, I’ve attempted to cover all testing possibilities to eliminate external problems

all pin voltages are consistent with schematics
All transistors pin voltages are consistent with schematics as best I can measure
 
Last edited:
In order to narrow this down you must determine if it is dc offset, overload, or false triggering (of those) or something else.
Set unit to Aux input, no input signal, volume control at minimum, no speakers or dummy loads connected. Tone controls centered or off, balance centered.
I am not surprised that Q26 is running hot, that circuit is similar to other units power supplies where that pass transistor has a lots of power dissipation. This unit's circuits look a lot like the SX-780's. Reflow the solder on that transistor, then:
As usual, start with verifying power supplies.
Black meter lead to chassis / ground, measure DCV with red lead.
Emitter of Q30, should be +41.5vdc:
Emitter of Q26, sb +13,5vdc:
Emitter of Q27, sb -41,5vdc:
Emitter of Q31, sb +25,5vdc:
Emitter of Q32, sb -25.5vdc:
+ side of main filter cap C2, sb +44.5vdc:
- side of main filter cap C3, sb -44.5vdc:
+ side of C406, sb +56.4vdc:
- side of C408, sb -58vdc:
 
In order to narrow this down you must determine if it is dc offset, overload, or false triggering (of those) or something else.
Set unit to Aux input, no input signal, volume control at minimum, no speakers or dummy loads connected. Tone controls centered or off, balance centered.
I am not surprised that Q26 is running hot, that circuit is similar to other units power supplies where that pass transistor has a lots of power dissipation. This unit's circuits look a lot like the SX-780's. Reflow the solder on that transistor, then:
As usual, start with verifying power supplies.
Black meter lead to chassis / ground, measure DCV with red lead.
Emitter of Q30, should be +41.5vdc:
Emitter of Q26, sb +13,5vdc:
Emitter of Q27, sb -41,5vdc:
Emitter of Q31, sb +25,5vdc:
Emitter of Q32, sb -25.5vdc:
+ side of main filter cap C2, sb +44.5vdc:
- side of main filter cap C3, sb -44.5vdc:
+ side of C406, sb +56.4vdc:
- side of C408, sb -58vdc:

I reflowed the solder on Q26. The follow readings are after unit has warmed up and not on DBT
Q30 E: +41
Q26 E: +13.5
Q27 E: -40.0
Q31 E: +25.3
Q32 E: -24.7
C2 +44.4
C3 -44.3
C406 +54.7
C408 -57.3
 
Those voltages look good.

I infer you replaced Q33 & Q34 C415 & C416. and It still does it irrespective of load at > 1/4 volume.

What are the DC offset voltages at the outputs.
With NO signal (aux?) run UP the volume watching what the DC offset does.

IF so, pull Q36 and see if it still does it. If it stops Replace Q36.

C418 keeps spikes out of DC detect pin 4, replace it.

should solve it...
 
Those voltages look good...

I infer you replaced Q33 & Q34 C415 & C416. and It still does it irrespective of load at > 1/4 volume. Yes

What are the DC offset voltages at the outputs. Around 0 +/-2mV
With NO signal (aux?) run UP the volume watching what the DC offset does. Nothing. No movement at all.

IF so, pull Q36 and see if it still does it. If it stops Replace Q36. MAJOR PROBLEM. I pulled Q36 and that fixed it in that it no longer would trip when volume was turned up. I replaced Q36 which is a 2SC1914 with a KSC2383YTA. When I turned it on, the relay never engaged. I pulled the new Q36 and tested it on a cheap transistor tester and it was reading as a diode. I put a new transistor in and it still doesn’t work. I removed Q36 and it still will not engage. That transistor damaged something else and now it won’t engage at all.

I double checked and I did put the new transistor in with the correct orientation.

OK - back to square one…… when I turn unit on, relay will not engage.

C418 keeps spikes out of DC detect pin 4, replace it.

should solve it..
 
Q36 was a 2sc1914a

ksc2383 is lower gain but is a 160v transistor which was ok., ksc1845 would have been better, we need higher gain and lower leakage.

If the ksc2383 was put in wrong, ( or a bad transistor was installed ) the PA3004 chip could have been damaged.
The emitter of Q36 is connected to -44v and the collector is moderated by an 8,200 ohm resistor before connecting to PA3004 pin 4, with 11k to ground and 47uF capacitance.
The left and right channels are moderated by 75,000 ohms each.
 
Q36 was a 2sc1914a

ksc2383 is lower gain but is a 160v transistor which was ok., ksc1845 would have been better, we need higher gain and lower leakage.

If the ksc2383 was put in wrong, ( or a bad transistor was installed ) the PA3004 chip could have been damaged.
The emitter of Q36 is connected to -44v and the collector is moderated by an 8,200 ohm resistor before connecting to PA3004 pin 4, with 11k to ground and 47uF capacitance.
The left and right channels are moderated by 75,000 ohms each.
I choose the ksc2383 by scanning other threads here for suitable replacements and that seemed to be the recommendation. I’m in the process of building a BOM for the sx-880 so I will accelerate that process so that I have valid substitutions going forward.

regarding Q36, the ksc2383 is an ECB configuration replacing the 2sc1914 which is a BCE configuration so the orientation s/b flipped. Also, there is an ‘E’ at the pin closest to the power transistor side. Therefore, I installed the Q26 with the flat side down (opposite the original q26) when unit is on its transformer side. If I put it in wrong, I don’t know how because I would do it the same way again.

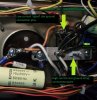
Q35 is giving me a reading of 43.5 volts on pin 3 when it previously was 0.75volts but I dont know if this is stray voltage or not since the relay won’t engage. Pin 4 is still showing zero volts. Is PA3004 chip readily available or do I have to scavenge from a donor unit?

please also note that Q3 and Q4 (TA7136PI) are both showing -18.8 volts on pin 5 while the schematics indicate it should be -0.4. I noticed this before the replacement of Q36 but didn’t mention it here because it is not part of the power/protection circuit.
 
If Q35 has +43.5vdc you have a problem with Q37 (relay driver) and maybe Q35 blown. I suspect Q37 is shorted BC. Try replacing Q37 with 512-KSC2690AYSTU.

EDIT: The PA3004 may still be available on the 'bay, but prices have risen dramatically. There is a DIY option available also: PA3004 chip PCB substitute | Audiokarma Home Audio Stereo Discussion Forums
Merlynski - thank you for the thread for the schematics for the Q35 replacement. Forgive my ignorance, but when I look at the schematic, I see all the various component legs going to ground but I don’t see a pin connection for ground. Where does ground go? Do they all simply connect together and therefore create a common ground?
 
Merlynski - thank you for the thread for the schematics for the Q35 replacement. Forgive my ignorance, but when I look at the schematic, I see all the various component legs going to ground but I don’t see a pin connection for ground. Where does ground go? Do they all simply connect together and therefore create a common ground?

Pa3004 pin 5 IS the ground for the chip.

Disconnect Q37 2sc1885, then check pin 3 again. Test Q37 with 6 way diode test once out of circuit.
 
Ground connection for Q35 (PA3004) is pin 5. Pioneer schematics are not consistent with marking the ground connections with the bolded line everywhere. If that is what your question relates to. It messes with me every so often also . . .
There is perhaps another explanation for your question, a more in depth answer to "Where does ground go." "Ground" is a monolithic concept that many people think is just 'magically' 0 volts and 0Ω. It is commonly represented this way on schematics, by showing a connection to a chassis ground symbol. Reality is much more complicated. Ohm's Law functions everywhere, whenever current flows there is a voltage drop. Sometimes it is so small it is unnoticeable, but when currents flow through common conductors they add and subtract and interact. There are high current return paths for high current circuits. The power supply has a common point that the power supply (ground) returns and Speaker output currents return to. There is another small signal 'ground' to consider, that path usually starts at the input jacks and follows the small signal along (in a daisy chain) through the boards that carry, shape and amplify the small (sometimes called 'line level') signals. Schematics almost never show those as separate wires. Design engineers have to consider the interaction of 'ground currents' when they design a chassis. There is a place on the chassis called a Star Ground. All the small signal 'ground' wires come together at a physical point as part of the Star ground. The high current ground return wires from the transformer, power supplies and speakers come together at a different point, as part of the Star ground. There is a low resistance connection between these two points that completes the Star ground. That is usually where the electrical connection to the chassis is physically made. The key concept here is that the high currents and small signal currents do not physically travel on the same wires, so they do not interact. This reduces noise and distortion.
Here is a picture of the Star ground on my SX-1050, the strap is between the main filter caps:
upload_2021-8-21_19-18-59.jpeg

Hope that was what you meant by your question, and I did not confuse you with too much information. I do ramble on sometimes :rolleyes:.
EDIT: I see you modified your question while I was composing an answer :cool:.
 
Last edited:
Ground connection for Q35 (PA3004) is pin 5. Pioneer schematics are not consistent with marking the ground connections with the bolded line everywhere. If that is what your question relates to. It messes with me every so often also . . .
There is perhaps another explanation for your question, a more in depth answer to "Where does ground go." "Ground" is a monolithic concept that many people think is just 'magically' 0 volts and 0Ω. It is commonly represented this way on schematics, by showing a connection to a chassis ground symbol. Reality is much more complicated. Ohm's Law functions everywhere, whenever current flows there is a voltage drop. Sometimes it is so small it is unnoticeable, but when currents flow through common conductors they add and subtract and interact. There are high current return paths for high current circuits. The power supply has a common point that the power supply (ground) returns and Speaker output currents return to. There is another small signal 'ground' to consider, that path usually starts at the input jacks and follows the small signal along (in a daisy chain) through the boards that carry, shape and amplify the small (sometimes called 'line level') signals. Schematics almost never show those as separate wires. Design engineers have to consider the interaction of 'ground currents' when they design a chassis. There is a place on the chassis called a Star Ground. All the small signal 'ground' wires come together at a physical point as part of the Star ground. The high current ground return wires from the transformer, power supplies and speakers come together at a different point, as part of the Star ground. There is a low resistance connection between these two points that completes the Star ground. That is usually where the electrical connection to the chassis is physically made. The key concept here is that the high currents and small signal currents do not physically travel on the same wires, so they do not interact. This reduces noise and distortion.
Here is a picture of the Star ground on my SX-1050, the strap is between the main filter caps:
View attachment 2321928

Hope that was what you meant by your question, and I did not confuse you with too much information. I do ramble on sometimes :rolleyes:.
EDIT: I see you modified your question while I was composing an answer :cool:.
Thank you, I appreciate the rambles as I always learn something
 
Yes I drilled it out with a pin vise and a 1mm drill bit. Leave it out for a moment to test Q35.
With Q37 out and power on, if the unit is 'in protection' pin 3 will be very low voltage, +0.2vdc or so, if it is out of protection pin 3 will pull up towards +13vdc.
 
The voltages on the other pins of Q35 will tell whether it is in or out of protection.


EDIT: Put your meter on dcv and hold it on pin 3 as you turn on the power. If the rest of the circuit is OK, pin 3 will be low voltage untill about 3 to 5 seconds after power is applied, then will go positive.
 
The voltages on the other pins of Q35 will tell whether it is in or out of protection.


EDIT: Put your meter on dcv and hold it on pin 3 as you turn on the power. If the rest of the circuit is OK, pin 3 will be low voltage untill about 3 to 5 seconds after power is applied, then will go positive.
Pin 3 is only reading 5mV. Right now Q36 and Q37 are removed
 
Back
Top Bottom