• The move to the new server is done. There are some software and database maintenance updates in process. This has us passing the hat around to help out. We appreciate any donations. Seriously, even a dollar helps. The payment page may be found here - https://www.audiokarma.org/support.html

Teac AS-200S find and restoration

quadmatrix82

AK Subscriber
Subscriber
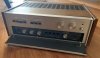
Hi all, I thought I’d start this thread to share with you a pretty rare amp I just got a Teac AS-200S.
Hoping this can be a source of info for any other owners but also share what the amplifier is about.

Teac made some really nice gear in its hey day - I’m a big fan of the AS-100 integrated amp.

I’ve been talking to fellow member @Numome who also owns one of these amps from new. He tells me these were made only for around 3 months so a lot less common than the already relatively scarce AS-200.

I’ll start to refurb this and share photos along the way.

Any other Teac AS-200S owners out there? Would be great to hear from you and your experiences with this amp!
 

Attachments
  • 1C748A34-8AC5-4C37-9C85-4FF4ADC9CCD2.jpeg
    1C748A34-8AC5-4C37-9C85-4FF4ADC9CCD2.jpeg
    76.9 KB · Views: 78
Last edited:
Register to hide this ad
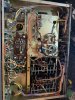
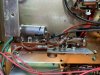
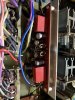
Few photos of the internals the switch gear feels very nice as good as any Pioneer or Sansui of the period.
The wiring is very neat Plenty of cable ties keep it clean - clearly Teac put care into the layout and design
 

Attachments

  • F90EDD82-5082-4283-96C0-67D4401EB1A7.jpeg
    F90EDD82-5082-4283-96C0-67D4401EB1A7.jpeg
    141.2 KB · Views: 93
  • B168F51C-3CEA-4CE2-AE39-73504E40D665.jpeg
    B168F51C-3CEA-4CE2-AE39-73504E40D665.jpeg
    95.2 KB · Views: 80
  • 914392D0-705D-4F89-BEA4-3A5EBB4E697D.jpeg
    914392D0-705D-4F89-BEA4-3A5EBB4E697D.jpeg
    180.4 KB · Views: 89
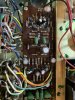
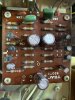
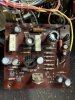
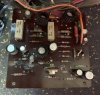
Control amp board after a recap - I used Elna Simmic caps here
 

Attachments

  • B9282212-0AF9-434F-B47C-202B582E7BF8.jpeg
    B9282212-0AF9-434F-B47C-202B582E7BF8.jpeg
    149 KB · Views: 57
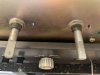
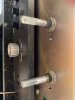
The amp looks totally original inside and out and never serviced before - dust and grim often builds up on the pot shafts I normally clean them with isopropyl alcohol it improves the feel of the pot and I’ll deoxit them for static free operation
 

Attachments

  • D23D1473-7886-4B82-8AA9-DEBE6579076A.jpeg
    D23D1473-7886-4B82-8AA9-DEBE6579076A.jpeg
    66.6 KB · Views: 37
  • F1E5A0EC-0EC3-4240-9D1E-CD8CF867CB6D.jpeg
    F1E5A0EC-0EC3-4240-9D1E-CD8CF867CB6D.jpeg
    70.7 KB · Views: 37
Some more progress believe this is part of the power supply. Used nice Vishay axial capacitor here
 

Attachments

  • C41FA7BB-4945-4D27-893F-06E597BACEC0.jpeg
    C41FA7BB-4945-4D27-893F-06E597BACEC0.jpeg
    120.2 KB · Views: 50
  • E919E79E-7CD2-4BCF-BF27-1B89CA93F9B0.jpeg
    E919E79E-7CD2-4BCF-BF27-1B89CA93F9B0.jpeg
    116.4 KB · Views: 53
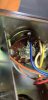
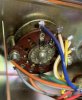
Noticed the contacts on the switches got some carbon build up not easy to clean but tried gently to remove as much as I could - not sure how much it makes a difference but looks betters - before and after I did this for all the rotary switches
 

Attachments

  • F4B33797-6008-4C36-BBBA-134BFF97C359.jpeg
    F4B33797-6008-4C36-BBBA-134BFF97C359.jpeg
    63.2 KB · Views: 48
  • EE770A41-70DA-43C1-A14B-A967125E4C5F.jpeg
    EE770A41-70DA-43C1-A14B-A967125E4C5F.jpeg
    110.9 KB · Views: 47
Phono board before and after - any thoughts on the towa caps? Should they be changed?
 

Attachments

  • 72D56088-4F07-46EB-937E-730D8C891DC1.jpeg
    72D56088-4F07-46EB-937E-730D8C891DC1.jpeg
    130 KB · Views: 43
  • 1710A6DF-D92B-4656-9B3E-405B360B4649.jpeg
    1710A6DF-D92B-4656-9B3E-405B360B4649.jpeg
    120.2 KB · Views: 43
  • B9FAB372-00BC-44E1-AFDA-E4841C633EE0.jpeg
    B9FAB372-00BC-44E1-AFDA-E4841C633EE0.jpeg
    129.7 KB · Views: 42
Just curious what kind of capacitors you are selecting for the various duties called for in the circuits. Are you using UKL type caps in the signal path, films for small UF coupling duty, general purpose for power supply, filtering etc? Everybody has their own way of doing things, just wondering how you’re going about it.
 
Nice work quadmatrix82, looks great. That is a very nice TEAC and well built by the looks of it. I don't remember seeing those Towa caps before on any gear l have worked on, l assume they are input or output signal coupling caps. If in doubt, a Wima MKS2 or Kemet R82 would do nicely.
 
Any idea as to the date of manufacture?
I see a relay, what circuit topography is this? ie what are the outputs part number.
Teac was particular about small signal gain, you can see the Y grade printed on top of transistor case.
Nice unit don't see at all.
 
Just curious what kind of capacitors you are selecting for the various duties called for in the circuits. Are you using UKL type caps in the signal path, films for small UF coupling duty, general purpose for power supply, filtering etc? Everybody has their own way of doing things, just wondering how you’re going about it.

i used mostly Elna Simmic caps, Teac used the same type of electrolytic cap throughout so without a service manual to check any type of preferred caps I thought Elna Simmic would suffice - plus I had heaps on hand so nice to use up the stock I had on hand. In the power supply I used the Vishay high temp capacitor
 
Nice work quadmatrix82, looks great. That is a very nice TEAC and well built by the looks of it. I don't remember seeing those Towa caps before on any gear l have worked on, l assume they are input or output signal coupling caps. If in doubt, a Wima MKS2 or Kemet R82 would do nicely.

cheers thanks for the tip I have left them in for now but might change them for films once all done and working ok!
 
Any idea as to the date of manufacture?
I see a relay, what circuit topography is this? ie what are the outputs part number.
Teac was particular about small signal gain, you can see the Y grade printed on top of transistor case.
Nice unit don't see at all.

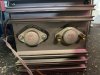
this was made in 1970, the S model was only released for 3 months so a very rare unit - this does have a relay and is a dc integrated amplifier. Here’s a photo of the outputs.
totally agree that Teac were fussy on transistors I have kept them all original for now to protect the integrity of the amp how Teac would like it!
 

Attachments

  • 2F4303AD-E36B-4C0D-B424-94F3A526D59B.jpeg
    2F4303AD-E36B-4C0D-B424-94F3A526D59B.jpeg
    118.3 KB · Views: 46
  • A0D0E54E-1CAC-4838-84CE-AD4CE07ABB6F.jpeg
    A0D0E54E-1CAC-4838-84CE-AD4CE07ABB6F.jpeg
    98.7 KB · Views: 45
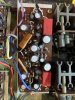
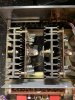
Next was onto the output power amplifier modules. Here is a before and after of them. The heat sinks are really solid. The amp really oozes quality! These are difficult to access without removing the mounting brackets to the chassis - this allows you to feed the board below the cavity for ease of access.
 

Attachments

  • F8E42670-5FB2-49D8-82AF-ABA2D1BEBE5D.jpeg
    F8E42670-5FB2-49D8-82AF-ABA2D1BEBE5D.jpeg
    130.3 KB · Views: 39
  • 5FF421CB-041E-4EAD-B596-5D3C6D3BBD82.jpeg
    5FF421CB-041E-4EAD-B596-5D3C6D3BBD82.jpeg
    128.4 KB · Views: 41
  • 643A53EF-3CCB-4923-9FD1-EE4600B3C00C.jpeg
    643A53EF-3CCB-4923-9FD1-EE4600B3C00C.jpeg
    132.9 KB · Views: 41
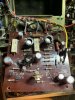
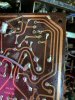
So onto the next power module, I said earlier this was totally original but open inspection it looks like someone attempted some poor soldering on two transistors on this power module - the transistors are still the original ones - they test well when I measured them with the multi meter however unfortunately the tracks have lifted in some spots from the previous repair. I used solder braid gently to remove the old solder and bent the legs down to the track to give better strength to the track before resoldering them. Also recapped and cleaned the board looks much better now
 

Attachments

  • 0F8097BE-2F57-40F7-B899-C48C1E12F14A.jpeg
    0F8097BE-2F57-40F7-B899-C48C1E12F14A.jpeg
    128.7 KB · Views: 38
  • 01427A1F-A91A-40FE-9524-A982A43B4B2A.jpeg
    01427A1F-A91A-40FE-9524-A982A43B4B2A.jpeg
    106.6 KB · Views: 36
  • 8E8EFD96-472B-4269-A36E-EE5D369A8BDF.jpeg
    8E8EFD96-472B-4269-A36E-EE5D369A8BDF.jpeg
    106.6 KB · Views: 33
  • 889BC12D-26F6-41EE-B352-EBE43C7185E5.jpeg
    889BC12D-26F6-41EE-B352-EBE43C7185E5.jpeg
    125.4 KB · Views: 35
  • A3E01F52-ABC7-487F-9A5E-E798E0CAD29A.jpeg
    A3E01F52-ABC7-487F-9A5E-E798E0CAD29A.jpeg
    194.7 KB · Views: 35
Here’s all the old electrolytics - most of them were leaking so glad I changed them - I have kept the original power filter capacitors in place for now but may change them later.
 

Attachments

  • 22344C7E-668F-4076-9F44-D803B674A8F9.jpeg
    22344C7E-668F-4076-9F44-D803B674A8F9.jpeg
    125.6 KB · Views: 43
Back
Top Bottom