

You are using an out of date browser. It may not display this or other websites correctly.
You should upgrade or use an alternative browser.
You should upgrade or use an alternative browser.
Technics Dustcover Fix
- Thread starter boreas
- Start date


boreas
"If it sounds good, it IS good." E.K.E.
Nice job of work and a great solution to something otherwise destined for the ash can. How did you cut the plastic? What tool did you use? I always have problems cutting that thin plexi without cracking it. I know the drilling part takes a deft touch and patience!
I used a Vaughan "Bear Saw". It's basically a Japanese saw with a very thin flexible blade but the set of the teeth is so good that it cuts straight as an arrow.
John
boreas
"If it sounds good, it IS good." E.K.E.
The dust covers on Technics tables aren't plexiglass.
It's a pretty sure bet they are just good ol' polystyrene.
Doug
Yup! And, as such, easier to crack.
John

Switchblade
Super Member
I have a jewelers saw and a power hobby jigsaw with ultrafine tooth blades. Also, a Dremel tool. What do you think? In the meantime, I'll look up the Bearsaw. I never heard of one of those. :scratch2:
Switchblade
Super Member
:headscrat There are a LOT of Bear Saw sizes!
If it worked on your Technics it should work on my Kenwood and Garrard.
If it worked on your Technics it should work on my Kenwood and Garrard.
boreas
"If it sounds good, it IS good." E.K.E.
:headscrat There are a LOT of Bear Saw sizes!
If it worked on your Technics it should work on my Kenwood and Garrard.
The size I used is this one, the "Mini". I'm sure it would work on the Kenwood or Garrard.
John
boreas
"If it sounds good, it IS good." E.K.E.
I have a jewelers saw and a power hobby jigsaw with ultrafine tooth blades. Also, a Dremel tool. What do you think?
For this job I'd use it in preference to any sort of power tool. The Bear Saw did a first class job.
In the meantime, I'll look up the Bearsaw. I never heard of one of those. :scratch2:
I love that thing. I use it all the time for all sorts of close or delicate work where straight cuts are required.
John
Last edited:
Switchblade
Super Member
Amazing! I thought I was on to ALL the little hobby cutting goodies but this is new to me. Ordering one today! Thanks for the tip! :thmbsp:

eb2jim
Super Member
I love this repair. I am going to take a whack at it in the near future.
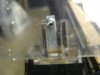
This is a cheapo repair I have done a couple of times, and it seems to work. It certainly doesn't look as nice, but I have picked up a few Technics and MCS machines in the past where there was previous attempts to fix/glue it, and a crack or two, so they didn't look that great to begin with. I buy a pack of 10 lb. picture hangers, and a #2 wood screw - either 1/4" or 1/2" long. You drill a small hole between the ridges on the broken hinge tab, screw the wood screw so it bites into the nail guide of the hanger, bend the tab out, and sit in the hinge slot. This has worked pretty well. The lid closes and shuts, and stays where it should. It is worth a shot if you have an otherwise decent deck.
This went to the kid next door, and it helps if the "lid" works.
This is a cheapo repair I have done a couple of times, and it seems to work. It certainly doesn't look as nice, but I have picked up a few Technics and MCS machines in the past where there was previous attempts to fix/glue it, and a crack or two, so they didn't look that great to begin with. I buy a pack of 10 lb. picture hangers, and a #2 wood screw - either 1/4" or 1/2" long. You drill a small hole between the ridges on the broken hinge tab, screw the wood screw so it bites into the nail guide of the hanger, bend the tab out, and sit in the hinge slot. This has worked pretty well. The lid closes and shuts, and stays where it should. It is worth a shot if you have an otherwise decent deck.
This went to the kid next door, and it helps if the "lid" works.
Attachments


sparky1116
Active Member
That's about the most elegant solution to this issue I've seen, Boreas.
One question.... The angle aluminum.... is that readily available at Home Depot et al? (Stupid question perhaps.....)
Bookmark'd.
One question.... The angle aluminum.... is that readily available at Home Depot et al? (Stupid question perhaps.....)
Bookmark'd.
boreas
"If it sounds good, it IS good." E.K.E.
That's about the most elegant solution to this issue I've seen, Boreas.
One question.... The angle aluminum.... is that readily available at Home Depot et al? (Stupid question perhaps.....)
Bookmark'd.
Thank you, sir! Yes, everything is available at places like Home Depot. If you're lucky you may find somewhere that sells fairly short lengths. I bought 6 feet (not from Home Depot) for around $15.00 in order to use 5 inches. I think later I saw that Home Depot sells it in 3 foot lengths for around $8.00 or $9.00. Maybe in Canada you can find it by the foot.
John

stratcat944
New Member
You Sir (Boreas), are a genius. I am attempting to apply your fix to my SL-D202 dust cover today. I snapped one of the tabs off yesterday. My first reaction was to run off for a tube of super glue. That was five bucks straight down the drain. :thumbsdn:
I found everything at Home Depot except the Bear Saw so I opted for the Stanley Fat Max extra fine instead.
My challenge is the crack in the cover right where I need to drill for the one of bolts. I guess I'll just have to be super careful.
What did you use to cut the aluminum angle? I'm going to try a hack saw and sand up the rough edges. I bought a 48" length of aluminum so I should be okay if I need a couple practice runs.
I will work on the cover first. :yes:
Thanks for the great idea Boreas! I'll let you know if I'm as successful as you were.
I found everything at Home Depot except the Bear Saw so I opted for the Stanley Fat Max extra fine instead.
My challenge is the crack in the cover right where I need to drill for the one of bolts. I guess I'll just have to be super careful.
What did you use to cut the aluminum angle? I'm going to try a hack saw and sand up the rough edges. I bought a 48" length of aluminum so I should be okay if I need a couple practice runs.
I will work on the cover first. :yes:
Thanks for the great idea Boreas! I'll let you know if I'm as successful as you were.
Did this repair -- another option for saw & tweak
As many of you have already stated, boreas' fix is elegant, and effective. I had a Technics dustcover with one broken tongue, so I got things set to follow his lead and fix it.
I tried to find a Vaughan "Bear Saw" locally, and had no luck. In my area Lowe's carried a larger sized one with coarser teeth. I enquired about their ordering a 'Mini' and although they said they could, it wasn't in their 'system' so that turned out to not be an option. I realized I could order one from Amazon, but I wanted to see if I might have another tool that would work.
I looked around my shop to see what I had that may work. I found a very badly damaged dust cover that had no turntable to mate it to, and decided to use that for my 'guinea pig.'
For a tool, what I found for a saw was this Bosch Pocket Saw.
 .
.
Its basic design and function is as a 'holder' for jig saw blades. One can change the position of the blade, so you can have a more traditional saw with the handle perpendicular to the blade.
I grabbed several of my Bosch jig saw blades, and tested them out on my guinea pig dustcover. I found, as I expected, that fine toothed metal blades (118A -- 17-24 teeth/inch or 118G -- 36 teeth/inch) worked great.
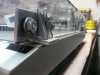
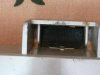
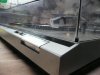
That settled, I set to work to cut off the broken tongues. I slightly modified boreas' method (if I understood what he did correctly) and cut off all of the horizontal material that made up the tongue (i.e., I left the buttresses, but not the 'base' they rest upon as boreas did (see pics below).
After carefully cutting off the tongues and their base, I made my replacement pieces so that the remaining buttresses rested on the metal of the new tongue. I followed the rest of boreas's procedure, but made one more modification.
Because the dustcover's rear is now slightly higher than the original (the aluminum material used as the replacement tongue is slightly thicker than the original), one needs to, as boreas pointed out, slightly raise the hinges out of their sockets so that the cover will fully close at the front.
What I did was cut two pieces (one for each) of scrap rubber I had to fit in the bottom of the hinge receptacle on the back of the TT. This raised the dustcover as needed, and I felt was a good way to ensure that the dustcover didn't get pushed down too far in the hinges at some point in time.
In the future, I am going to see if by cutting a notch in the dustcover that is equivalent to the thickness of the replacement tongue, one may avoid the problem of a dust cover needing to be raised to close properly.
Hats off and thanks to boreas for supplying us the inspiration to do this repair. I hope my post will help us realize that you may already have what you need in your toolbox or shop to do these types of repairs.
Oh, one last thing -- I used one of my metal jigsaw blades to cut the aluminum. Came out very nice. A little buffing from a wire wheel made the replacement tongues look factory fresh.
As many of you have already stated, boreas' fix is elegant, and effective. I had a Technics dustcover with one broken tongue, so I got things set to follow his lead and fix it.
I tried to find a Vaughan "Bear Saw" locally, and had no luck. In my area Lowe's carried a larger sized one with coarser teeth. I enquired about their ordering a 'Mini' and although they said they could, it wasn't in their 'system' so that turned out to not be an option. I realized I could order one from Amazon, but I wanted to see if I might have another tool that would work.
I looked around my shop to see what I had that may work. I found a very badly damaged dust cover that had no turntable to mate it to, and decided to use that for my 'guinea pig.'
For a tool, what I found for a saw was this Bosch Pocket Saw.
Its basic design and function is as a 'holder' for jig saw blades. One can change the position of the blade, so you can have a more traditional saw with the handle perpendicular to the blade.
I grabbed several of my Bosch jig saw blades, and tested them out on my guinea pig dustcover. I found, as I expected, that fine toothed metal blades (118A -- 17-24 teeth/inch or 118G -- 36 teeth/inch) worked great.
That settled, I set to work to cut off the broken tongues. I slightly modified boreas' method (if I understood what he did correctly) and cut off all of the horizontal material that made up the tongue (i.e., I left the buttresses, but not the 'base' they rest upon as boreas did (see pics below).
After carefully cutting off the tongues and their base, I made my replacement pieces so that the remaining buttresses rested on the metal of the new tongue. I followed the rest of boreas's procedure, but made one more modification.
Because the dustcover's rear is now slightly higher than the original (the aluminum material used as the replacement tongue is slightly thicker than the original), one needs to, as boreas pointed out, slightly raise the hinges out of their sockets so that the cover will fully close at the front.
What I did was cut two pieces (one for each) of scrap rubber I had to fit in the bottom of the hinge receptacle on the back of the TT. This raised the dustcover as needed, and I felt was a good way to ensure that the dustcover didn't get pushed down too far in the hinges at some point in time.
In the future, I am going to see if by cutting a notch in the dustcover that is equivalent to the thickness of the replacement tongue, one may avoid the problem of a dust cover needing to be raised to close properly.
Hats off and thanks to boreas for supplying us the inspiration to do this repair. I hope my post will help us realize that you may already have what you need in your toolbox or shop to do these types of repairs.
Oh, one last thing -- I used one of my metal jigsaw blades to cut the aluminum. Came out very nice. A little buffing from a wire wheel made the replacement tongues look factory fresh.
Attachments


Last edited:
boreas
"If it sounds good, it IS good." E.K.E.
You Sir (Boreas), are a genius. I am attempting to apply your fix to my SL-D202 dust cover today. I snapped one of the tabs off yesterday. My first reaction was to run off for a tube of super glue. That was five bucks straight down the drain. :thumbsdn:
Yeah, Super Glue has very little shear strength and very highm tensile strength. That's why you can glue your hard hat to a beam and hang yourself from it and at the same tile use it like Locktite and still remove the bolt if you need to.
I found everything at Home Depot except the Bear Saw so I opted for the Stanley Fat Max extra fine instead.
The 20-500? That should be fine. Basically any Japanese razor saw type thing will be appropriate.
My challenge is the crack in the cover right where I need to drill for the one of bolts. I guess I'll just have to be super careful.
If the Super Glue you bought is the thin sort you might lay a bead of it right along the crack before you drill the hole. The thin stuff will wick into the crack and glue it shut. Thicker stuff won't.
What did you use to cut the aluminum angle? I'm going to try a hack saw and sand up the rough edges. I bought a 48" length of aluminum so I should be okay if I need a couple practice runs.
I used both a saber saw and a hack saw and dressed the cuts with a file. Having a vise helps a lot.
Sucks having to buy all that extra material, doesn't it?

I will work on the cover first. :yes:
Thanks for the great idea Boreas! I'll let you know if I'm as successful as you were.
Let us know how it works. Pictures!
One last thing. I think I mentioned that the slight extra thickness of the new aluminum tongues made it necessary to pull the hinges up in their sockets at the back of the turntable. Unless you do that the cover won't close completely.
I discovered that over time the hinges would sink back down to the bottom of the sockets and I would have to raise them back up again. After a few times I got tired of doing that so I stripped the insulation from a piece of 16 ga. wire and then shoved the insulation down into the bottom of the sockets and into that little grove where the hinges lock in. That solved the problem permanently.
John
boreas
"If it sounds good, it IS good." E.K.E.
As many of you have already stated, boreas' fix is elegant, and effective. I had a Technics dustcover with one broken tongue, so I got things set to follow his lead and fix it.
I tried to find a Vaughan "Bear Saw" locally, and had no luck. In my area Lowe's carried a larger sized one with coarser teeth. I enquired about their ordering a 'Mini' and although they said they could, it wasn't in their 'system' so that turned out to not be an option. I realized I could order one from Amazon, but I wanted to see if I might have another tool that would work.
I looked around my shop to see what I had that may work. I found a very badly damaged dust cover that had no turntable to mate it to, and decided to use that for my 'guinea pig.'
For a tool, what I found for a saw was this Bosch Pocket Saw.
Its basic design and function is as a 'holder' for jig saw blades. One can change the position of the blade, so you can have a more traditional saw with the handle perpendicular to the blade.
I grabbed several of my Bosch jig saw blades, and tested them out on my guinea pig dustcover. I found, as I expected, that fine toothed metal blades (118A -- 17-24 teeth/inch or 118G -- 36 teeth/inch) worked great.
That settled, I set to work to cut off the broken tongues. I slightly modified boreas' method (if I understood what he did correctly) and cut off all of the horizontal material that made up the tongue (i.e., I left the buttresses, but not the 'base' they rest upon as boreas did (see pics below).
After carefully cutting off the tongues and their base, I made my replacement pieces so that the remaining buttresses rested on the metal of the new tongue. I followed the rest of boreas's procedure, but made one more modification.
Because the dustcover's rear is now slightly higher than the original (the aluminum material used as the replacement tongue is slightly thicker than the original), one needs to, as boreas pointed out, slightly raise the hinges out of their sockets so that the cover will full close at the front.
What I did was cut two pieces (one for each) of scrap rubber I had to fit in the bottom of the hinge receptacle on the back of the TT. This raised the dustcover as needed, and I felt was a good way to ensure that the dustcover didn't get pushed down too far in the hinges at some point in time.
The 1/8" tongues fit the hinges very well but they're slightly thicker than the originals. That means that the hinges have to be raised up out of the sockets they fit into very slightly in order for the cover to fully close. A small matter and a fair trade-off for repairing an otherwise usable dustcover.
In the future, I am going to see if by cutting a notch in the dustcover that is equivalent to the thickness of the replacement tongue, one may avoid the problem of a dust cover needing to be raised to close properly.
Hats off and thanks to boreas for supplying us the inspiration to do this repair. I hope my post will help us realize that you may already have what you need in your toolbox or shop to do these types of repairs.
Oh, one last thing -- I used one of my metal jigsaw blades to cut the aluminum. Came out very nice. I little buffing from a wire wheel made the replacement tongues look factory fresh.
Nice job! :thmbsp::thmbsp::thmbsp:
My cut on the dustcover was horizontal and flush with the bottom edge of the dustcover so it left all of the buttresses and the little shoulder which acts as a stop when inserting the tongue into the hinge but none of the tongue.
After doing this repair on the SL-D3 I noticed that there is a difference between my dustcover and some of the lower profile ones on P-mount tables. On those P-mounts the bottom surface of the tongue is flush with the bottom edge of the dustcover as a whole. On mine the top surface is.
That means the bottom of the tongue is lower and fully exposed to the saw blade in the initial cut. With others it's necessary to cut in and around the buttresses, 5 or 6 cuts in all, to leave just the buttresses and shoulder. Is that what you had to do? If so, notching the dustcover would probably be the way to go.
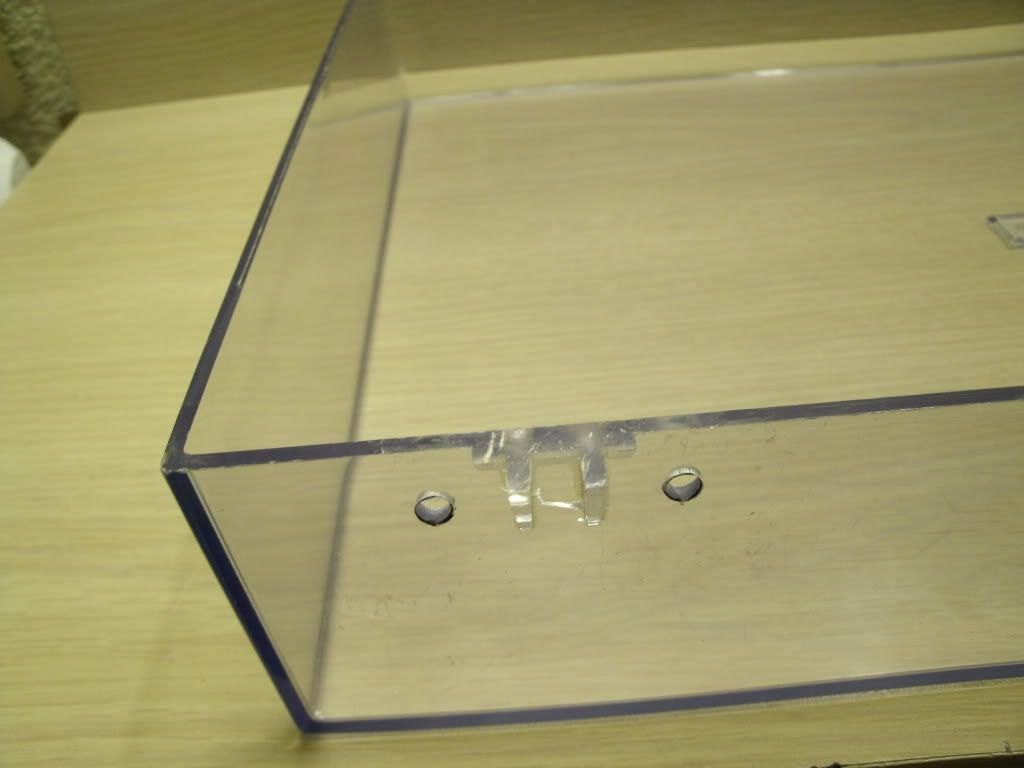
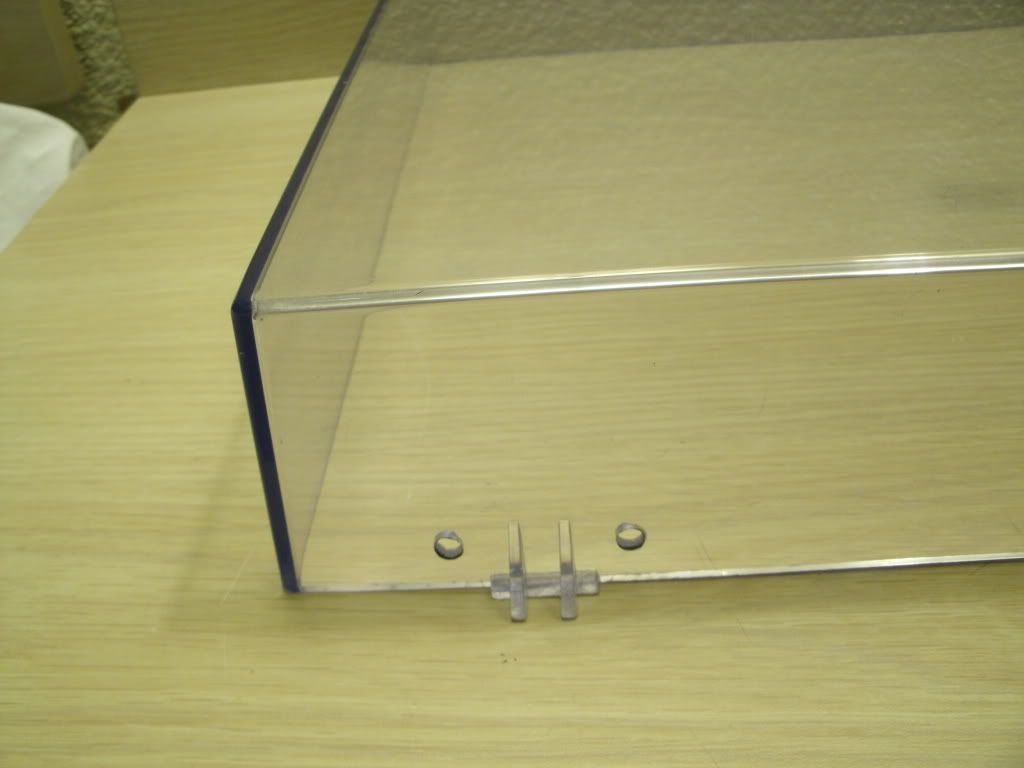
Good catch on figuring out the flaw in my approach and inserting those pieces of rubber. As I wrote in my reply to stratcat944, I ended up doing something similar.
John
Last edited:
Boreas said: "Good catch on figuring out the flaw in my approach and inserting those pieces of rubber"
I wouldn't call it a flaw ... I prefer to think of this as an evolutionary process. We are just refining and improving on your original idea. As I said, than you for the inspiration!
I wouldn't call it a flaw ... I prefer to think of this as an evolutionary process. We are just refining and improving on your original idea. As I said, than you for the inspiration!

princeoftides
Born in Charleston SC
Boreas you ought to make a few hundred of those and sell them on Ebay or sone other favorite place. . There are millions of those tables out there and hundreds of thousands who would pay dearly for something as nice and elegant as that fix is.
Incidentally, I have a Pioneer PL-61 turntable and it's been cared for immaculately but I'm worried about that piece of plastic ruining my antiskating. It works fine now. Would it pay to pull out that plastic pieceand have it machined in aluminum? Maybe after that coat it with Liquid Rubber (pure edpm rubber when it dries) or some other plastic coating material so as not to damage anything else in there?
Incidentally, I have a Pioneer PL-61 turntable and it's been cared for immaculately but I'm worried about that piece of plastic ruining my antiskating. It works fine now. Would it pay to pull out that plastic pieceand have it machined in aluminum? Maybe after that coat it with Liquid Rubber (pure edpm rubber when it dries) or some other plastic coating material so as not to damage anything else in there?
boreas
"If it sounds good, it IS good." E.K.E.
Boreas you ought to make a few hundred of those and sell them on Ebay or sone other favorite place. . There are millions of those tables out there and hundreds of thousands who would pay dearly for something as nice and elegant as that fix is.
Incidentally, I have a Pioneer PL-61 turntable and it's been cared for immaculately but I'm worried about that piece of plastic ruining my antiskating. It works fine now. Would it pay to pull out that plastic pieceand have it machined in aluminum? Maybe after that coat it with Liquid Rubber (pure edpm rubber when it dries) or some other plastic coating material so as not to damage anything else in there?
As I'm guessing Stratcat944 and Reneborg will attest, the tricky part is preparing the dustcover to accept the new parts. If someone is capable of doing that the aluminum pieces are a snap. Anyway, I'm just happy to be able to pass something along to the community here.
Re: the PL-61, I'm not sure what plastic piece you're referring to.
John
stratcat944
New Member
Well it took a few tries to cut the aluminum angle correctly, but I am thrilled to say everything works beautifully after a few hours of careful planning and work. It's not as clean as Boreas' work so I won't post any photos (this time).
I ended up cutting some short lengths of a sturdy plastic coated twist ties to shim up the hinge receptacle. The lid closes completely now. There is a slight gap at the back but there always was.
What a great solution to a really annoying problem. Thanks again Boreas and all who pitched in their 2¢! :thmbsp:
I ended up cutting some short lengths of a sturdy plastic coated twist ties to shim up the hinge receptacle. The lid closes completely now. There is a slight gap at the back but there always was.
What a great solution to a really annoying problem. Thanks again Boreas and all who pitched in their 2¢! :thmbsp:
boreas
"If it sounds good, it IS good." E.K.E.
Well it took a few tries to cut the aluminum angle correctly, but I am thrilled to say everything works beautifully after a few hours of careful planning and work. It's not as clean as Boreas' work so I won't post any photos (this time).
I ended up cutting some short lengths of a sturdy plastic coated twist ties to shim up the hinge receptacle. The lid closes completely now. There is a slight gap at the back but there always was.
What a great solution to a really annoying problem. Thanks again Boreas and all who pitched in their 2¢! :thmbsp:
:yippy:
John