• The move to the new server is done. There are some software and database maintenance updates in process. This has us passing the hat around to help out. We appreciate any donations. Seriously, even a dollar helps. The payment page may be found here - https://www.audiokarma.org/support.html

They're at it again! Re-imagining the Infinity Quantum 3.

Ya we don't need lubrication to screw up in a tremendous manner. Its an inherent component in our "teamwork."
At least in the shop it has been proven that only one of us can be cognizant of what we are doing at a time... today nobody got the brian today. And Ron is oh so right on the caffeine thing :nono:

Oh well now we can theoretically buckle down tomorrow.

--Bobfalk
 
The Quantum 3's are, at this point, more or less done (at least true for the "right" channel- all that's left for the left is a final test assembly). There are some details left to be settled out, but we played around with one and discovered both the good and the bad of our folly.

My concerns over the new cabinets not being as dead as MDF were, unfortunately, grounded in reality. However, it seems that this is the case only in a certain, narrow band, and they are, on balance, as or more inert than the originals over the broader range. Additionally, we're taking steps to alleviate the problem, including an MDF/rubber composite that I'm hoping will not only add mass but also absorb some of the vibration. Further, some additional bracing could be installed, but, because of the re-location of the woofer crossover, it would be a tad difficult. But, we can chalk this experiment up to "lesson learned".

Still, they did turn out better than I had thought, and at least they will be mirror imaged, which was becoming my main problem with them. The cabinets also do not have any rude rattles or mystery air leaks, which is also an improvement.

Bob will be applying a sort of finish to them (clear-coat, I believe), and the left and right front baffle corners will be receiving a 3/4" round-over treatment. Finally, the grille pegs will be installed.

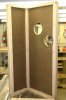
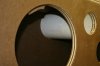
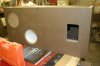
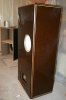
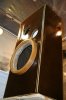
Here are some pics showing some progress. Note that these were not taken yesterday (when we had the one up and running) and there have been a couple of insignificant changes made since the pictures were taken.

attachment.php


attachment.php


attachment.php


attachment.php


attachment.php
 

Attachments

  • IMG_2733_ak.JPG
    IMG_2733_ak.JPG
    131.6 KB · Views: 210
  • IMG_2734_ak.JPG
    IMG_2734_ak.JPG
    137 KB · Views: 211
  • IMG_2742_ak.JPG
    IMG_2742_ak.JPG
    130 KB · Views: 204
  • IMG_2745_ak.JPG
    IMG_2745_ak.JPG
    141.6 KB · Views: 209
  • IMG_2747_ak.JPG
    IMG_2747_ak.JPG
    135.8 KB · Views: 205
Nice work guys! Please provide more details and pics. What do you mean by woofer xover relocation? Wasn't it bottom-center mounted before? Surely some sort of arch brace could be installed? How did you secure the pvc transmission line for the mid-bass coupler? Silicone?
 
Nice work guys! Please provide more details and pics. What do you mean by woofer xover relocation? Wasn't it bottom-center mounted before? Surely some sort of arch brace could be installed? How did you secure the pvc transmission line for the mid-bass coupler? Silicone?

The woofer crossover was on the bottom, but it was moved to the rear baffle, right behind the woofer. The original wood block it sat on was just a bit too big to sit on the bottom with the cleats installed.

I'm also thinking of some sort of slightly arched or bowed brace for the area that's resonating worst, and will run that by Bob when we get started again today. The original idea was that we can add mass and attempt to require the amount of energy needed to make the panel vibrate higher than would be encountered normally (not to mention lower the resonant frequency). Coincidently, the area that's vibrating is where we mounted the woofer crossover. It could be that there is enough mass there, but it's simply storing (and releasing) energy instead of just absorbing it.

The mid-coupler TL is indeed held in with silicone (as was the original).
 
Wouldn't it have been simpler to mount the caps and coils on a smaller board? That's what I had to do when I rebuilt the bases of my QLS's, cleats were in the way.
 
Wouldn't it have been simpler to mount the caps and coils on a smaller board? That's what I had to do when I rebuilt the bases of my QLS's, cleats were in the way.

Simpler...? In the short term, no, because we just recycled the original board- we didn't have to dismount anything. In the long term though, with the bracing I'm now considering, it would have been the way to go, perhaps.

But, I really don't look forward to having to remove that resistor array for the mid-bass coupler, in any event. It's a lot of solder joints, fragile leads, and hot-glue, and has "messy" written all over it.
 
yeah, those Quantum crossovers just BEG to be redone. good job on the cabs. i had something else to say, but i forgot now...:scratch2:
 
Another alternative is to take the crossover external, in a separate box. Less vibration issues, more cabinet volume to added braces, infinite tweakability.
 
yeah, those Quantum crossovers just BEG to be redone. good job on the cabs. i had something else to say, but i forgot now...:scratch2:


Maybe... Someday... But, it must be remembered that these speakers are (theoretically) only temporary- just a fill in to use during the real project. However, as that project has the potential to drag on for some time (I'm thinking a time frame of a year or more), I do need something I can live with for at least that long.

If, on the other hand, the other project proves abortive, as some of my more ambitious undertakings have proven to be, the Quantum 3 may then become a permanent fixture in my setup- at least as permanent as anything else has been. It would be then that I consider a crossover overhaul, if I felt such a thing was needed.
 
Have you thought about using Dynamat or any or it's equivalents inside the cabinets? It's amazing the resonances the stuff cancels out and it wouldn't take up much internal cabinet volume.
 
Have you thought about using Dynamat or any or it's equivalents inside the cabinets? It's amazing the resonances the stuff cancels out and it wouldn't take up much internal cabinet volume.

We have, but for the time being the no more money is to be spent; but knowing Mike's tinkering habit we can expect a dampening product in the next month or two. We are rounding over edges at the moment (3/4 roundover on sides and chamfer on top) makes it look a bit better considering the odds of these things ever getting veneer seems to be waning. They should look respectable enough and will still be veneer-able (yes I'm making that a word now) in the future.

--Bobfalk
 
Nice job, Bob. You also broke 29 posts finally. :D

I love your collective genius working over speaker cabs and drivers.

Hope to see you and Mike at Ron's this Spring.

Cheers.
 
Well they are almost done; we're down to some final sanding and finishing. After Mike called it quits today I managed to sneak some oil based polly on the bottoms. stuff soaks right in; I'm thinking it will help deaden the cabs a bit, which they could certainly use, although I doubt the finish will make a noticeable sonic improvement.

Oil based polly was the most durable coating I can think of for this material. it soaks in as well as any film finish could will be nice and shinny

Mike's gotten impatient for the new cabs--can't say I blame him, but it looks like it will be a battle of wills on how many coats the speakers gets. Unless he steals them from my shop they won't be leaving without two coats and some buffing (three if i can delay him that long), but he may just snatch them while I'm not there.

We'll get some picts posted as soon as Mike brings his camera back over.

--Bobfalk
 
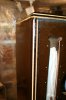
Here are some more pics, for the amusement for those who are following this. They're getting very nearly finished, although not as quickly as I would like.

The pictures shown were taken in Bob's finishing room, and the gloss is just from the wet poly- I don't expect that they will be so glossy once they have dried.
 

Attachments

  • IMG_2754_ak.JPG
    IMG_2754_ak.JPG
    136.4 KB · Views: 80
  • IMG_2752_ak.JPG
    IMG_2752_ak.JPG
    136 KB · Views: 56
  • IMG_2751_ak.JPG
    IMG_2751_ak.JPG
    135 KB · Views: 111
  • IMG_2750_ak.JPG
    IMG_2750_ak.JPG
    133.3 KB · Views: 56
  • IMG_2749_ak.JPG
    IMG_2749_ak.JPG
    128.5 KB · Views: 82
  • IMG_2758_ak.JPG
    IMG_2758_ak.JPG
    133.5 KB · Views: 80
Yeah, those look very nice! Had my doubts based on Bob's description, but that color really accents the edge plys and makes them most attractive. +1 for a report on the sound quality!

Jim
 
A report on the sound will likely not be coming this week yet. Bob seems hell-bent on getting three coats on, which means that I cannot even really consider re-assembling the speakers until Thursday at the soonest. There is still the matter of installing a bit of additional bracing, not to mention getting the drivers and crossover from the other speaker transplanted (they're still in the original cabinet).

Additionally, since one of the speakers is still in the original configuration (more or less), I plan on performing a little bit of an A/B between the new and old- listen for both what was gained and what, potentially, was lost.

But you may indeed look forward to something in that regards in the future. Unless, of course, the project ends in abject failure, in which the less said, the better, as per the usual case.
 
Back
Top Bottom