You are using an out of date browser. It may not display this or other websites correctly.
You should upgrade or use an alternative browser.
You should upgrade or use an alternative browser.
Thorens TD145 MkII Project
- Thread starter Divotdog
- Start date


Divotdog
"I can fix it Grampa"
I'll bet you spend the rest of today balancing, setting VTA, cart alignment, etc. Which is a good thing!
What cart/stylus is going on your baby?
Right you are Meggy! seems like one mod leads to every thing needing readjusted, right now she is wearing an AT 440MLa, it's not a real good match for the TA but it is starting to sound pretty sweet.
Divotdog
"I can fix it Grampa"
Initially, the hum is pretty much gone, it still hums a little but it is inaudible until I turn the volume well past any level that I listen at, the bass seems to be little bit tighter, the highs are more extended and there is more air around the instruments, this is particularly noticeable on cymbals and such. Overall I am impressed with the cables. :thmbsp:
Divotdog
"I can fix it Grampa"
I had to send the table to my electronics guru last week; the hum was going to make me nuts! Although only audible at high volume it was there none the less, he soldered my cable in a little better than I had it, and here is the important part, he re installed the little plastic box over the wiring, this box is metalized on the inside, apparently this offers some shielding, thus reducing hum, the table now has no electrical noise at all.

Attachments


Divotdog
"I can fix it Grampa"
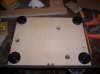
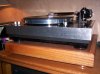
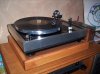
The latest installation, I made a new bottom plate from ¾ Baltic Birch plywood, to replace the original 1/8 inch hardboard, I also cut three 1 inch holes under the springs so that it can now be adjusted without removing the bottom cover,

I was able to scavenge some nice looking black feet off of an old BPC receiver that I had around, I installed this last night and have now listened to around ten LPs, the difference is astounding, if you only do one mod to your TD-16x or TD-14x, this is the mod, I am not sure why it made such a tremendous difference, perhaps someone in the know will chime in here, but the noise floor has lowered significantly, and the overall sound stage has opened up considerably.


I was able to scavenge some nice looking black feet off of an old BPC receiver that I had around, I installed this last night and have now listened to around ten LPs, the difference is astounding, if you only do one mod to your TD-16x or TD-14x, this is the mod, I am not sure why it made such a tremendous difference, perhaps someone in the know will chime in here, but the noise floor has lowered significantly, and the overall sound stage has opened up considerably.
Attachments

gogofast
Addicted Member
I had to send the table to my electronics guru last week; the hum was going to make me nuts! Although only audible at high volume it was there none the less, he soldered my cable in a little better than I had it, and here is the important part, he re installed the little plastic box over the wiring, this box is metalized on the inside, apparently this offers some shielding, thus reducing hum, the table now has no electrical noise at all.
looks like the capacitor is replaced, too. do you think that might've been the problem of hum, too?
i have 125 that needs adjustments and this thread's been encouraging...since i'm so lazy to do anything but just listen to the music.

Hi Mel,
Thank you for responding to my Thorens thread. Wow, you sure have done some nice mods to your Thorens. However, I must admit, I am NOT what one would call a "handy/hands on" type of guy. Therefore, any work done to my 160 will have to be performed by the Pros. Of course this could get COSTLY very fast and as such, I plan to have only THE most basic tuneup/mods performed. I figure things such as new Cartridge, Belt, Tonearm tuning/settings, oil, RCA plugs, and a WALL mount shelf with an Isolation platform would be a good place to start and perhaps give the Turntable the best BANG for the buck performance. I must admit however, I like your suggestion "if you do only ONE mod" new bottom plate replacement.
Mel, do you think these BASIC mods would improve the performance of my
stock Thorens 160? I figure it'll at least get the ol' 160 running close to spec. I just can't spend TOO much money at this time. Thanks Mel.
Regards,
SixCats! aka Tom Patrick
Thank you for responding to my Thorens thread. Wow, you sure have done some nice mods to your Thorens. However, I must admit, I am NOT what one would call a "handy/hands on" type of guy. Therefore, any work done to my 160 will have to be performed by the Pros. Of course this could get COSTLY very fast and as such, I plan to have only THE most basic tuneup/mods performed. I figure things such as new Cartridge, Belt, Tonearm tuning/settings, oil, RCA plugs, and a WALL mount shelf with an Isolation platform would be a good place to start and perhaps give the Turntable the best BANG for the buck performance. I must admit however, I like your suggestion "if you do only ONE mod" new bottom plate replacement.
Mel, do you think these BASIC mods would improve the performance of my
stock Thorens 160? I figure it'll at least get the ol' 160 running close to spec. I just can't spend TOO much money at this time. Thanks Mel.
Regards,
SixCats! aka Tom Patrick
Divotdog
"I can fix it Grampa"
looks like the capacitor is replaced, too. do you think that might've been the problem of hum, too?
i have 125 that needs adjustments and this thread's been encouraging...since i'm so lazy to do anything but just listen to the music.
I am not sure if the cap had anything to do with the hum or not, my Guru is a local member here, perhaps he will chime in. :scratch2:
Divotdog
"I can fix it Grampa"
Hi Mel,
Thank you for responding to my Thorens thread. Wow, you sure have done some nice mods to your Thorens. However, I must admit, I am NOT what one would call a "handy/hands on" type of guy. Therefore, any work done to my 160 will have to be performed by the Pros. Of course this could get COSTLY very fast and as such, I plan to have only THE most basic tuneup/mods performed. I figure things such as new Cartridge, Belt, Tonearm tuning/settings, oil, RCA plugs, and a WALL mount shelf with an Isolation platform would be a good place to start and perhaps give the Turntable the best BANG for the buck performance. I must admit however, I like your suggestion "if you do only ONE mod" new bottom plate replacement.
Mel, do you think these BASIC mods would improve the performance of my
stock Thorens 160? I figure it'll at least get the ol' 160 running close to spec. I just can't spend TOO much money at this time. Thanks Mel.
Regards,
SixCats! aka Tom Patrick
Tom, you might try the suspension tune yourself, removing the bottom plate to get at everything is a pretty simple affair, and it is something that should be done on a regular basis, the bottom plate mod has been simply stunning, I can't imagine why Thorens didn't do it this way to start with, I am sure that any of these basic tune ups or simple mods would get your 160 singing the way that it should, good luck with it! :thmbsp:
Divotdog
"I can fix it Grampa"
Nice work, great thread! I'll be keeping an eye on your mods,I have one of these tables as well.
Thank you, there will be more to come, right now I am just rolling up on 75 hours on the AT 440MLa, I think that I will wait until I have around 100 hours before I go any farther on the table.

daddydlb
Well-Known Member
Wow, I cannot believe the timing of this thread. I bought a TD 145 MkII a week ago. Should be here any day. Divotdog you have inspired me to try and get the best out of my table that "I" can. Thank you for taking the time to document your process and then generously sharing it. One question tho. Does your nickname have to do with your golfing ability?

sabocat
Well-Known Member
The latest installation, I made a new bottom plate from ¾ Baltic Birch plywood, to replace the original 1/8 inch hardboard, I also cut three 1 inch holes under the springs so that it can now be adjusted without removing the bottom cover, I was able to scavenge some nice looking black feet off of an old BPC receiver that I had around, I installed this last night and have now listened to around ten LPs, the difference is astounding, if you only do one mod to your TD-16x or TD-14x, this is the mod, I am not sure why it made such a tremendous difference, perhaps someone in the know will chime in here, but the noise floor has lowered significantly, and the overall sound stage has opened up considerably.
Wow. That looks sweet. So how did you attach the birch to the TT?
Divotdog
"I can fix it Grampa"
Wow. That looks sweet. So how did you attach the birch to the TT?
The original masonite bottom plate is attached to the TT by the small original feet, there is just a screw going through them and the masonite and then into the corner braces of the TT plinth, I attached the new plate with these screws and then attached the new feet directly to the new bottom plate. :thmbsp:
Divotdog
"I can fix it Grampa"
O.K. we are back on this project, I had to stop for awhile due to work obligations, then there were some other upgrades to the system and this just got put on hold for a few months but we are back after it with a vengeance now!
The next mod is going to be a sand filled plinth, I tossed this idea around quite a bit in the last few months, and I spent some time over at the Analog Dept. studying Rolf Kelch’s shot filled designs, he modifies a stock plinth and fills a series of hollows with lead shot, with all due respect to Mr. Kelch I am sure that he has a number of plinths to choose from, I only have one and I did not want to destroy it to try this mod, so I built a new plinth in the stock dimensions from ¾ Baltic Birch plywood, this had an added advantage as I was able to machine this plinth to hold the additional Birch plywood that creates the hollows which should make it stronger and more immune to resonance, another place that I deviated from Mr. Kelch’s design is in using sand rather than lead shot, I am not after mass as much as I want to control any resonant vibrations that are transmitted to the sub chassis, and I feel that sand would be more effective at this.
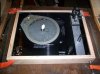
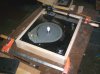
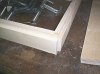
Here is the new plinth cut out and clamped together for a test fit.


The next mod is going to be a sand filled plinth, I tossed this idea around quite a bit in the last few months, and I spent some time over at the Analog Dept. studying Rolf Kelch’s shot filled designs, he modifies a stock plinth and fills a series of hollows with lead shot, with all due respect to Mr. Kelch I am sure that he has a number of plinths to choose from, I only have one and I did not want to destroy it to try this mod, so I built a new plinth in the stock dimensions from ¾ Baltic Birch plywood, this had an added advantage as I was able to machine this plinth to hold the additional Birch plywood that creates the hollows which should make it stronger and more immune to resonance, another place that I deviated from Mr. Kelch’s design is in using sand rather than lead shot, I am not after mass as much as I want to control any resonant vibrations that are transmitted to the sub chassis, and I feel that sand would be more effective at this.
Here is the new plinth cut out and clamped together for a test fit.