

You are using an out of date browser. It may not display this or other websites correctly.
You should upgrade or use an alternative browser.
You should upgrade or use an alternative browser.
Ultrasonic cleaner… review after cleaning 50 records
- Thread starter 34dean
- Start date

I think you can do it either way, actually, since you are just trying to rinse off any contaminants that might be loosely stuck to the surface of the records when they come out of the US cleaner. In my experience, those small bits of detritus are not attached firmly, just kind of clinging to the record as you pull it out of the bath. However, in my case, I also vacuum-dry the records so this will take care of anything that is left. Are you planning a vacuum drying step?
That is a highly important aspect of the vacuum process, @T68! What kind of DIY wand did you make? The one I am using is a bit labor-intensive to make, but in the end I believe it is highly effective and "does no harm" as far as I can tell (over 3,000 records cleaned). I'm going to see if I can attach a picture of mine so you can see what I have going on.
Here is the wand, a simple crevice tool from a vacuum cleaner.

I cut off the end, which was an angle and now straight. I then covered that end with some heavy-duty electrical tape but plain would work also. I see mine is in need of an overhaul!!! After cutting it straight, I used a dremel tool to cut that slit that runs from the top down to the end of the white strips in the middle of the crevice tool, which are just slightly (maybe 1/8 inch) longer than the distance from the edge of the label to the very outside edge of the record, in most cases just right at 4 inches. The slit needs to be not too wide, not too narrow, just enough to create good suction and I've found 1/4 inch about right.
Those strips, we'll call them pads, are fashioned from a painter's edging tool (see below) by cutting them from the refill pads which can be bought cheaply at any Home Depot or Lowes store. I got these at Walmart, in fact. Not sure what you have up there in Sweden, but you must have something like one of these stores, eh? Then, the pads must be trimmed very closely (see the beard trimmer below), removing the bulk of the fibers until only very small nubs are left. Don't worry, they will still create enough space between the strip and the record to safely vacuum away anything that is on the record. If you don't do this, the vacuum will not create enough suction and the liquid will remain on the record while you spin it for a very long time! You will see what I mean if you try without doing this.
Now that you have the two strips cut to the desired length and the fibers trimmed, glue them to the crevice tool so that you get the configuration that you see in the picture. The strips can still be removed using a flat blade and prying up on one end, which is what I will be doing after writing this post because I can see they are in need of it.
I try to keep these as clean as I can, no point if you are just going to apply dirt to the record by vacuuming it due to pads that aren't clean. However, I have learned that these pads can be cleansed in between replacements by running some hot tap water, using an old toothbrush that has been cleaned with lots of soap and dried, followed by another rinse with IPA, and applying a soap like Dawn on the pads directly and scrubbing with the clean toothbrush, rinsing finally with some distilled water. Sounds more complicated than it is, just try it and you'll get the hang of it directly.
So, now you have a wand that you can attach to a vacuum and dry your records. Technically, I suppose you could just lay the records on a clean, lint-free cloth and vacuum them on top of that. I, however, fashioned another DIY tool for holding and spinning the record while I dry them. In the final picture, you will see the contraption that I have made and it works exceedingly well but to describe the manufacture process would take a lot longer than I have time for currently.
You'll figure out a way yourself, no doubt. Just wait for those rainy days when there is not much else to do!!! The rain is what makes your part of the world so incredibly beautiful!!!
The painter's edging pad:

The super glue:
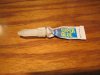
And finally, the Wahl beard trimmer I used (without any attachments) to raze the fibers down to the stubble:

And my personal favorite that began life as a (probably Delrin) throwaway cutting board for the base, a 12 inch lazy susan from Lowes, and some scraps of wood I had laying around the garage:


Notice how the record never touches anything except where it is fastened at the label, which is completely covered by the screw-down puck protecting it from water that I am rinsing with. I simply pour the distilled water on the record, rotate the thing around moving the water with a new, clean painters edging pad a dozen or so times and then vacuum.
Hope that gives you some ideas, amigo!
WARNING!!!! WHEN APPLYING THE WAND TO THE RECORD, MAKE SURE IT IS ABSOLUTELY FLAT!!! IF IT IS TILTED IN ONE DIRECTION OR ANOTHER, THE EDGES OF THE PADS CAN SCRATCH, EVEN GOUGE THE RECORD IF THEY ARE NOT CUT CLOSELY ENOUGH AND STICK OUT A BIT. WARNING!!!!
Here is the wand, a simple crevice tool from a vacuum cleaner.
I cut off the end, which was an angle and now straight. I then covered that end with some heavy-duty electrical tape but plain would work also. I see mine is in need of an overhaul!!! After cutting it straight, I used a dremel tool to cut that slit that runs from the top down to the end of the white strips in the middle of the crevice tool, which are just slightly (maybe 1/8 inch) longer than the distance from the edge of the label to the very outside edge of the record, in most cases just right at 4 inches. The slit needs to be not too wide, not too narrow, just enough to create good suction and I've found 1/4 inch about right.
Those strips, we'll call them pads, are fashioned from a painter's edging tool (see below) by cutting them from the refill pads which can be bought cheaply at any Home Depot or Lowes store. I got these at Walmart, in fact. Not sure what you have up there in Sweden, but you must have something like one of these stores, eh? Then, the pads must be trimmed very closely (see the beard trimmer below), removing the bulk of the fibers until only very small nubs are left. Don't worry, they will still create enough space between the strip and the record to safely vacuum away anything that is on the record. If you don't do this, the vacuum will not create enough suction and the liquid will remain on the record while you spin it for a very long time! You will see what I mean if you try without doing this.
Now that you have the two strips cut to the desired length and the fibers trimmed, glue them to the crevice tool so that you get the configuration that you see in the picture. The strips can still be removed using a flat blade and prying up on one end, which is what I will be doing after writing this post because I can see they are in need of it.
I try to keep these as clean as I can, no point if you are just going to apply dirt to the record by vacuuming it due to pads that aren't clean. However, I have learned that these pads can be cleansed in between replacements by running some hot tap water, using an old toothbrush that has been cleaned with lots of soap and dried, followed by another rinse with IPA, and applying a soap like Dawn on the pads directly and scrubbing with the clean toothbrush, rinsing finally with some distilled water. Sounds more complicated than it is, just try it and you'll get the hang of it directly.
So, now you have a wand that you can attach to a vacuum and dry your records. Technically, I suppose you could just lay the records on a clean, lint-free cloth and vacuum them on top of that. I, however, fashioned another DIY tool for holding and spinning the record while I dry them. In the final picture, you will see the contraption that I have made and it works exceedingly well but to describe the manufacture process would take a lot longer than I have time for currently.
You'll figure out a way yourself, no doubt. Just wait for those rainy days when there is not much else to do!!! The rain is what makes your part of the world so incredibly beautiful!!!
The painter's edging pad:
The super glue:
And finally, the Wahl beard trimmer I used (without any attachments) to raze the fibers down to the stubble:
And my personal favorite that began life as a (probably Delrin) throwaway cutting board for the base, a 12 inch lazy susan from Lowes, and some scraps of wood I had laying around the garage:
Notice how the record never touches anything except where it is fastened at the label, which is completely covered by the screw-down puck protecting it from water that I am rinsing with. I simply pour the distilled water on the record, rotate the thing around moving the water with a new, clean painters edging pad a dozen or so times and then vacuum.
Hope that gives you some ideas, amigo!
WARNING!!!! WHEN APPLYING THE WAND TO THE RECORD, MAKE SURE IT IS ABSOLUTELY FLAT!!! IF IT IS TILTED IN ONE DIRECTION OR ANOTHER, THE EDGES OF THE PADS CAN SCRATCH, EVEN GOUGE THE RECORD IF THEY ARE NOT CUT CLOSELY ENOUGH AND STICK OUT A BIT. WARNING!!!!

Hey Jedi, you are quite welcome. It's a system that has worked for me. Some choose not to rinse or vacuum at all and that's fine, but I tried that initially and always found crud on the record that had stuck on it after taking it out of the US cleaner. I'm using a formula for my solution that essentially came out of the thread by Phantomrebel which I believe is also similar if not identical to that mentioned by Rushton in his description.
You can probably come up with a contraption that will work for you with a little time and ingenuity. I strongly recommend that you make every effort to use a method that holds the record in place by just grasping the label area rather than putting the record on a platter. I did that for a while and it was always a mess. I fashioned a piece of plastic/vinyl to put between the record and the surface of the platter to avoid getting the clean side dirty again when the record was flipped but it always seemed to only work so-so. The way I'm doing it now completely makes this a moot point and is far more effective.
You can probably come up with a contraption that will work for you with a little time and ingenuity. I strongly recommend that you make every effort to use a method that holds the record in place by just grasping the label area rather than putting the record on a platter. I did that for a while and it was always a mess. I fashioned a piece of plastic/vinyl to put between the record and the surface of the platter to avoid getting the clean side dirty again when the record was flipped but it always seemed to only work so-so. The way I'm doing it now completely makes this a moot point and is far more effective.

T68
Super Member
Thank you sooo much for this detailed descriptionThat is a highly important aspect of the vacuum process, @T68! What kind of DIY wand did you make? The one I am using is a bit labor-intensive to make, but in the end I believe it is highly effective and "does no harm" as far as I can tell (over 3,000 records cleaned). I'm going to see if I can attach a picture of mine so you can see what I have going on.
Here is the wand, a simple crevice tool from a vacuum cleaner.
View attachment 2645296
I cut off the end, which was an angle and now straight. I then covered that end with some heavy-duty electrical tape but plain would work also. I see mine is in need of an overhaul!!! After cutting it straight, I used a dremel tool to cut that slit that runs from the top down to the end of the white strips in the middle of the crevice tool, which are just slightly (maybe 1/8 inch) longer than the distance from the edge of the label to the very outside edge of the record, in most cases just right at 4 inches. The slit needs to be not too wide, not too narrow, just enough to create good suction and I've found 1/4 inch about right.
Those strips, we'll call them pads, are fashioned from a painter's edging tool (see below) by cutting them from the refill pads which can be bought cheaply at any Home Depot or Lowes store. I got these at Walmart, in fact. Not sure what you have up there in Sweden, but you must have something like one of these stores, eh? Then, the pads must be trimmed very closely (see the beard trimmer below), removing the bulk of the fibers until only very small nubs are left. Don't worry, they will still create enough space between the strip and the record to safely vacuum away anything that is on the record. If you don't do this, the vacuum will not create enough suction and the liquid will remain on the record while you spin it for a very long time! You will see what I mean if you try without doing this.
Now that you have the two strips cut to the desired length and the fibers trimmed, glue them to the crevice tool so that you get the configuration that you see in the picture. The strips can still be removed using a flat blade and prying up on one end, which is what I will be doing after writing this post because I can see they are in need of it.
I try to keep these as clean as I can, no point if you are just going to apply dirt to the record by vacuuming it due to pads that aren't clean. However, I have learned that these pads can be cleansed in between replacements by running some hot tap water, using an old toothbrush that has been cleaned with lots of soap and dried, followed by another rinse with IPA, and applying a soap like Dawn on the pads directly and scrubbing with the clean toothbrush, rinsing finally with some distilled water. Sounds more complicated than it is, just try it and you'll get the hang of it directly.
So, now you have a wand that you can attach to a vacuum and dry your records. Technically, I suppose you could just lay the records on a clean, lint-free cloth and vacuum them on top of that. I, however, fashioned another DIY tool for holding and spinning the record while I dry them. In the final picture, you will see the contraption that I have made and it works exceedingly well but to describe the manufacture process would take a lot longer than I have time for currently.
You'll figure out a way yourself, no doubt. Just wait for those rainy days when there is not much else to do!!! The rain is what makes your part of the world so incredibly beautiful!!!
The painter's edging pad:
View attachment 2645297
The super glue:
View attachment 2645298
And finally, the Wahl beard trimmer I used (without any attachments) to raze the fibers down to the stubble:
View attachment 2645299
And my personal favorite that began life as a (probably Delrin) throwaway cutting board for the base, a 12 inch lazy susan from Lowes, and some scraps of wood I had laying around the garage:
View attachment 2645312
View attachment 2645323
View attachment 2645313
View attachment 2645314
Notice how the record never touches anything except where it is fastened at the label, which is completely covered by the screw-down puck protecting it from water that I am rinsing with. I simply pour the distilled water on the record, rotate the thing around moving the water with a new, clean painters edging pad a dozen or so times and then vacuum.
Hope that gives you some ideas, amigo!
WARNING!!!! WHEN APPLYING THE WAND TO THE RECORD, MAKE SURE IT IS ABSOLUTELY FLAT!!! IF IT IS TILTED IN ONE DIRECTION OR ANOTHER, THE EDGES OF THE PADS CAN SCRATCH, EVEN GOUGE THE RECORD IF THEY ARE NOT CUT CLOSELY ENOUGH AND STICK OUT A BIT. WARNING!!!!
 .
My vacuum is a pvc pipe with a slot and velvet strips on each side. But I see the advantage of having a flatter surface to work with.
I think my wand is ok. But I really need to make a rig like yours for spinning the record without touching the underside. Genious!
You're very welcome, @T68!
In the very first incarnations of this system I used the pvc pipe/velvet(velour) wand too. It was OK, but for me the crevice tool works much better and the versatility of being able to easily clean/replace the pads has been an advantage as well. I just need to plan ahead a bit, so that if I know my pads are nearing a point where they need replacement, I do that and then let the glue dry for a couple hours before use. It's usually after a cleaning session that I take the time to do that so the next day things are good to go for sure should I want to clean more records. I like the fact that the pads are white because everything shows up on them. If they are soiled, it's not hard to see so I can either clean or replace them.
I use the rig to pre-vacuum records as well before they go into the US tank, that way the tank solution stays a lot cleaner a lot longer. I have another wand that I use for that process. Still, I will usually get only about 30 records per tank before I have to dump and start over.
I understand not everyone will want to, or even feel the need to take all of these steps but it has worked exceedingly well for me. After having done it so many times, it's actually not bad at all.....just follow the steps and that's it. For the curious, my pace is about 12 records/hour not counting the time it takes for the US cleaner to reach the required 35° Celsius. That's from beginning, taking the records out of their sleeves, loading three on the spindle and starting them in the tank after vacuuming them. While those three are being cleaned for 15 minutes in the tank, I prepare the next three and put them on the second spindle after vacuuming them. The first three come out of the tank and are rinsed after inserting the second group of three. After rinsing, drying and inserting the first group in new inner sleeves, I still have time to prepare the third group, putting them on the first spindle as the second group is just finishing the cycle and so on. I usually turn the unit on and start the heater along with running a quick 5 minute cycle which helps with degassing and gets the solution warm a bit faster.
Let us know how you go with making a rig, amigo.....
T68
Super Member
Count me in, I'm a believer!!!
It's late here in Sweden and I have only had time to listen to one track on one the records in the first batch. It's the opening track of Prince, Around the world in one day.
Before it had an annoying constant crackle in the dead wax into the soft intro music. After the ultrasonic cleaning. Almost total silence except for the music.
Will sleep well with a smile on my face. Cannot wait to evaluate the other six albums in the batch !
It's late here in Sweden and I have only had time to listen to one track on one the records in the first batch. It's the opening track of Prince, Around the world in one day.
Before it had an annoying constant crackle in the dead wax into the soft intro music. After the ultrasonic cleaning. Almost total silence except for the music.
Will sleep well with a smile on my face. Cannot wait to evaluate the other six albums in the batch
!
ripblade
Addicted Member
The round pipe is fine. Since the record is already washed and rinsed there's less need for a gasket. I use the mesh of nylon laundry bag on my wand. There's no risk of scratching if the only residue is clean water. Doesn't block airflow, doesn't get (very) wet. It's held in place by 3 nails spiked through nozzle. Mesh is easily changed in seconds and a lifetime supply of changes cost me $1.Mixed the brew last night and will try to run my first batch tonight. Have decided to rinse in the Knosti afterwards but not vacuum since I am not 100% my wand is proper and will not scratch the records.
This is an old photo. I've since printed a custom one I designed in Tinkercad. I don't need the nails anymore but I still kept the best part....the mesh.

Last edited:
Hey Rip, that is very interesting and got me thinking.....it appears you are using a different attachment tool as well. One thing I like about the shaved painters pads is they are, albeit short, very, very soft and I'm wondering if the laundry bag mesh is equally so? I don't quite understand what you did that you no longer need the nails?
T68
Super Member
So, I have listened through the first batch records now and must say I am quite happy with the results.
A couple of noisy records are now sounding like new and one has gone from unbearable to enjoyably (my Springsteen Nebraska) even though there still are some pops caused by record damage.
I also ran an almost new album which has bugged me for being a bit noisy in places - much better now!
Only one album could not be saved. But here there's a lot of scratches. Even ultrasonic cannot do magically remove them I guess .
So can't wait to run more batches and also get a vacuum rig setup for after the rinse step (this batch was air dried after rinsing in the Knosti)!
A couple of noisy records are now sounding like new and one has gone from unbearable to enjoyably (my Springsteen Nebraska) even though there still are some pops caused by record damage.
I also ran an almost new album which has bugged me for being a bit noisy in places - much better now!
Only one album could not be saved. But here there's a lot of scratches. Even ultrasonic cannot do magically remove them I guess
.So can't wait to run more batches and also get a vacuum rig setup for after the rinse step (this batch was air dried after rinsing in the Knosti)!
Mister Pig
Pigamus Maximus
If a person does not want to assemble one, and once you buy all the pieces and figure in the time....this does not seem like a bad alternative.
https://www.amazon.com/Vinyl-Vac-33...28&sprefix=record+vaccuum+wand,aps,123&sr=8-3
https://www.amazon.com/Vinyl-Vac-33...28&sprefix=record+vaccuum+wand,aps,123&sr=8-3
ripblade
Addicted Member
Yes, it's a ShopVac upholstery attachment. I modified it by closing the wide opening and relocating it as a narrow one on the leading edge. Unlike conventional practice, I think contact between the wand and the record should be kept to a minimum. If I was to modify a crevice tool I would cut the slot on the narrow face rather than the wide one.Hey Rip, that is very interesting and got me thinking.....it appears you are using a different attachment tool as well. One thing I like about the shaved painters pads is they are, albeit short, very, very soft and I'm wondering if the laundry bag mesh is equally so? I don't quite understand what you did that you no longer need the nails?
The inspiration for the mesh is based on the thread type cleaners. I figure if a single thread works for the point nozzle of a KM or Loricraft then a mesh of similar material should be ok for use in a broad slot. As I posted earlier, if the record is already clean there should be no grit and no reason for scratches. In several years of use I've had the rare minor scratches occur as a result of the mesh bunching up and leaving the bare slot uncushioned, but this is more just sloppy care rather than a fault of the method. Securing the mesh and making sure it's positioned properly before starting will avoid any potential for scratches.
Here's a photo of the new wand, still in the initial prototype stage. The mesh wraps all the way around and is clamped at the top and held with U-shaped clips. The slot contact area is actually round which keeps it to a barest minimum. The rubber tubing is experimental...I wanted something more flexible than the stiff hose that comes with the ShopVac. It works, but the total area inside the tubing is too restricting so I lose a lot of the suction power. Still, there's enough to get the job done in a single rotation. I have room for 2 more tubes but this means a redesign/reprint of the wand and hose coupling plug and I'm not sure if a 40% increase in air flow justifies the effort. Thinner wall tubing would be more ideal.

T68
Super Member
Thank-you T68. Having a 3d printer and a free design program like Tinkercad is heady addicting lol. I find myself designing things that could more easily be constructed without the printer!
Haha, I hear you! Last couple of years I have started to learn cad and 3d printing too