• The move to the new server is done. There are some software and database maintenance updates in process. This has us passing the hat around to help out. We appreciate any donations. Seriously, even a dollar helps. The payment page may be found here - https://www.audiokarma.org/support.html

Vandersteen 2CI Burned Resistors

I agree that you should cut the leads close to the old resistors, then clean the old
lead, and twist them to the new ones. When you solder them, hold the old lead tight down
close to the board with long nose pliers so that the heat doesn't desolder the end down on the
circuit board. You can probably get away with not doing this but just hold the iron
there long enough to properly flow the solder.

Great tip Pete, didn’t think about unsoldering the back side of the circuit board by accident! THAT would have been a disaster! Now I just have to find the resisters. Not having much luck so far…
 
Now I just have to find the resisters. Not having much luck so far…

Mouser has 3 Watt metal oxide resistors in the values you need:
6.8Ω
12Ω
20Ω

These KOA Speer resistors have body dimensions of 6mm diam (just under 1/4") and 15.5mm length (just under 5/8").

If you happen to have enough room on the PCB, Mouser also stocks 5 Watt resistors that are 6.5mm diam. X 17.5mm long:
6.8Ω
12Ω
20Ω
 
Mouser has 3 Watt metal oxide resistors in the values you need:
6.8Ω
12Ω
20Ω

These KOA Speer resistors have body dimensions of 6mm diam (just under 1/4") and 15.5mm length (just under 5/8").

If you happen to have enough room on the PCB, Mouser also stocks 5 Watt resistors that are 6.5mm diam. X 17.5mm long:
6.8Ω
12Ω
20Ω

Thank you SO MUCH Stewart! I, by no means, have mastered navigating Mouser. This is EXACTLY what I needed help with. I’m going with the 5 watt resisters, I’ll just use a shoe horn when installing them!

Elevating them slightly above the board should give them a little more breathing room anyway. Thanks again for the help!
 
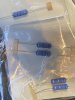
Ok, just to make an update on this one, ordered/received the 5 watt resisters…

B631B774-2B76-45C7-8C5D-1DA2AB4CD7B5.jpeg

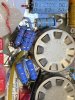
They were about twice the size of the originals, so I just allowed them to float slightly above the IC board to allow them to disperse their heat a little better.

CA858BF5-9F70-4F04-9320-8C519A50010C.jpeg

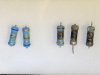
The old resisters were definitely smoked in some cases, and overheated in others, so I just swapped them out…

52D9A9BE-A291-4D34-84A7-AFAD0DF7C07D.jpeg

Tested everything and got a big thumbs up! I’m planning on stapling the sock back on tomorrow, solder up some bi-amp speaker wires, and hook them up to the Marantz. The testing that I’ve done gives me a lot of optimism that these are going to be amazing. I don’t have the the “mandatory” Vandersteen speaker stands, so may have to figure out a viable alternative. Looking forward to getting these singing again. I’ll post pictures on the final results.

Thanks again for all of the help on this project, the experts really showed up for me, and I am eternally greatful!
 
Last edited:
Very nice work.
I lost one of my stands in a move, and put them on 4 coffee cans on each side, they should get some tilt also.

I would get them into the main system and play them for a week or more before closing them up given
how difficult it is to close them up.
 
Last edited:
Very nice work.
I lost on of my stands in a move, and put them on 4 coffee cans on each side, they should get some tilt also.

I would get them into the main system and play them for a week or more before closing them up given
how difficult it is to close them up.

Thanks Pete, your coaching was a big help and inspiration for me moving forward on these. Your idea of coffee cans is probably on par with what the Vandersteen stands do (i.e. elevate, and allow sound waves to disperse from the bottom of the speaker). I think the idea is to not use anything completely solid under them. Maybe 4 concrete filled coffee cans per side!?!

I’ll ponder this one…Vandersteen's “bolted on”, open design steel stands are unique. I’ll try to come up with something that would mimic their sonic design attributes, or maybe I just need some coffee cans too!
 
I did think about filling them with concrete.
The original stands did have tubular supports but they were a much smaller diameter.
I actually soldered the cans together, I have a 40W iron and it was very easy to do.

I know that RV makes a big deal about the stands, they are spiked also by the way, but I think that it is
mostly functional and esthetics that they went for in the design.
 
Finally got these hooked up and “in production”. Have to say, these are really amazing speakers. I need to play with their placement, and still need to work out a proper speaker stand for these, but that’s for another day. Even without being optimally placed or elevated, I’m so glad I went through the refurbishment effort. They sat for 10+ years in disrepair. I didn’t have the skill set or knowledge to problem solve or repair these10 years ago - knowledge gained through AK and all of my wonderful coaches got me to the point of being able to tackle this project (repairing burned through spiders on 4 drivers and repairing a crossover with fried resisters). The end result is very rewarding. They sound amazing!

Thanks to all who helped me along the way. AK is an amazing forum, and a great group human beings. I am humbly appreciative of the expertise, free flow of knowledge, and goodwill…
 
Last edited:
Nice Fix. The use of higher rated parts will help with longer life. The air gap between the resistors will let them run cooler. Putting hot part on hot part = wrong. Work for a electronics manufacturer. since 82. Good luck with the speakers..
 
Back
Top Bottom