This week I was wrapping up an AU-717 overhaul and noticed the volume pot was noisy around the 9 o'clock region. My first attempt and fixing it was to turn off the amp and work the pot back and forth through the full range a couple dozen times. This didn't help so I knew I needed to do something a little more invasive. After a bit of research I came up with a plan to clean the pots with Deoxit F5 (not D5), and I decided to take photos so I could make a guide in case it was successful.
The AU-717 has four stacked pots. Two are 150k pots (R and L), and two are 5k (R and L). The 150k pots attenuate the signal coming in to the tone board, and the 5k pots attenuate the signal as it leaves the preamp. There are some descriptions here on Audiokarma explaining the rationale, and I won't cover it here.

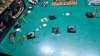
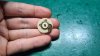
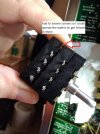
If you want to get an idea of what the pots look like, you can loosen the two long screws until the nuts come off the back. Then you can pull off the rear cap and expose the rearmost pot. The white disc has contacts near the center that touch an un-attenuated track on the PCB. These are connected to contacts near the edge of the disc that sweep along the attenuated outer track on the PCB. Along one edge of the PCB you will see some traces with black rectangles overlapping adjacent pairs. The black rectangles are (IIRC) resistors that tweak the attenuation curve in the lower half of the volume range (again, this is explained better elsewhere).


To completely disassemble the pot you would need to remove (probably destructively) the push nut at the end of the shaft that holds the assembly together and applies pressure to the contacts. I would only use this as a last resort or if trying to rebuild from a donor pot. But it shouldn't be necessary for cleaning and protecting the contacts and attenuated traces inside.
Some threads have recommended pulling the chambers apart a few mm, one chamber at a time, to allow cleaner to be introduced. I tried this approach initially, but found it was tricky to get it to open wide enough for a Deoxit F5 spray tube to fit. Also, when pulling the chambers apart like this, you are flexing the spring contacts significantly.
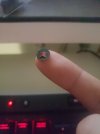
I decided to take a slightly more invasive approach and drill access holes in the plastic sections for spraying and draining contact cleaner. I used a piece of tape as a guide for the hole locations. I used a pin vise with a drill bit slightly larger than the Deoxit F5 spray tube. I held the volume pot while I drilled so that the holes I was making pointed downward, and the debris from drilling would fall away from the hole instead of ending up inside. To make sure I didn't drill too far and touch internal parts, I set up the pin vise so the drill bit only protruded a few mm (slightly thicker than the plastic wall of the pot). Every 10 revolutions or so I pulled out the bit and tapped it on a hard surface to get rid of excess debris.


Once all four holes were drilled, I sprayed Deoxit 5 into each of the chambers and then oriented it with the shaft pointing down so the fluid would spread out on the PCB. I rotated the shaft back and forth a couple dozen times. Next, I laid the pot on its side, holes down, on top of a piece of folded paper towel. The paper towel draws out a lot of the excess contact cleaner through the holes and the between chamber sections. After this I cleaned up the outside of the pot and reinstalled it (and F-2720) back in the front panel.

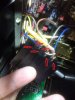
When I had the amp reassembled and started to test I had a moment (or a few hours) of panic because the pot had stopped working. The amp would only play at about 50% volume regardless of the volume setting. I was convinced I had somehow damaged the pot, so I started de-soldering the flying leads from the PCB so I could measure resistances of each pot at various settings. The third wire I de-soldered was number 21 (black), and it just fell out of the amp even though it should have been connected to a solder tab on the volume pot. What had happened was while I was maneuvering the volume pot earlier (for drilling, spraying, draining, etc.) the black wire had broken off. It was brittle from solder that had flowed into the insulated part when it was originally assembled. The black wire (21) provides the signal ground for the two pots (R and L) that attenuate the signal as it leaves the preamp. Without this wire connected, the signal wasn't being pulled down and the pot was unable to decrease volume to nothing. The lesson I learned (although this hasn't happened on previous AU-717 projects) was to inspect all the flying leads whenever F-2720 and the volume pot are removed for any reason (recap, pot cleaning, etc.). It's much easier to fix in the moment than to have everything back together and worry that you've killed the preamp board and/or pot in some mysterious way.
The AU-717 has four stacked pots. Two are 150k pots (R and L), and two are 5k (R and L). The 150k pots attenuate the signal coming in to the tone board, and the 5k pots attenuate the signal as it leaves the preamp. There are some descriptions here on Audiokarma explaining the rationale, and I won't cover it here.
If you want to get an idea of what the pots look like, you can loosen the two long screws until the nuts come off the back. Then you can pull off the rear cap and expose the rearmost pot. The white disc has contacts near the center that touch an un-attenuated track on the PCB. These are connected to contacts near the edge of the disc that sweep along the attenuated outer track on the PCB. Along one edge of the PCB you will see some traces with black rectangles overlapping adjacent pairs. The black rectangles are (IIRC) resistors that tweak the attenuation curve in the lower half of the volume range (again, this is explained better elsewhere).
To completely disassemble the pot you would need to remove (probably destructively) the push nut at the end of the shaft that holds the assembly together and applies pressure to the contacts. I would only use this as a last resort or if trying to rebuild from a donor pot. But it shouldn't be necessary for cleaning and protecting the contacts and attenuated traces inside.
Some threads have recommended pulling the chambers apart a few mm, one chamber at a time, to allow cleaner to be introduced. I tried this approach initially, but found it was tricky to get it to open wide enough for a Deoxit F5 spray tube to fit. Also, when pulling the chambers apart like this, you are flexing the spring contacts significantly.
I decided to take a slightly more invasive approach and drill access holes in the plastic sections for spraying and draining contact cleaner. I used a piece of tape as a guide for the hole locations. I used a pin vise with a drill bit slightly larger than the Deoxit F5 spray tube. I held the volume pot while I drilled so that the holes I was making pointed downward, and the debris from drilling would fall away from the hole instead of ending up inside. To make sure I didn't drill too far and touch internal parts, I set up the pin vise so the drill bit only protruded a few mm (slightly thicker than the plastic wall of the pot). Every 10 revolutions or so I pulled out the bit and tapped it on a hard surface to get rid of excess debris.
Once all four holes were drilled, I sprayed Deoxit 5 into each of the chambers and then oriented it with the shaft pointing down so the fluid would spread out on the PCB. I rotated the shaft back and forth a couple dozen times. Next, I laid the pot on its side, holes down, on top of a piece of folded paper towel. The paper towel draws out a lot of the excess contact cleaner through the holes and the between chamber sections. After this I cleaned up the outside of the pot and reinstalled it (and F-2720) back in the front panel.
When I had the amp reassembled and started to test I had a moment (or a few hours) of panic because the pot had stopped working. The amp would only play at about 50% volume regardless of the volume setting. I was convinced I had somehow damaged the pot, so I started de-soldering the flying leads from the PCB so I could measure resistances of each pot at various settings. The third wire I de-soldered was number 21 (black), and it just fell out of the amp even though it should have been connected to a solder tab on the volume pot. What had happened was while I was maneuvering the volume pot earlier (for drilling, spraying, draining, etc.) the black wire had broken off. It was brittle from solder that had flowed into the insulated part when it was originally assembled. The black wire (21) provides the signal ground for the two pots (R and L) that attenuate the signal as it leaves the preamp. Without this wire connected, the signal wasn't being pulled down and the pot was unable to decrease volume to nothing. The lesson I learned (although this hasn't happened on previous AU-717 projects) was to inspect all the flying leads whenever F-2720 and the volume pot are removed for any reason (recap, pot cleaning, etc.). It's much easier to fix in the moment than to have everything back together and worry that you've killed the preamp board and/or pot in some mysterious way.
Last edited: