• The move to the new server is done. There are some software and database maintenance updates in process. This has us passing the hat around to help out. We appreciate any donations. Seriously, even a dollar helps. The payment page may be found here - https://www.audiokarma.org/support.html

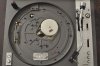
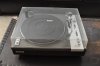
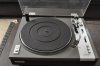
Where to start on this Pioneer TT?

:tears:
Bittersweet thread. This was my first table out of college, and I pretty much gave it away a few years back. Been thinking of recreating that system. I'm usually a dyslexic investor (buy high, sell low), now I am recidivist too - buy high, sell low, buy high (again)
:screwy:

Btw, after my M91ED, I had a Grado Black on it that worked very well.

Oh, and if you want to get more adventurous on the veneer, a place called Oakwood Veneer appears to sell all kinds of exotic wood veneers at very reasonable prices. I haven't bought there before, but am about to try them.

Well, I found this TT for $20 on CL so theres still a chance to buy low if you look hard enough. Thanks for the veneer lead they have some nice stuff!:D
 
Oh Crap just when...

I thought I was getting this TT all ship shape I screw it up!

So I order & install new belt..Done
Sand & polish Dust cover..Done but needs a little more polishing.
Clean & lube main spindle & bearings...Done
Find correct pioneer rubber matt ..Done
Replacement matt is heavier than the felt matt Re-tune the suspension..Done
Find 2 inch walnut veneer to replace the nasty cheap vinal veneer ..ordered.
Find additional head shell with an OK cart....Done

Try it out & automation is fully functional but way out of adjustment.
Try the adjustment screw... better but still not setting down or picking up in the correct spot...

So I check the service manual & follow instructions & Boom now I am in trouble.:tears:

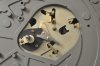
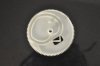
I cant for the life of me figure out how to line up all the switches & levers to reinstall the big white gear to finish the job:dunno:

Can anyone help?
Totally stumped:sadwave:
PQ

More photos here...http://s1310.photobucket.com/user/Trainwreckmusic/library/?sort=3&page=1
 

Attachments

  • DSC_8185.jpg
    DSC_8185.jpg
    57.9 KB · Views: 19
  • DSC_8186.jpg
    DSC_8186.jpg
    57.6 KB · Views: 18
  • DSC_8192.jpg
    DSC_8192.jpg
    35.9 KB · Views: 19
  • DSC_8171.jpg
    DSC_8171.jpg
    44.1 KB · Views: 14
  • DSC_8172.jpg
    DSC_8172.jpg
    50 KB · Views: 18
Oh no! You didn't remove the Big White Gear?! You are screwed...:tears:


Just kidding. I don't have the exact model but I can have a look later at a Pioneer PL-514 I do have. It's only semi auto so might not have all the levers though. However if you work with the levers there and see what they do, as well as move the tonearm in and out you might figure it out.
 
Oh no! You didn't remove the Big White Gear?! You are screwed...:tears:


Just kidding. I don't have the exact model but I can have a look later at a Pioneer PL-514 I do have. It's only semi auto so might not have all the levers though. However if you work with the levers there and see what they do, as well as move the tonearm in and out you might figure it out.


LOL! Yep I removed the big white gear...Note to self NEVER remove the big white gear!:nono:

I have been messing with this all day. I understand what levers do what. But I am stumped on how to align them all & install "the big white gear", The service manual is very clear in how to disassemble in sect 11 & 12. How to put it back together not so much or I am just too stupid or tired.
 
Day 2 ...No progress

Ok Day 2 with the service manual and no progress..:dunno:
I have gone from joy to bummed & frustrated!:smilemad:
Any help would be awesome!:sadwave:
PQ
 
I have never worked on this table so I don't know for sure.

Looking at the Big White Gear I would surmise that the key is where to put the area with no teeth. The teeth are missing for a reason. Look at the rest of the levers to find the clue.

Good luck, Bob
 
Last edited:
My friend had the semi-automatic version PL-115D, back in the day. He had a Shure M95HE (hyperelliptical stylus) mounted. That combo sounded amazing!

Enjoy your PL-117D! :thmbsp:
 
I have never worked on this table so I don't know for sure.

Looking at the Big White Gear I would surmise that the key is where to put the area with no teeth. The teeth are missing for a reason. Look at the rest of the levers to find the clue.

Good luck, Bob

The missing tooth section is "neutral" or while the record is playing or at rest. When the start button is engaged, it will flick a lever that causes the gear to rotate so the teeth hook up with the spindle cog and the BWG will continue to guide the arm to the start position as one of the pins runs the track. I think the end of side guide pin is the one above the pin that the BWG sits on. I THINK the pins to the right are related to the Start and Repeat buttons.

Here's a suggestion. Trace the underside of the BWG shape and in particular the track on thin paper (or a piece of clear plastic?), then flip that over and copy the pattern on the reverse side so you can see where the track is. Lay that down over the table where it should go and see if you can tell what goes where as you engage the buttons. Press the appropriate button and see what it should do if the BWG where in place and able to rotate. Rotate the spindle as if the gear where engaged, or move the arm to cause the pins to move.

You might need 3 hands for this but I think it will help.
 
Day 3 begins....

The missing tooth section is "neutral" or while the record is playing or at rest. When the start button is engaged, it will flick a lever that causes the gear to rotate so the teeth hook up with the spindle cog and the BWG will continue to guide the arm to the start position as one of the pins runs the track. I think the end of side guide pin is the one above the pin that the BWG sits on. I THINK the pins to the right are related to the Start and Repeat buttons.

Here's a suggestion. Trace the underside of the BWG shape and in particular the track on thin paper (or a piece of clear plastic?), then flip that over and copy the pattern on the reverse side so you can see where the track is. Lay that down over the table where it should go and see if you can tell what goes where as you engage the buttons. Press the appropriate button and see what it should do if the BWG where in place and able to rotate. Rotate the spindle as if the gear where engaged, or move the arm to cause the pins to move.

You might need 3 hands for this but I think it will help.

Thanks Thats a great Idea I’ll give it a try. After working on this for 2 days & reading the manual I pretty much understand what each gear & lever do.
I think the trick is getting every thing lined up in the stopped/start position. There are 3 moveable pawls ,2 plates ,a rod & 2 arms above the plinth. That all need to be lined up. Also there are a large number of levers ,arms,Rods & plates underneath that all must be aligned just so on the underside.

There is a micro switch that has to be adjusted within a tolerance of 0.2 -0.3 mm which might be the problem. Also some plates that have to be adjusted 0.5 to 1mm. Last but not least another plate that has to be 62mm +/- 2 mm.
There is no way for me to get this accurate with a metric ruler. I’ll need a micrometer & some feeler gages.

So I am off to buy a micrometer & feeler gages to make sure that everything is alined properly on the Top & underside....


Since there were no transit screws present I think that the whole mechanism has be knocked out of alignment & causing all the problems to start with.
 
this was my first time ever to stain and I could of done a lot better of a job I would of liked to have it darker, another mod I did was to replace the flimsy base with a piece of 3\4 inch plywood.


picture.php

I don't know, but I kinda like the color of the stain. I think it adds to the look. Great job!
 
Time to veneer the base....

Here is mine after the veneer basically just cut to length, iron on, trim, sand, and then stain, this was my first time ever to stain and I could of done a lot better of a job I would of liked to have it darker, another mod I did was to replace the flimsy base with a piece of 3\4 inch plywood.


picture.php

I just recived the 2 inch pre-glued walnut veneer that I ordered.:thmbsp:

Was wondering how you removed the Pioneer badge from the base & if you had any issues or helpful suggestions? Also did you veneer the back as well & if so were you able to remove & reapply the Serial/model # & other original stickers?

Was there a audible difference when you replaced the baseboard with the 3/4” plywood?

Thanks
PQ
 
Last edited:
Sorry so slow to reply

I think the badge is just in there snugly with 2 pegs to hold it up I believe I pushed it out from the inside after I took the bottom off.

I did reveneer the back too and did not reinstall the ser no. Or anything else

My base was warped and cracked when I got the table and I never even played it in that condition I'm sure it can't hurt plus standing up a little taller helps the looks :)

Thanks Luke
 
Sorry so slow to reply

I think the badge is just in there snugly with 2 pegs to hold it up I believe I pushed it out from the inside after I took the bottom off.

I did reveneer the back too and did not reinstall the ser no. Or anything else

My base was warped and cracked when I got the table and I never even played it in that condition I'm sure it can't hurt plus standing up a little taller helps the looks :)

Thanks Luke

No worries!:D
I have to admit I am pretty frustrated with the automation adjustments so its been on my “need to give working on this thing a break” status. Sometimes working on something else & coming back to it works wonders.
In any event thanks for the response.
The one peg on the badge is behind a wooden support.:scratch2:
I’ll post pics when the new veneer is done.
Thanks for the info & inspiration!
PQ
 
On the emblem I might have taken something flat and carefully pried it up (its been over a year and I can't remember very well) and then after reveneering drilled the holes through the veneer into the original holes.
 
Back
Top Bottom