• The move to the new server is done. There are some software and database maintenance updates in process. This has us passing the hat around to help out. We appreciate any donations. Seriously, even a dollar helps. The payment page may be found here - https://www.audiokarma.org/support.html

Wipe on poly coat

But your not a finisher. You do cabinetry, we've talked on the phone when you where out of work remember?

Anyway, have a good day, don't tell me how to finish wood work and I won't tell you how to build it unless I got to work on it. ;) Really though I'm lucky to have a couple great furniture makers around here, I get a lot of different cabinet makers that are not that great and I have to make it look good.

I know you know what you’re doing. I also do my own finishing, except for that brief period where I worked for a shop and we had a finisher. But even then, it was a small shop, 4 guys, and once in a while the finisher would need a hand. I knew the products, I knew the equipment. I know how to spray. I certainly know how to prep. I know exactly the sanding schedule needed to produce the results I am looking for.
 
Sometimes I'll do a little hand sanding after a machine, but not that often, unless I have a lot of areas the machine cant get to. Again, I finish all day every day for a living at least a 1000 peaces of furniture a year as well as on site architectural work. Most my work is from high end designers having custom furniture made for all the top homes being furnished, or built around the country. But also old that I refinish and restore, I really do work on a very wide range of furniture and different finishes.

Do you think they want to see sanding swirl in their $50,000 and $70,000 pieces of furniture?
Do you not think I can see? and if I did see issues would not correct it to produce the best finish these people are looking for?

Anyway this is why I don't respond to finishing threads much anymore on the site. Can't give professional advice without friction form others that don't do this for a living.
Hey, I'll take all the advice I can get. :thumbsup:
 
"Anyway this is why I don't respond to finishing threads much anymore on the site. Can't give professional advice without friction form others that don't do this for a living."
Hey, everyone has different ideas. That doesn't make them bad, just different.
Yes, applying poly with 1500 paper does little for the result. But, if you consider your efforts as experiments to learn and apply the best results, we can all get a good finish, eventually.
 
I'm not exactly sure what "wipe on poly" is. Polyurethane varnish always used to be oil-based and I used to thin it with white spirit (I think they refer to it as mineral spirit in the USA) so it was thin enough to wipe on with a cloth.
These days there are water-borne polyurethane finishes available, but they don't feel anything like the old oil-based stuff. They tend to froth up and dry so quickly that they cause me problems. I'm still trying to find a method of applying the modern water-borne polyurethane that I'm happy with.
 
I'm not exactly sure what "wipe on poly" is.
It's just as it says, it's designed to wipe on.
Theoretically you can wipe on any of those oil base poly, and as you'v done dilute it as well. I don't know what's available to you in your country, but I'm sure a search would find it for you.

Different types of application will do different things with different products.

Spraying will saturate into the wood but not as much with thicker materials. Even thin material will lay on top of the surface of the wood. It takes many coats spraying and sanding to start to fill the grain and many more for a filled grain.

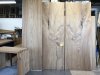
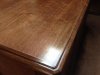
However we might need a sharp open grain as part of the look of the finish look. This is a 15 foot table made of mahogany veneer in a starburst pattern and they wanted a very dark ebonized color. If one did a filled grain with this table and color, you might as well made it of MDF and painted it. There is a fine line of just the right amount of finish to leave the grain nice and sharp with a equal pattern.

56997699448__153EB1FE-93D5-49E2-A271-03D0E2C9194F.jpg 56997703667__8DD2C670-B859-45A5-9487-CAA647A3A4CB.jpg

Using a brush will help force finish into the grain and cracks but leaves a thick layer on top of the wood surface. Lets say you have a raised panel front door, it will be constructed with many joints and gaps. If you only sprayed a door like this moisture will get into the gaps and into the wood, the finish will be lifted off the wood. If you brush coat a door like this the brush will scrap...force finish into the gaps sealing all the joints, one can spray it latter if you want a smother even finish coat.

A wipe on finish is nice but limited to the type of construction and design.
However wipe on finishes will pack the grain with finish while leaving a thinner coat on the wood top surface.

With nice fine antiques they where finished with a technique called "French Polish". If you look at the finish it looks really thin but the grain is filled. This is done with a rag wadded tight like a hard pad and shellac. It's not easy to do as the finish is very sticky, drys fast, and also is a solvent to the finish you'v already laid down. However done right this fills the grain and leave a thin finish on the wood surface all the while the hard padding leaves a burnished even sheen as the final result.

A wipe on polly is a lot easier to use and doesn't look anything like french polish, nor do you aplly it the same way. What I do is pour it on the surface of the wood, or if vertical in the rag. Wipe it over the whole side working it into the wood. I then rub it cross grain as it starts taking up to pack the grain. Before it gets to tacky I'll do an even wipe with the grain trying not to have any rag lines and then stop. I'll let this sit for 30 or more minutes to dry a little, then I take a piece of burlap and burnish the slightly tack finish until it feels dryer. If you want a nice satin sheen you don't over do this step. If you want more sheen you can do it more and apply more coats of the finish


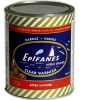
Rothwell I have used Epifanes for some out door furniture, they are global.
https://www.epifanes.com/introduction
clear_varnish_large.png

I'v been working with a designer doing a house with all custom furniture inside and out. The customer like natural wood and like no finish or color added. So the designer when wanting color change for all the different stuff they made thing out of different woods. However they need me to shift colors, killing reds or adding a cold look and finish it dry looking as not to look like its finished.

These are outside patio tables, a coffee table and one cutup to make side tables but can be clustered to look whole again.

58509243761__92788A12-A281-48F6-A269-02B7F8C28AF3.jpg 58509263617__EE2E4600-ACCE-441F-BC24-B2034455E4BB.jpg

What I did to finish it was to use the Epifane mat finish, I sprayed a diluted coat to get it in everywhere including the ruff underside. But then did a technique similar to the french polish with a wadded pad but not over working it like the wipe on polly. It wasn't easy not getting lap lines and rag marks but they turned out good.

This is a huge armoire made of elm and tables for the master bed room
The right side of the sample is bleached, the left side is natural. Well he didn't like the red in the natural, and the bleach killed the life of the wood and was to white. The middle of the sample I put a blue dye tint over the natural to kill the red in the wood. He liked that direction so to do this massive unit made of many pieces I decided to add a little blue dye in my lacquer. This way after just spraying it normally the blue would gradually eliminate the red in the wood, all without it looking like I put any color on it.

Here are only the two front doors and one side panel, and night stand made of different wood but he wanted them to blend.

59846832791__0A86FE5A-8C4A-4F1E-B26C-18455EFA05AF.JPG 59846849330__A617EF08-6C41-44ED-B213-63E3FE72C604.JPG 59846836522__E47B1E75-7221-496B-B2CB-A11DAC29912E.JPG
 
Last edited:
It's just as it says, it's designed to wipe on.
Theoretically you can wipe on any of those oil base poly, and as you'v done dilute it as well. I don't know what's available to you in your country, but I'm sure a search would find it for you.

Different types of application will do different things with different products.

Spraying will saturate into the wood but not as much with thicker materials. Even thin material will lay on top of the surface of the wood. It takes many coats spraying and sanding to start to fill the grain and many more for a filled grain.

However we might need a sharp open grain as part of the look of the finish look. This is a 15 foot table made of mahogany veneer in a starburst pattern and they wanted a very dark ebonized color. If one did a filled grain with this table and color, you might as well made it of MDF and painted it. There is a fine line of just the right amount of finish to leave the grain nice and sharp with a equal pattern.

View attachment 1756941 View attachment 1756942

Using a brush will help force finish into the grain and cracks but leaves a thick layer on top of the wood surface. Lets say you have a raised panel front door, it will be constructed with many joints and gaps. If you only sprayed a door like this moisture will get into the gaps and into the wood, the finish will be lifted off the wood. If you brush coat a door like this the brush will scrap...force finish into the gaps sealing all the joints, one can spray it latter if you want a smother even finish coat.

A wipe on finish is nice but limited to the type of construction and design.
However wipe on finishes will pack the grain with finish while leaving a thinner coat on the wood top surface.

With nice fine antiques they where finished with a technique called "French Polish". If you look at the finish it looks really thin but the grain is filled. This is done with a rag wadded tight like a hard pad and shellac. It's not easy to do as the finish is very sticky, drys fast, and also is a solvent to the finish you'v already laid down. However done right this fills the grain and leave a thin finish on the wood surface all the while the hard padding leaves a burnished even sheen as the final result.

A wipe on polly is a lot easier to use and doesn't look anything like french polish, nor do you aplly it the same way. What I do is pour it on the surface of the wood, or if vertical in the rag. Wipe it over the whole side working it into the wood. I then rub it cross grain as it starts taking up to pack the grain. Before it gets to tacky I'll do an even wipe with the grain trying not to have any rag lines and then stop. I'll let this sit for 30 or more minutes to dry a little, then I take a piece of burlap and burnish the slightly tack finish until it feels dryer. If you want a nice satin sheen you don't over do this step. If you want more sheen you can do it more and apply more coats of the finish


Rothwell I have used Epifanes for some out door furniture, they are global.
https://www.epifanes.com/introduction
View attachment 1756912

I'v been working with a designer doing a house with all custom furniture inside and out. The customer like natural wood and like no finish or color added. So the designer when wanting color change for all the different stuff they made thing out of different woods. However they need me to shift colors, killing reds or adding a cold look and finish it dry looking as not to look like its finished.

These are outside patio tables, a coffee table and one cutup to make side tables but can be clustered to look whole again.

View attachment 1756915 View attachment 1756916

What I did to finish it was to use the Epifane mat finish, I sprayed a diluted coat to get it in everywhere including the ruff underside. But then did a technique similar to the french polish with a wadded pad but not over working it like the wipe on polly. It wasn't easy not getting lap lines and rag marks but they turned out good.

This is a huge armoire made of elm and tables for the master bed room
The right side of the sample is bleached, the left side is natural. Well he didn't like the red in the natural, and the bleach killed the life of the wood and was to white. The middle of the sample I put a blue dye tint over the natural to kill the red in the wood. He liked that direction so to do this massive unit made of many pieces I decided to add a little blue dye in my lacquer. This way after just spraying it normally the blue would gradually eliminate the red in the wood, all without it looking like I put any color on it.

Here are only the two front doors and one side panel, and night stand made of different wood but he wanted them to blend.

View attachment 1756930 View attachment 1756931 View attachment 1756932

Holy CRAP! That is absolutely stunning! And it isn't even done! I never put much stock into being filthy rich but being surrounded by such beauty as your work is going to motivate me to work a hell of a lot harder. Bravo!
 
This is my finishing schedule for stain or clear coat.

Sand 150-180-220 RO sander
Hand sand 220 to remove RO marks.
stain
Seal coat
Sand 400 grit.
clear coat
Sand 400 grit.
Final coat.

I don't finish like that nor do most finishers, it might be fine if it doesn't really mater what the color needs to be in the end result.

However I have to control the color, I have to mach colors that are spec by the customer and designers regardless if I like it or not. I even have to make things made out of mahogany and they want a color like maple on it. A house painter might say they are a finisher, and do some cabinets in a house, or hand rail. They slap some stain on it and clear coat it, they don't care if all the boards match or if it matches a spec color. Thats fine as long as the customer likes it and is in agreement of the end results.

I don't get that luxury nor do most high end finishers doing this work. I have to be able to control the color and manipulate it as well as having the finish effect they are looking for. Most finishes are a manipulation and gradually shifting colors through many steps. It's not uncommon for me, in fact it's really necessary for me to used three different color steps in a finish.

First one has to look at the raw wood, what's that relationship to the color that needs to be the end result? Is it already to dark, does it read to red, purple, orange? Do I need to do something like bleaching or a dye stain to kill something?

Most my finishes and this has change over the years as trend colors have changed as far as what people like today.

I start with the fist thoughts posted above, and then decide what my starting color will be. This is the background color, could be over bleached wood, maybe the bleached wood is a good background color and just needs a light seal coat. I may choose to spray a little dye stain on it and then seal it this will give a background glow that might be in the sample . Maybe a wipe on oil stain is needed on raw wood. (BTW, this is where you say you see swirl marks and it has more to do with how you are finishing more than how your sanding the wood). In any of these cases this is the background color only, and the piece is then coated lightly.

This is walnut that's been bleach and a yellow dye stain sprayed on and a light sea coat. This is a 1920s home that the customer wanted the new to look like other hundred year old wood in the house.

IMG_0876.JPG IMG_1041.JPG

The small panel is the approved sample that matches the old.

IMG_0913.JPG

The actual job it's leaning on was then sprayed with a oil stain made with Van Dyke brown and Red...lots of red, it was specked and look like a leopard, then rubbed back very hard with scotch bright. This rubbed the color around and into the grain, and when coated the red, yellow and van dyke brown started to blend into a nice glowing amber brown and orange look.

So a glaze will be a second and even a third color added over the top of a locked in background stain.

IMG_0924.JPG IMG_1058.JPG

While the above is a nice color and good looking finish, it doesn't have the look I need. I'm supposed to look old and right now looks new and clean, so lets add dirt, shape and age.
Now for the second glaze after the finish has been built up more, I will want to start hanging doors and draws to work a piece of furniture or in this case a room together blending all the parts together. Using another oil stain made with van dyke brown and black, selectively applying it in corners, trim and modeling it with a dry brush. When the stain drys I can shape it more and highlight edges by rubbing it back with 0000 steal wool or scotch bright.

IMG_1020.JPG
IMG_0956.JPG IMG_1072.JPG

The effect after a clear coat, but I want to add more amber. yellowing of the finish like old finish does. So I tinted the lacquer with raw sienna dye stain, I also evened up boards that are not dark enough with tint.

Oh boy after lots of steps and colors I just dropped the gun after spraying this wall

IMG_1080.JPG
 
It's just as it says, it's designed to wipe on.
Theoretically you can wipe on any of those oil base poly, and as you'v done dilute it as well. I don't know what's available to you in your country, but I'm sure a search would find it for you.

With nice fine antiques they where finished with a technique called "French Polish". If you look at the finish it looks really thin but the grain is filled. This is done with a rag wadded tight like a hard pad and shellac. It's not easy to do as the finish is very sticky, drys fast, and also is a solvent to the finish you'v already laid down. However done right this fills the grain and leave a thin finish on the wood surface all the while the hard padding leaves a burnished even sheen as the final result.
Sorry, I think you may have misunderstood me. I should have said I wasn't sure what the OP meant by "wipe-on poly". Yes, I've wiped on thinned oil-based polyurethane varnishes many times and been happy with it. I've had less success with the water-borne stuff, which behaves quite differently. Was the OP using oil or water based polyurethane? :dunno:

Yes, I've done quite a bit of french polishing too.

BTW, that's some very impressive work. :thumbsup:
 
Holy CRAP! That is absolutely stunning! And it isn't even done!
Thanks for the compliment, that armoire and night tables where done. Those photos where taken and sent to the designer to get him excited to come look in person. The whole goal in this job was to make things look unfinished. I did a color shift with color and in the case of the bedroom stuff it has enough lacquer on it to protect it. I'm still working on other stuff for this house yet, it's been a pretty big
project, doing outside and inside furniture for many rooms. I have a very nice kitchen table to do, forgot what kind of wood, 6 teak chairs and 6 teak bar stools for the kitchen, and 12 walnut dinning room chairs. I finished all the other rooms last year and these are just the last things left before final install of the project.

I never put much stock into being filthy rich but being surrounded by such beauty as your work is going to motivate me to work a hell of a lot harder. Bravo!
Yeah I go to many amazing homes and work on some great furniture, but I'm a finisher and also work on the mundane also. Hell I'v been finishing so long, the crap nobody wanted in the 80s that was 50s & 60s junk is now in vogue. However in most the new huge homes they are copying the style but much bigger and better quality hand made to fit the room sizes better. A 6 foot credenza made back then wouldn't look good on a 30 foot wall, however they will make a new one 14-15 feet long to fit these big homes better.
 
@4-2-7 Youre doing site finishing which is WAY different then finishing in a climate controlled booth! Also WAY different than the guy thats going to sand and refinish something in his garage. When you are finishing your own product in your own shop you will have a company that you buy your products from. You work with them to develop a system that works with your shop. A lot of these companies will create a system if you need custom colors. You send in a sample, and they will figure it out for you! What you are doing is totally different. The only thing we were originally talking about was swirl marks. And my original point about that stands.
 
@4-2-7 Youre doing site finishing which is WAY different then finishing in a climate controlled booth!
:wtf:

Booth

IMG_0425.JPG

Shop
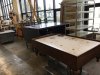
IMG_0523.JPG IMG_0679.JPG IMG_0584.JPG IMG_0588.JPG

IMG_0591.JPG IMG_0575.JPG

Also WAY different than the guy thats going to sand and refinish something in his garage. When you are finishing your own product in your own shop you will have a company that you buy your products from. You work with them to develop a system that works with your shop. A lot of these companies will create a system if you need custom colors. You send in a sample, and they will figure it out for you! What you are doing is totally different.

No one figures out how I need to do any finish, or what product to use other than me. I'm not a manufacturer doing one type of finish that has been figured out for me and doing the same thing all day every day. My day is different every day with obstacles and coming up with the best way to do each job. As you can see the shop is full of very different jobs all the time, new old and other wise. I don't get you really Lazerus, you keep making statements your not knowing anything about, and just keep assuming. My last post to you I had hoped you actually learn something from, I put a lot of time into it for you, and I get this back from you. Yeah I'll stand by my statement that one should sand to 150-180 to start their finishing work, done right, and proper finishing techniques you will not have swirl marks. If you do have them your not sanding right nor is your finishing techniques the right direction so you should stop and adjust something to eliminate the problem.

Again you are proving my point of why I don't comment in home hobbier threads, I always get someone who knows nothing about the real world of professional finishing try to ague a point that they know best how to do it. I learn new things every day in my trade, I'm always open to it. But their is a way and a way not to do basic steps.
 
:wtf:

Booth

View attachment 1757088

Shop
View attachment 1757089 View attachment 1757090 View attachment 1757091 View attachment 1757092

View attachment 1757098 View attachment 1757099


No one figures out how I need to do any finish, or what product to use other than me. I'm not a manufacturer doing one type of finish that has been figured out for me and doing the same thing all day every day. My day is different every day with obstacles and coming up with the best way to do each job. As you can see the shop is full of very different jobs all the time, new old and other wise. I don't get you really Lazerus, you keep making statements your not knowing anything about, and just keep assuming. My last post to you I had hoped you actually learn something from, I put a lot of time into it for you, and I get this back from you. Yeah I'll stand by my statement that one should sand to 150-180 to start their finishing work, done right, and proper finishing techniques you will not have swirl marks. If you do have them your not sanding right nor is your finishing techniques the right direction so you should stop and adjust something to eliminate the problem.

Im not going to argue with you since you are the type that thinks he has it all figured out! I guess I am a little but this is my final statement on this matter. I guarantee GUARANTEE that you have swirl marks if you are finishing over 180 grit RO!! Get your inspection lights at the right angle and you will see them. I have the best RO Sanders you can buy and I know how to use them. They make a swirl pattern. That’s how they work! THE ONLY ****ING WAY TO GET RID OF THEM IS TO HAND SAND WITH THE GRAIN. This is not something that can be debated. It is a fact. I’m done. You can bombard the thread with pictures all you want.
 
I'll leave your thread now, sorry it's the way it is now, if you would like any info on another project don't hesitate to PM me. Or you could follow Lazerus guidance:confused:
You are something else. Is this new work? I can see large scratches in it! If you guys are letting that pass, then of course you don’t care about the swirl pattern

987C7845-ED5F-4179-931E-E6E328BE5992.jpeg
 
You are something else. Is this new work? I can see large scratches in it! If you guys are letting that pass, then of course you don’t care about the swirl pattern
:jump:

Thats a half done finish, and it's in a 100 year home, the goal is for it not to look new.

This is a 1920s home that the customer wanted the new to look like other hundred year old wood in the house

The small panel is the approved sample that matches the old in the house.
IMG_0913.jpg

I actually distressed the sample more but not really the job as it will get it's own ware and tear. Some of the counter tops got some, base boards, and between the construction site and everyone working around it before I got there it was good to go.

Lazerus, you should see what I have to do with some brand new fine furniture a shop took their talent building. I'll beat the **** out of it, take chisels and cut open joints, throw stain spots on it, add ring marks, scrap it, cut laminated joints lines on a top so it looks planked. No my friend you just keep going with what you know little about.

This was a very nice brand new custom dinning table top, made from solid mahogany. They wanted it to look old, they didn't want red that the mahogany is naturally. They wanted it to look like a very old chestnut table that might have been in a kitchen of the 1700s. Hell it didn't matter what I did to it the designer would come in and say she wanted more. I think I really got a good effect when I took lacquer thinner and started to wash through my finish at the ends of the table. I was already doing color changes there because old tables get the finish worn through at the ends from plates. Do you see any scratches on this brand new table?

I tried, hell I put burn marks, rings dented and stained, banged it with bottles because they have bumpy bottoms and leave unique marks. You see I'v worked with new and antiques many many years working with old furniture, leaves me with what damage accrues on it. The damage will be different over centuries that a piece survives, they had oil lamps in the 1700s, quill pens, firearms that are heavy as well as swords, knifes and cutlery. Hot cast iron pots, dishes and plates with a ruff ring on the bottom **** happen and this stuff left it's mark on what was once new 300 years ago.
Art work? or a Finish?

IMG_0721.JPG IMG_0722.JPG IMG_0723.JPG IMG_0725.JPG IMG_0726.JPG IMG_0728.JPG IMG_0727.JPG
 
Last edited:
Yeah. I’ve done plenty of distressing. But I’ve never included semi circular scratch marks.. You’re just going to continue to bombard with photos so you can achieve an authoritative win, so bravo. I now agree that you are the only person in the world that can get an RO sander to not produce a swirl pattern. Congrats.
 
Back
Top Bottom