• The move to the new server is done. There are some software and database maintenance updates in process. This has us passing the hat around to help out. We appreciate any donations. Seriously, even a dollar helps. The payment page may be found here - https://www.audiokarma.org/support.html

Working on an SX-1280

Cleaned up the faceplate and knobs last night, it's lookin' pretty good! Got the pots treated with Faderlube F5, hit the switches with Deoxit D5. No more scratchy sound or channel dropouts.

Hi, I have a SX 780 with a scratchy left side. Last night I squirted Deoxit D5 in all the switches and knobs turned them all about 40 times back and forth and then hit them with FaderLube F5 and did the same process. The scratchy left side is still there. This is a first for me to work on any audio equipment. So help me please, can you identify the pots that you say you treated so I may do the same and get the left side fully functuioning again? If this doesn't work, what's next? Thanks.
 

Attachments

  • IMG_6761.jpg
    IMG_6761.jpg
    87.5 KB · Views: 45
drummergrl; You need to start a NEW THread specifying the problem with the 780, and any remedial work that you have done. Go to the AKDATABASE and get the Service Manual for the 780.
It's considered poor form to hijack a thread.
Larry
 
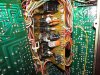
Access to PS board. I tied off the protect board out of the way, and also to relieve any stress on the wire wraps. I now have access to all the joints I'll need to reach, without having to put undue stress on the PS board wire wraps by flipping it out all the way. I'll probably need to push the PS board back up to fit the big axial caps in from the component side of the board. Anyway, this should work much better than trying to recap the PS board with it still upright in the chassis. :D
 

Attachments

  • IMG_0206.jpg
    IMG_0206.jpg
    100.1 KB · Views: 67
  • IMG_0207.jpg
    IMG_0207.jpg
    140.7 KB · Views: 74
Yowser thats tight quarters. I see why pictures are a necessity in case a wirewrap comes off. Once through that board rebuild would be plenty enough entertainment for one afternoon.
-Lee
 
Finally got back to the 1280. I'd really like to thank Pioneer for slopping that glue all over the boards. :rolleyes: The axial caps on the PS board are a bit unpleasant to remove. Some of the caps in here are in poorer shape than I first thought. I've removed a few that had 1/16" of shiny top showing. Those big resistors do a fine job of cooking the electrolytics. Got about a dozen caps to go, then I can get the 1280 back together.
 
As big as the 1280 is, I'm surprised to see how small the big filter caps look compared to the 1980. Thanks for the pics and good luck on the rebuild.
 
As big as the 1280 is, I'm surprised to see how small the big filter caps look compared to the 1980. Thanks for the pics and good luck on the rebuild.

The 1250 uses larger cans than the 1280 --- but the 1980 uses the biggest.
Why the can was downsized for the 1280 ,I don't have an answer,my bet was to save cost~~~.
 
Finally got back to the 1280. I'd really like to thank Pioneer for slopping that glue all over the boards. :rolleyes: The axial caps on the PS board are a bit unpleasant to remove. Some of the caps in here are in poorer shape than I first thought. I've removed a few that had 1/16" of shiny top showing. Those big resistors do a fine job of cooking the electrolytics. Got about a dozen caps to go, then I can get the 1280 back together.

Acetone softens the glue for cleanup - UNLESS it has been baked a deeper brown and hardened to a more brittle substance - then acetone doesn't work. ( fast enough? if at all - I gave up)

I usually see the baking when it's used to mount transistor heat sinks, caps usually don't get hot enough - AND once you get the cap moving slightly a slow steady pull usually brings a lot of the glue up off the board.
 
Last edited:
Got all the old glue off the PS board, and finished installing new Panasonic FC caps. I got it all put back together so it would be safe for an ops check power on. Relay engages, and voltages on the power supply look good. Most of them are a bit high, the 13V pins are at 13.7, the 32V pins are at 32.8. I would figure that is in tolerance, allowing for line voltage variations and such.

I guess it's on to some of the transistors and diodes on the PS board now. I have most of the parts on hand.
 
The 1250 uses larger cans than the 1280 --- but the 1980 uses the biggest.
Why the can was downsized for the 1280 ,I don't have an answer,my bet was to save cost~~~.

The filters in the 1280 are 100V 15000uF, the Spec 2 appears to use the same filters.
 
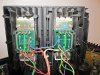
Protect board and power supply installed. Cleaned the boards and surrounding area up a bit. All new Panasonic FC capacitors, except for the Nichicon axials. Voltages measure good on the PS, and the relay engages, so it's time to proceed to the amp boards.
 

Attachments

  • IMG_0274.jpg
    IMG_0274.jpg
    89.5 KB · Views: 56
Last edited:
The 1250 uses larger cans than the 1280 --- but the 1980 uses the biggest.
Why the can was downsized for the 1280 ,I don't have an answer,my bet was to save cost~~~.
Not likely to save cost, because if that was the case, then they would have used smaller caps in the 1980 since it succeeded the 1280, but the 1980 and 1250 share the same 22,000uF caps, however I believe the 1980's is 100 volt versus the 1250 is 85 volt, am I right? I too have a 1280 and it is currently being worked on. It has gremlins that my tech is havng trouble trying to exhume. He's been working on it for the better part of six months now.
 
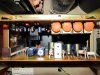
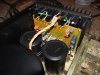
Now we're having fun! Pull 8 screws, flip the amp assembly over on top of the transformer, and you have access to everything in there! Just make sure that caps are discharged, you don't want any unpleasant surprises. And keep a close eye on that bias diode.

I'm going to recap the board, and probably regrease the outputs.
 

Attachments

  • IMG_0278.jpg
    IMG_0278.jpg
    102.1 KB · Views: 62
  • IMG_0279.jpg
    IMG_0279.jpg
    98.8 KB · Views: 57
OK, amp boards are recapped and cleaned. Outputs regreased as well. I did a bit of general cleanup on the chassis and tuner board to make her look a bit better too.

I set bias and DC offset. It takes a while to warm up, bias climbs up and settles at 15mV after about 5 minutes. DC offset drifts a bit while it's warming up too. Starts at around 90mV, drifts down to 5mV in about a minute. It floats within a couple mV of 5 after it's warmed up. Should I be concerned?

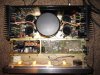
The last pic shows it playing some tunes, running my Dahlquist DQ-10s. Sounds pretty nice.
 

Attachments

  • IMG_0287.jpg
    IMG_0287.jpg
    119.5 KB · Views: 61
  • IMG_0289.jpg
    IMG_0289.jpg
    85.9 KB · Views: 47
  • IMG_0288.jpg
    IMG_0288.jpg
    91 KB · Views: 51
No work on the front panel boards?

I can understand leaving the tuner alone...
 
No work on the front panel boards?

I can understand leaving the tuner alone...

I mostly wanted to get those overheated caps in power supply and protect done. The amp boards were dirty, so I pulled those to clean up and also regrease the outputs.

But I haven't worked on Pioneer before, so if it's important to hit the preamp boards, I'll get in there. How tough are they to access?

Also, do you think the bias and offset is OK?
 
Where/when the bias/offset settle after warming up should be the factory recommended set points (0.000v and 0.015v). the 11/17 and 12/18 are measuring and comparing the sharing of the load between the two pairs of output transistors. one set ( an arbitrary selection of one versus the other) should be at 15, and then if the other set is between 10 and 25, everything is ok.

You have improved the reliability of the unit, but have not touched the preamp "sound portion" at all.

The only way to find out about the sound, is to try it.. All these boards are mounted behind the front panel, and are easier (usually) to get to than the boards in the "chimney", once the front panel comes off.

The 1280's I have worked on have received owner comments afterward indicating there were improvements, but i do more than recap, I change transistors, and disassemble/clean/reassemble switches etc... all of which impact things.
 
Last edited:
Thanks for the pointers, Mark. I'll let Joel take a listen so he can make the call on how it sounds. We were mainly looking to make the unit a reliable daily driver.

But I'll probably get in the preamp boards sometime in the future. There's quite a few tantalums in those boards.
 
Back
Top Bottom