• The move to the new server is done. There are some software and database maintenance updates in process. This has us passing the hat around to help out. We appreciate any donations. Seriously, even a dollar helps. The payment page may be found here - https://www.audiokarma.org/support.html

Yamaha CR-1040 Maintenance

Chalkboard

Member
I have a CR-1040 needing some maintenance. I thought instead of asking questions all over the forum, I would just consolidate most of them in one spot.

The receiver has been in storage for more than 20 years and it was working perfectly when stored. I have powered it up and it sounds fine using the aux or tuner inputs. However, the phono section is not working. My turntable works fine when connected to a CR-420, so I can eliminate the turntable as the problem.

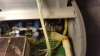
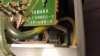
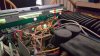
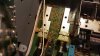
Since this receiver has never been serviced, I am starting with the assumption something just needs to be cleaned, especially since the phono section was working when stored. I have removed what I think is the constant power regulator board, so I have access to the input and output selector switches. There are two openings on the tops of the switches, as well as a large opening in the rear (see photo) where I am hoping to spray some cleaner. There is another switch, the MC/MM (also pictured,) where I will do the same. My dad used the MC setting, so I was probably the first person to switch it to MM.
20180726_081734.jpg

The MC/MM switch front view:
20180726_081832.jpg

The MC/MM switch top view:
20180726_081847.jpg

After some research on this forum and elsewhere, it seems spraying the switches with deoxit, followed by compressed air (turned down to 25psi,) and finish with some faderlube could be the way to go.

I would appreciate any thoughts or advice on this first step. The receiver has other issues such as the meter lights not all illuminating at the same level, and possible cap leakage, or excess glue on the regulator board mentioned above. But for now, I just want to focus on the phono section.

Bob
 
Register to hide this ad
it seems spraying the switches with deoxit,
Deoxit goes on the switches and controls internal electrical contacts within the switch. Won´t do a darn bit of good spraying down the external switch.
 
These need to be removed from the board , disassembled and cleaned.
index.php
 
There are two openings on the tops of the switches, as well as a large opening in the rear (see photo) where I am hoping to spray some cleaner.
Won´t do any good. Needs to be disassembled. Once you see what the insides looks like you will understand why the external holes won´t do diddly.
 
index.php


Note the plastic pockets that the sliders reside in. Thats what prevents the deoxit from even getting to the contact areas.
 
index.php


Note the plastic pockets that the sliders reside in. Thats what prevents the deoxit from even getting to the contact areas.

A photo is worth a thousand words. Obviously, I wasted a couple of hours trying to clean those switches. And unfortunately, I don't know if I have the skills to remove and disassemble them. I'll have to look at it again tomorrow.

There has been absolutely no sound, or even any static coming from the phono section. The only way to hear anything would be place my ear next to the cartridge. Maybe working the switches as much as I did today will clean them up some. I'll test it tomorrow. Thank you for sharing your knowledge.

Bob
 
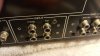
Success! I am not sure how the phono section is working, but it is. And after looking at Avionic's photo, I don't really see how any deoxit could have found the contacts, so maybe just working the switches as much as I did was the trick. I also cleaned the phono input jacks (see photos.) I didn't really have the right tools to clean them very well. First, I tried a magic eraser pad and deoxit which didn't do much. I then tried some Nevr-Dull and finally got some dirt/corrosion off. I couldn't clean the phono and aux inputs further, as I didn't want to mar the rear chassis plate finish. In the future, I may try to mask off the plate with some painter's tape and then really dig in. But today, I just wanted to spend the afternoon listening to some music and save the cleaning of rca jacks for another day.

Condition of jacks after 20 years of storage.
20180727_114145.jpg

Condition of phono and aux jacks after fiddling with them (not done.)
20180727_120953.jpg

So what fixed it? Did a drop of deoxit find its way home, or did working the switches dislodge something, or maybe cleaning the jacks? I don't know, but I am glad the phono section is working. So now on to the next problem.
 
Last edited:
...I also cleaned the phono input jacks (see photos.) I didn't really have the right tools to clean them very well. First, I tried a magic eraser pad and deoxit which didn't do much. I then tried some Nevr-Dull and finally got some dirt/corrosion off. I couldn't clean the phono and aux inputs further, as I didn't want to mar the rear chassis plate finish. In the future, I may try to mask off the plate with some painter's tape and then really dig in. But today, I just wanted to spend the afternoon listening to some music and save the cleaning of rca jacks for another day.

Condition of jacks after 20 years of storage.
View attachment 1245308

Condition of phono and aux jacks after fiddling with them (not done.)
View attachment 1245310

A small trick for cleaning those RCA jacks that I learned from Avionic. Take a small piece of rag, soak it with some Deoxit and use a 9mm socket over the rag along with a little twisting and the jack will clean up very nicely.

Cheers,
James
 
..Small piece of cloth is actually a shotgun cleaning patch.

Unfortunately I had to sell my 12ga pump, SKS, Ruger 10/22 and M1911 Mk.IV/70 before moving over here. So I no longer have access to shotgun cleaning patches. :(

Cheers,
James
 
A small trick for cleaning those RCA jacks that I learned from Avionic. Take a small piece of rag, soak it with some Deoxit and use a 9mm socket over the rag along with a little twisting and the jack will clean up very nicely.

Cheers,
James

I like this idea!

Or you favorite polishing compound. I like Blue Magic..Small piece of cloth is actually a shotgun cleaning patch.

Nevr-Dull is all I have on hand, so I will have to go with it. Your idea mentioned above looks like the way to go, but I will be sticking the polish wadding into the socket instead of a patch.

Thanks, Bob
 
The next maintenance item: Meter Bulbs

The meter bulbs are not all lit equally. In the linked thread, the OP had the same problem, but no resolution was ever posted.

http://audiokarma.org/forums/index.php?threads/yamaha-cr-1040-dim-meter-lights.800555/#post-11109171

Front: Note the one on the far left looks like it is working, not so much when seen from the back.
20180727_121603.jpg


Back: They all appear to have a different level of brilliance. And, I'm not sure if the one on the far right is working (far left when viewed from the front.)
20180727_121813.jpg

My first thought is to just order the 4 bulbs or (5 including the pointer,) and just be done with it. But, if you looked at the linked thread, the OP did just that only to be in the same position after changing them. So, I thought maybe some troubleshooting should be done first. I have a downloaded service manual and schematic, and should be able to locate test points with some guidance.

I am definitely not in a hurry to solder bulbs in, as I haven't soldered anything in 40 years. I also need to get some tiny insulated clips for my multi-meter probes so I can troubleshoot and I'm not sure if these clips can be purchased locally. Of course, as my luck would have it, a bulb has recently gone out on my cr-420, and I should probably practice on it first, since it's not an heirloom. The 420 is an impressive receiver. It has made it more than 40 years without ever being touched.

Thanks in advance for any troubleshooting tips! Also, is it considered OK, or appropriate to have two threads going on two different receivers? I would like to start a similar thread for my 420.

Bob
 
It has been quite some time since I posted, but to update. I continued to listen to the receiver's great sound for a couple of years without ever fixing the dim meter bulbs. Then, upon powering up in my new listening room after moving in late '21, no relay click and the dreaded protection light. I subbed in my CR-420 and put the 1040 back in storage until now.

I have reread some of the threads dealing with the 1040, and hope it is not the chips. The unit has been in the family since new and has never been worked on to my knowledge, other than me fiddling with it. Curiously, I do see where a light bulb was replaced/spliced and it looks to be an exact replacement, color of wires and all. My 90 year old dad does not remember a bulb being replaced, but doubt it came from the factory with a splice.

My investigation thus far has determined the fuses are all good. And as it is easy to do, I also checked the voltages at TP1 and TP2.
TP1= 54.96
TP2= -100mv

The amp has sentimental value, and any suggestions on where to go next with an emphasis on simple would be appreciated.
 
TP1= 54.96

Most probable cause of this is a failed output "power pack", Yamaha IG02960 or Sanyo STK0080II. You could remove it and verify that the receiver will then come out of protection, but going further than that goes beyond the realm of simplicity.
 
Back
Top Bottom