• The move to the new server is done. There are some software and database maintenance updates in process. This has us passing the hat around to help out. We appreciate any donations. Seriously, even a dollar helps. The payment page may be found here - https://www.audiokarma.org/support.html

Yamaha MX-1000 repair

Alonia

Member
Hello, I'm new here )
Currently I have a broken Yamaha MX-1000 on my table.
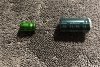
After a few hours of measuring I located the defective parts and desoldered them.

I do not know if I can take these parts as replacement parts.

[ The "A" version has a lower voltage. I still have some of them.
I'm not sure if the "A" version fits in terms of voltage].

2SA1306B = 2SA1837 (or 2SA1306A)
2SC3298B = 2SC4793 (or 2SC3298A)

2SC2240 = KSC1845
2SA970 = KSA992
(The diode is not broken. Would like to know if the BZX could be used as a comparison type)
MTZ6.2C = ‎BZX55C6V2
1SS133 = 1N4148
MA185 = BAV21

I am looking forward to helpful answers :)
 
Last edited:
Register to hide this ad
Hello, I'm new here )
Currently I have a broken Yamaha MX-1000 on my table.
After a few hours of measuring I located the defective parts and desoldered them.

I do not know if I can take these parts as replacement parts.

[ The "A" version has a lower voltage. I still have some of them.
I'm not sure if the "A" version fits in terms of voltage].

2SA1306B = 2SA1837 (or 2SA1306A)
2SC3298B = 2SC4793 (or 2SC3298A)

2SC2240 = KSC1845
2SA970 = KSA992
MTZ6.2C = ‎BZX55C6V2
1SS133 = 1N4148
MA185 = BAV21

I am looking forward to helpful answers :)

are you sure only the drivers on that channel went bad?

A = 180V
B = 200V

The originals are 1.5A Ic devices, A1837 and C4793 are 1A Ic devices.
Use the A version if you have on hand.
 
are you sure only the drivers on that channel went bad?

A = 180V
B = 200V

The originals are 1.5A Ic devices, A1837 and C4793 are 1A Ic devices.
Use the A version if you have on hand.

noo :)
there is more bad.
The previous owner tried to repair it and broke even more...
He replace the four 1ohm 1/4W resistors with 1ohm 1W and he overlooked damaged parts on the main board. Probably he thought that was enough :crazy:

Here is a list of all defective parts I have found so far:

main board:
R531 = 100ohm 1/4W
R533 = 100ohm 1/4W
Q513 = 2SC3416 => replace with KSC3503
Q515 = 2SA1352 => replace with KSA1381
Q511 = 2SC3416 => replace with KSC3503
R547 = 1ohm 1/4 W
R548 = 1ohm 1/4 W
D507 = ISS133 => replace with 1N4148
D509 = ISS133 => ...
D511 = ISS133 => ...

The diode is not broken. Would like to know if the BZX could be used as a replacement type.
D515 = MTZ6.2C => replace with BZX55C6V2 ???

Left Channel:
Q309 = 2SA970 =>replace with KSA992 ???
Q311 = 2SC2240 => replace with KSC1845 ???
Q313 = 2SC3298(B) => replace with 2SC3298(A) => is there an alternative to 2SC3298(A,B)?
Q315 = 2SA1306(B) => replace with 2SA1306(A) => is there an alternative to 2SA1306(A,B)?
D309 = MA185 => replace with BAV21 ???
R309 = 1Kohm 1/4W

I think the final transistor 2SC3280 and 2SA1301 can be replaced with 2SC5200N and 2SA1943N right?

One 2SC3280 is blown So I have to exchange all 2SC3280 and 2SA1301, because you should not mix different series :)

The marked replacement types (which are marked with three "???") I am not sure if I can use them.
 
Last edited:
responses inline below:

noo :)
there is more bad.
yes, it looks like Chernobyl
The previous owner tried to repair it and broke even more...
He replace the four 1ohm 1/4W resistors with 1ohm 1W and he overlooked damaged parts on the main board. Probably he thought that was enough :crazy:

Here is a list of all defective parts I have found so far:

main board:
R531 = 100ohm 1/4W
R533 = 100ohm 1/4W
Q513 = 2SC3416 => replace with KSC3503
Q515 = 2SA1352 => replace with KSA1381
Q511 = 2SC3416 => replace with KSC3503
R547 = 1ohm 1/4 W
R548 = 1ohm 1/4 W
D507 = ISS133 => replace with 1N4148
D509 = ISS133 => ...
D511 = ISS133 => ...

The diode is not broken. Would like to know if the BZX could be used as a replacement type.
D515 = MTZ6.2C => replace with BZX55C6V2 ??? yes, 6.2v @1/2w

Left Channel:
Q309 = 2SA970 =>replace with KSA992 ??? Yes
Q311 = 2SC2240 => replace with KSC1845 ??? Yes (c1815 and a1015 would work too, but the input stage calls for low noise and the c1845 and a992 are better suited)
Q313 = 2SC3298(B) => replace with 2SC3298(A) => is there an alternative to 2SC3298(A,B)? Use the A version if you do not have a B version. The transistor does not see that high voltage anyways. Stick with the plastic case. for TO-220 alternatives you would have to worry about electrical insulation to the heatsink
Q315 = 2SA1306(B) => replace with 2SA1306(A) => is there an alternative to 2SA1306(A,B)? same as above
D309 = MA185 => replace with BAV21 ??? yes but why not get the originals: https://www.electronic-spare-parts.com/descript/m/ma_185.htm
R309 = 1Kohm 1/4W

I think the final transistor 2SC3280 and 2SA1301 can be replaced with 2SC5200N and 2SA1943N right? yes, C5200 and A1943 from Toshiba, were the recommended factory replacements

One 2SC3280 is blown So I have to exchange all 2SC3280 and 2SA1301, because you should not mix different series :) yes, replace all power transistors and output transistors on the bad channel with C5200 & A1943. If this was my amp, I would do the same for the other channel, but that is not required.

The marked replacement types (which are marked with three "???") I am not sure if I can use them.
 
responses inline below:

noo :)
there is more bad.
yes, it looks like Chernobyl
The previous owner tried to repair it and broke even more...
He replace the four 1ohm 1/4W resistors with 1ohm 1W and he overlooked damaged parts on the main board. Probably he thought that was enough :crazy:


Here is a list of all defective parts I have found so far:

main board:
R531 = 100ohm 1/4W
R533 = 100ohm 1/4W
Q513 = 2SC3416 => replace with KSC3503
Q515 = 2SA1352 => replace with KSA1381
Q511 = 2SC3416 => replace with KSC3503
R547 = 1ohm 1/4 W
R548 = 1ohm 1/4 W
D507 = ISS133 => replace with 1N4148
D509 = ISS133 => ...
D511 = ISS133 => ...


The diode is not broken. Would like to know if the BZX could be used as a replacement type.
D515 = MTZ6.2C => replace with BZX55C6V2 ??? yes, 6.2v @1/2w


Left Channel:
Q309 = 2SA970 =>replace with KSA992 ???
Yes
Q311 = 2SC2240 => replace with KSC1845 ??? Yes (c1815 and a1015 would work too, but the input stage calls for low noise and the c1845 and a992 are better suited)
Q313 = 2SC3298(B) => replace with 2SC3298(A) => is there an alternative to 2SC3298(A,B)? Use the A version if you do not have a B version. The transistor does not see that high voltage anyways. Stick with the plastic case. for TO-220 alternatives you would have to worry about electrical insulation to the heatsink
Q315 = 2SA1306(B) => replace with 2SA1306(A) => is there an alternative to 2SA1306(A,B)? same as above
D309 = MA185 => replace with BAV21 ??? yes but why not get the originals: https://www.electronic-spare-parts.com/descript/m/ma_185.htm
R309 = 1Kohm 1/4W

I think the final transistor 2SC3280 and 2SA1301 can be replaced with 2SC5200N and 2SA1943N right? yes, C5200 and A1943 from Toshiba, were the recommended factory replacements

One 2SC3280 is blown So I have to exchange all 2SC3280 and 2SA1301, because you should not mix different series :) yes, replace all power transistors and output transistors on the bad channel with C5200 & A1943. If this was my amp, I would do the same for the other channel, but that is not required.

The marked replacement types (which are marked with three "???") I am not sure if I can use them.

Thanks a lot for your help.:bowdown:
I looked around the internet again and found the following transistor:
2SC4883(A) 2SA1859(A)

It has 180V
it is more a replacement for the A version (2SA1306A / 2SC3298A)

Can I use it as a replacement part?
The transistor does not see that high voltage anyways.

https://www.semicon.sanken-ele.co.jp/sk_content/2sa1859_ds_en.pdf
https://www.semicon.sanken-ele.co.jp/sk_content/2sc4883_ds_en.pdf

https://datasheetspdf.com/pdf-file/952382/Toshiba/2SA1306B/1
https://datasheetspdf.com/pdf-file/514185/ToshibaSemiconductor/2SC3298B/1
 
Last edited:
those would work

Thanks for that.
I will report when the MX-1000 is working again.

Can I work with 2 output transistors and 2 power transistors to test the channel? (Q317, Q319 and Q347, Q349).
I am pretty sure that it works with 4 transistors in total. Of course I do not have the full power but it will not be so expensive in case of a failure.

A master does not fall from the sky.:rflmao:

index.php
 
Last edited:
Thanks for that.
I will report when the MX-1000 is working again.

Can I work with 2 output transistors and 2 power transistors to test the channel? (Q317, Q319 and Q347, Q349).
I am pretty sure that it works with 4 transistors in total. Of course I do not have the full power but it will not be so expensive in case of a failure.

A master does not fall from the sky.:rflmao:

index.php
I am not sure that you can get the APS working with just two power transistors.
Yes to the output transistors. A single pair should suffice to get it going. You should also check out the forum as there is a wealth of information about the restoration of these amps. Particularly helpful for you it would be to look into @amr2 description on how to power up the main board without the amp sub-boards.
 
While I was searching for the error, I wanted to change all capacitors. Then I'm on the safe side in case one of them is faulty or something.
I just read that the ES series is used as a replacement for BP-P capacitors when it is in the audio range. If it's in other places you use VP or EP.
I only have ES series capacitors on hand. Can I use them on the power supply board?
My trust in myself disappears :bowdown:
 

Attachments

  • 19935971-36B3-4EEC-822A-AD18722D4DD8.jpeg
    19935971-36B3-4EEC-822A-AD18722D4DD8.jpeg
    216.3 KB · Views: 43
how to power up the main board without the amp sub-boards.

I have read some topics and I could not find out if one sub-board is enough to avoid damaging the power supply board (without resistors between +LB and -LB etc.).
I can actually test the right channel and check with an oscilloscope if it amplifies properly, because it is not defective.
I will not solder it in place, but mount probes with leads. So that I can still get to the solder side in case of a failure.
 
Last edited:
I have read some topics and I could not find out if one sub-board is enough to avoid damaging the power supply board (without resistors between +LB and -LB etc.).
I can actually test the right channel and check with an oscilloscope if it amplifies properly, because it is not defective.
I will not solder it in place, but mount probes with leads. So that I can still get to the solder side in case of a failure.
if one of your amp boards works and if you are confident the main board works, you can power the amp that way without having to worry that you would damage the PSU. If you look at the schematic, this is not a dual-mono design. The two transformers and all four main caps provide current to both alps at the same time. The load from one of the working amps should suffice to get that thing going (if you do not have other issues).

Use a DBT to power up the first time.
 
if one of your amp boards works and if you are confident the main board works, you can power the amp that way without having to worry that you would damage the PSU. If you look at the schematic, this is not a dual-mono design. The two transformers and all four main caps provide current to both alps at the same time. The load from one of the working amps should suffice to get that thing going (if you do not have other issues).

Use a DBT to power up the first time.

That sounds good.
I contacted @amr2 to get some more information about the PSU. I will test the VAS on the weekend before I connect a SUB board.
Thanks a lot for your help!
 
Good News!
the PSU / VAS works without problems!
I will now check the SUB boards.
I would also have been surprised if I had overlooked defective parts. Always measure there very accurately, that saves a lot of trouble and magic smoke.;)
1604B346-2C83-47C8-9664-75D8BEFE41E0.jpeg
 
:thumbsup:

how is your DC offset?

The DC offset is 10mV (+-1) as described in the service manual.
The repaired one I had to adjust, the working one fitted with 9,5mV
The offset is stable and does not fluctuate.
Or is the information in the service manual wrong?
 
Back
Top Bottom