• The move to the new server is done. There are some software and database maintenance updates in process. This has us passing the hat around to help out. We appreciate any donations. Seriously, even a dollar helps. The payment page may be found here - https://www.audiokarma.org/support.html

Yamaha newbie A-700 resto thread

analogwisdom

When in doubt, stuff in a WIMA
Hey all.

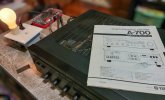
With the graciousness earlier this week I received an A-700 in need of some love.
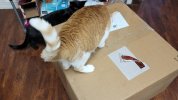
1.jpg
What's in the box?! :jump:

2.jpg

He packed it extremely well, this thing was in there like a glove. Kudos on the great packaging. I'm gonna hoard the box and material to use in the future. :biggrin:
3.jpg

I bought an original Service Manual and Schematic. It came with a service bulletin that's not online yet, but it's a pretty boring one... Just a notice that the 2SK270 FET is being discontinued and can be replaced with two 2SK170's. I built a DBT earlier this week as well, in anticipation for this project and future ones. I was told it would light up in Class A mode and dim in AB mode, which how the amp behaved! It's definitely in need of a bit of love. Turning any of the pots caused the signal to drop out like crazy, and the input source buttons were lighting up erratically, getting stuck and not switching.
deoxit.jpg
Naturally, it got a good preliminary soak in Deoxit...! The buttons freed up a bit, but they will need a closer look and cleaning. I hope it's not too difficult. I saw another thread where isopropyl was suggested, so I will try that once I begin work proper on the unit. It sounds great through headphones right now! :banana: I can tell once it's really cleaned up it'll be a treat.

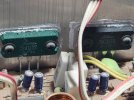
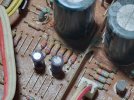
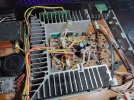
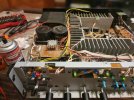
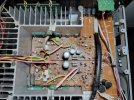
Some inside shots:
4.2.jpg

6.jpg

4.3.jpg

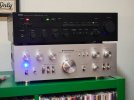
Thankfully this is the only spot where any of the caps spread that dreaded glue I've read about. I've got quite a bit of work to do to get this thing really cleaned up, but I'm eager to dive in. Here's a photo after the Deoxit, with my Kenwood KA-7300 just for fun:
with-kenwood.jpg

I have read through every thread I could find, and already have a Mouser order on the way for all of the capacitors I'm going to replace, the parts damaged by glue, new thermal compound, and new bias transistors as I saw suggested in another thread. Can't wait to really dig in and share my progress on this! I think it'll be pretty straightforward... Fingers crossed, anyway.
 
Last edited:
Register to hide this ad
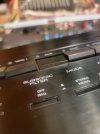
button.jpg

Gonna go ahead and ask my first question: Any suggestions to fix this? It's pretty bent to **** and holds its button down, and I can't figure out how to bend it back into place. Also, are there any other troublesome parts in this amplifier that are recommended to replace? I'm open for any advice or suggestions at all. Thanks!
 
I'm gonna hoard the box and material to use in the future. :biggrin:
You wouldn't believe how long I've had that box. It originally protected an oscilloscope at work which was returning from the calibration lab. No way was I gonna toss it, so I brought it home and kept it in storage for a couple of years, waiting for the right time to use it. Shipping the A-700 was the perfect opportunity!
 
Well, small update. Disregard my question on the faceplate above. The power button and class-A button were in need of gluing back on anyway, which I was going to do. However, one of the cats decided that the loose buttons (which I stupidly left on a table :crazy:) would be fun toys to bat around the house and they are lost to the void now. Thankfully there was a matching faceplate on eBay so that's now on the way...
 
Last edited:
However, one of the cats decided that the loose buttons (which I stupidly left on a table :crazy:) would be fun toys to bat around the house and they are lost to the void now.
Work bench pussy 101:
One could pacify the cats with a scratching post in the middle of the room. Pepper the top of the post with cat nip. Pepper it once once a week at least. I do that in my living room so my cats leave my speakers alone. It works, they're stoned all day.
While your parts are enroute...be mindful of the corroded glue part areas and not just for the obvious reasons. You'll have a component or three that might have corrosion eating away on the solder side of the board. Sometimes that old glue eats away the circular solder trace. Where that circular trace meets the thin board trace can become a high resistance connection if ya don't catch it during the service.

Nice Kenwood piece by the way and welcome to the Yamaha arena.
Meeow
 
Last edited:
I just don't get cats. a lot cheaper that way and more money to spend on audio gear, caps, resistors, transistors, test equipment , soldering wire etc etc etc :D

Athanasios
 
Work bench pussy 101:
Pacify the cats with a scratching post in the middle of the room. Pepper the top of the post with cat nip. Pepper it once once a week at least. I do that in my living room so my cats leave my speakers alone. It works, they're stoned all day.
While your parts are enroute...be mindful of the corroded glue part areas and not just for the obvious reasons. You'll have a component or three that might have corrosion eating away on the solder side of the board. Sometimes that old glue eats away the circular solder trace. Where that circular trace meets the thin board trace can become a high resistance connection if ya don't catch it during the service.

Nice Kenwood piece by the way and welcome to the Yamaha arena.
Meeow
Thanks for the advice. I guess I need to keep the kitties stoned from now on :rflmao:

I didn't think to check the underside of boards where that glue is for parts that'll need replacing. I will do that too. Thanks for pointing that out. I plan on re-doing every suspect* solder joint and de-fluxing the boards so I'll keep my eyes out.
 
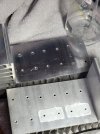
Started to get 'er down to the skeleton today. I got the main board completely out, and the heatsinks too.
1000008517.jpg

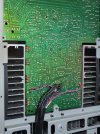
Back of the main board!
1000008524.jpg

Top heat sink cleaned, bottom one not quite yet.
1000008549.jpg

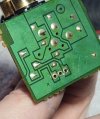
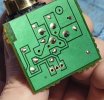
Phono input board before and after. Start small, right? :biggrin:
1000008555.jpg

20240227_214634.jpg


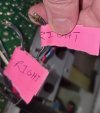
I labeled the desoldered wires with post-its and took tons of videos so hopefully I can get it back together correctly. I think I will:

1000008557.jpg


More to come soon!
 
I didn't think to check the underside of boards where that glue is for parts that'll need replacing.
It's almost impossible to see. I notice it when desoldering parts mainly. The circular trace turned to white powder and/or raises off the board. :thumbsdown: Seems to happen on the jumpers if memory serves.
 
Last edited:
1000008564.jpg
1000008565.jpg
1000008567.jpg

1000008569.jpg

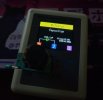
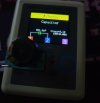
Here's what the 4 caps with glue around them on the main board measured, if anyone's curious... Not really sure how much I trust this cheapo tester. I think it's best for matching transistor pairs, since even if it measures inaccurately, you can still match transistors with it. Mouser order is out for delivery today, the real fun is about to start!
 
Last edited:
Great progress! It's a good idea to replace all the aged electrolytic caps. Did you plan on replacing some of the smaller rated electrolytic caps with film caps? Wima films seem to be the preference around here.
 
Great progress! It's a good idea to replace all the aged electrolytic caps. Did you plan on replacing some of the smaller rated electrolytic caps with film caps? Wima films seem to be the preference around here.
Yes sir. I'm a WIMA freak, I ordered possible replacements for anything 10uF and below. I have spare electrolytics just in case some won't fit into place, though. I know that it's a bit of a no-no from most people and it's almost certainly pointless, but I'm possibly going to replace most of the Mylars with WIMAs as well. We'll see how I feel about it once I get started!
 
Are you replacing the main filter caps per chance? ( largest ones)
I hadn't planned on it unless it's absolutely necessary. I haven't replaced the ones in my Kenwood yet, either. Frankly, the reason is because it's intimidating and I'm afraid I'll wire something up or put them in wrong, so I want to leave them alone until I have more experience.
 
I hadn't planned on it unless it's absolutely necessary. I haven't replaced the ones in my Kenwood yet, either. Frankly, the reason is because it's intimidating and I'm afraid I'll wire something up or put them in wrong, so I want to leave them alone until I have more experience.
Understood...I shy away from those too on my mid 80's Yammies thinking there's another 10 years left on them at least. Thinking about swapping them on my A-1020 project pretty soon though. Our pieces run hot so I've heard.
 
I hadn't planned on it unless it's absolutely necessary. I haven't replaced the ones in my Kenwood yet, either. Frankly, the reason is because it's intimidating and I'm afraid I'll wire something up or put them in wrong, so I want to leave them alone until I have more experience.
Replacing the main filter caps is not quite as difficult as you imagine. If you decide to have a go at it, match the outer dimensions of the new caps (diameter and height) to be as close as possible to the originals. Of course matching the μF and voltage is important, and you may have to go higher with those in order for the caps to fit nicely in place.
The only drawback is you lose the nice Yamaha insignia on the old caps.

I took a bad and blurry picture of the A-700 main filter underside due to limited access and lighting. Looks like there's plenty of room to de-solder/solder if you choose to do this.

A-700 main filter caps.jpg
 
20240228_224200.jpg

Worked on the main board this evening. I wasn't joking about being a WIMA freak, lol! Of course, I missed a few caps when I made my Mouser order, and I also accidentally got Vishay resistors that are too big... But it's never possible to make just one parts order, is it?

Here's everything that's been replaced so far:

1000008577.jpg


A lot of work to go still, and sadly the most fun part is basically out of the way. Time for some more cleaning soon...
 
Back
Top Bottom