


Defeño
Active Member
Today I cured my Yamaha R8 Receiver's Alzheimer's. It was incredibly easy, and if your R-8 or similar receiver keeps forgetting its presets, you can cure Alzheimer's too.
By way of background, this receiver was made during the 1980's so surviving examples are getting long in the tooth. My own came from a friend who had found it at a yard sale about 5 years ago. Though it looks a little worse for wear, it worked fine. (Except for the fact that the flap that covers the front panel controls refuses to stay shut. If anyone knows a fix for this, please comment.) Most importantly, it had a set of presets for radio stations, and would remember your selection after the power was cycled. Not long ago, the receiver developed Alzheimer's and every time I turned it on, I'd have to re-tune the radio station. Not a biggie, but kind of a nuisance.
But like all nuisances, it finally motivated me to do something, so I figured I'd pop off the cover and look for a small mercury battery, which is frequently used for such circumstances. But I was frustrated to find no such thing. So I resigned myself to simply re-tuning my favorite radio station every time I turned on the unit. It was a minor annoyance, but otherwise the receiver continued to work well. Recently I decided to do a bit more research and I discovered that instead of using a small battery to remember the presets, Yamaha had elected to use a supercapacitor instead. The same site explained that the supercapacitor was installed on the board that controls the presets, etc.
The supercapacitor in question is a 0.047 F @ 5.5V (or 47 mF @ 5.5 V) component, and I easily located one on eBay. With shipping, it set me back $6.00USD. This morning, I installed it. Surprisingly, it it was incredibly easy and only took about 20 minutes, and I didn't even have to remove the circuit board. What follows is a step-by-step set of instructions so you can do the same. If you have the most basic soldering skills, and are careful, I believe that virtually anyone could complete this repair.
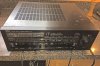
Step 1: Remove the top cover and locate the capacitor.
The top cover is held in place by 4 screws on the sides and two on the back.
The capacitor sits on the preset control board. Facing the receiver, this board is on the right side of the receiver and parallel to the floor. The capacitor sits on the left edge of this board, about half of the way toward the back.
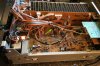
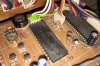
Step 2: Remove the bottom panel
This is held on by about 9 screws. Once you have this panel off, locate the capacitor's two pins and also carefully note the orientation of your existing capacitor. In my case, the capacitor had a stripe on one side which corresponds to the ground side of the capacitor. You can tell which side of the capacitor is ground because it's attached to (or part of) the outside housing of the cap. (Not to be confused with the shrink-wrap cover.) Using either solder wick or a solder sucker (what I used) de-solder the capacitor.

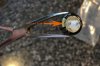
Step 3: Replace the capacitor
Install your new capacitor making sure that the ground side of the new capacitor is in the same position as the old one was. In my case, the ground side of the cap was the striped side, and this was the same for both old and new. On my receiver the ground side was facing the right side of the receiver as seen from the front.
Step 4: Reassemble and enjoy getting your receiver's memory back!
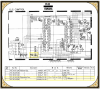
Schematic of the relevant board:
Cheers,
Kim G
Boston, MA
Where it's great to be home again with our own nice stereo setup.
By way of background, this receiver was made during the 1980's so surviving examples are getting long in the tooth. My own came from a friend who had found it at a yard sale about 5 years ago. Though it looks a little worse for wear, it worked fine. (Except for the fact that the flap that covers the front panel controls refuses to stay shut. If anyone knows a fix for this, please comment.) Most importantly, it had a set of presets for radio stations, and would remember your selection after the power was cycled. Not long ago, the receiver developed Alzheimer's and every time I turned it on, I'd have to re-tune the radio station. Not a biggie, but kind of a nuisance.
But like all nuisances, it finally motivated me to do something, so I figured I'd pop off the cover and look for a small mercury battery, which is frequently used for such circumstances. But I was frustrated to find no such thing. So I resigned myself to simply re-tuning my favorite radio station every time I turned on the unit. It was a minor annoyance, but otherwise the receiver continued to work well. Recently I decided to do a bit more research and I discovered that instead of using a small battery to remember the presets, Yamaha had elected to use a supercapacitor instead. The same site explained that the supercapacitor was installed on the board that controls the presets, etc.
The supercapacitor in question is a 0.047 F @ 5.5V (or 47 mF @ 5.5 V) component, and I easily located one on eBay. With shipping, it set me back $6.00USD. This morning, I installed it. Surprisingly, it it was incredibly easy and only took about 20 minutes, and I didn't even have to remove the circuit board. What follows is a step-by-step set of instructions so you can do the same. If you have the most basic soldering skills, and are careful, I believe that virtually anyone could complete this repair.
Step 1: Remove the top cover and locate the capacitor.
The top cover is held in place by 4 screws on the sides and two on the back.
The capacitor sits on the preset control board. Facing the receiver, this board is on the right side of the receiver and parallel to the floor. The capacitor sits on the left edge of this board, about half of the way toward the back.
Step 2: Remove the bottom panel
This is held on by about 9 screws. Once you have this panel off, locate the capacitor's two pins and also carefully note the orientation of your existing capacitor. In my case, the capacitor had a stripe on one side which corresponds to the ground side of the capacitor. You can tell which side of the capacitor is ground because it's attached to (or part of) the outside housing of the cap. (Not to be confused with the shrink-wrap cover.) Using either solder wick or a solder sucker (what I used) de-solder the capacitor.
Step 3: Replace the capacitor
Install your new capacitor making sure that the ground side of the new capacitor is in the same position as the old one was. In my case, the ground side of the cap was the striped side, and this was the same for both old and new. On my receiver the ground side was facing the right side of the receiver as seen from the front.
Step 4: Reassemble and enjoy getting your receiver's memory back!
Schematic of the relevant board:
Cheers,
Kim G
Boston, MA
Where it's great to be home again with our own nice stereo setup.
Last edited:


