

You are using an out of date browser. It may not display this or other websites correctly.
You should upgrade or use an alternative browser.
You should upgrade or use an alternative browser.
1963 FISHER DIPLOMAT D38...I want one but...
- Thread starter ODYOFAEL
- Start date


Nah. A GU-11!
If you have a Full size Pickup, they should fit upright. Make sure you either tighten down the travel stops on the turntables or just take them out. Take a diagram of the tuner and amp, and pull each tube and mark it against the diagram. Wrap in tissue and pile them in a shoebox (or other small box) and keep in the cab.

ODYOFAEL
The Voice of Vintage HiFi
If you have a Full size Pickup, they should fit upright. Make sure you either tighten down the travel stops on the turntables or just take them out. Take a diagram of the tuner and amp, and pull each tube and mark it against the diagram. Wrap in tissue and pile them in a shoebox (or other small box) and keep in the cab.
It's my girlfriends brother-in-law's Mitsubishi Montero. With the rear seats folded down, I'll be able to fit the 60 inch console. I'm not sure if I can fit another one though. I'm off to San Diego in a few minutes. Updates when I get back.

I'll set the turntables down, I think I won't have enough room if I take them out.
DAMN! TWO Fisher consoles in one day? You better stop NOW. I was away a couple days. Always hit GW and SAs on vacation (what better souvenir than a record? ANOTHER Fisher!). First thing I did was fire up the console when I got home.
Really, CONGRATULATIONS on your treasures. Once gone over, you'll be using them as "daily drivers".
Really, CONGRATULATIONS on your treasures. Once gone over, you'll be using them as "daily drivers".

 :thmbsp:


ODYOFAEL
The Voice of Vintage HiFi
Thanks guys, I was quite surprised by its condition. It was really in veru condition for its age. Some of the 12AX7A tubes (3 tubes) were replaced with different brands (vintage Dumont, Zenith and RCA). Also de6cided to change the phono tubes with my VM (1957 mullard) ECC83 tubes.
DEOXIT all the pots and cleaned the dial, it had a couple dead spiders inside.
Listening:
I noticed everytime I turn it on, I hear a sort of tube noise coming from the right channel, a slight hum when I switch to phono but does not increase when i turn up the volume. I also noticed, the treble adjustment is already in the max setting and I am still not getting the right amount of treble I want.
I do not hear any distortion whatsoever.
QUESTION:
With all those mentioned (Listening), what would the first thing to take care of? Has anyone recapped the whole preamp section and and what would the best caps to use?
Last edited:
Many of us have recapped. It would be a good idea (almost mandatory) that you do it or have it done. Follow the threads here, ask questions and go for it. Get the Fisher shematic. Personally, I like to also have the Sam's because it shows actual photos of the chassis with everything labeled. And take LOTS of photos first.
One easy step is to replace the crossover caps on the speakers.
One easy step is to replace the crossover caps on the speakers.
Very Nice! It cleaned up really well!
As for the phono hum, check the interconnects, (clean the ends with deoxit). You can twist the RCA's to clean them some to start and it may stop the hum. You will find that modern RCA cables are too large(the rubber insulators) most times. So you can get new cables, just install smaller insulator ends on them.
Try swapping the 6HU8's side to side. These are the driver tubes for the transistors. If it still has that tbe rush when starting up, find which tubes are on which side and roll them side to side, (allow 10 minutes per stop-start cycle), and when the tube rush swaps sides that's the noisy tube.
As for caps in the preamp, you can use any film cap you want. DME series from CD are smallish in size but fairly neutral IMO. As are ECQ's. Mallory Axial 150 series are a big long, but sound pretty good in these. Illinois caps make a smallish white axial that fits well in the preamps. Then there are the Orange Drops, Russian PIO's, Jensens, Angela's, Auricaps, etc. for when you want to spend more $$.
Start out easy and get a baseline sound from it. I did my Futura 4-5 years ago with DME's and Illinois and haven't touched it since. I like it, but you may not. (The Futura has the 59A amp/59T preamp) which is basically the same but updated to the A690.
As the POWER SUPPLY in these Hybrid consoles handle the load for both the amp and tuner/preamp, it needs a good amount of attention. From previous experience with the 2 I have at home, The power supply is barely up to the task, and makes one hell of a lot of heat from resistors. I'm surprised they have lasted as long as they have, with the caps running at near max voltages 100% of the time, and resistors getting so hot they heat up the chassis to finger burning temps at times. So what we need to do is increase the voltage reserve on the P.S. caps, and install larger wattage resistors. (3w resistors in the values you need are hard to find anyway, so 5w are going to be your friends).
The Transistors tend to get pretty warm so I would recommend you pull them (one at a time) clean them, clean the mica(don't crack the mica or it'll short the transistor), then regrease both sides of the mica, and the transistor with White Silicon based heatsink grease). You'll find the original stuff has dried up and isn't working as it should be. Just enough to make a THIN OPAQUE LAYER!!!!!! Anymore than that and the transistor will overheat and blow. You want just enough to fill the microscopic valleys and airpockets in the metal and mica for heat transfer.
Replace the diodes. uf4007's to replace them. The 390ohm 3w resistors between the can cap sections should be uprated to 5W. The CAN's are 3300uf 35V (IIC) and are single section. Gut them and install new caps inside. TRY NOT TO BREAK the phenolic wafer the can's sit on. If they do break, grind out the rivets, and bolt on new wafers with 4-40x3/8" bolt and nuts. Then install the can's and wire up. The rest of the amp caps are mainly above 1uf so you can use Electrolytics. The one multisection can in the middle of the chassis you can replace with separate cap's. When looking for them get the shortest, squatest ones you can find. Nichicon makes some that fit well. 47uf 350V IIRC. I follow the wires back from the cap to the 1st terminal strip (usually along the back wall) the wire goes to and remove the wire and mount the cap there. You'll need to replace the axials with axials as the distances are more than radial leads will handle in most cases.
If your's still has the 4 BIAS POTS, DO NOT TOUCH THEM PERIOD!!!! FISHER had problems with them and came out with a fix in 19 on the 49A amp. These are EXTREMELY TOUCHY and can open from shock and blow the transistors and you've got a pretty doorstop. You can measure the bias per the manual, just don't adjust it. If it does need adjusting, take it and the preamp to FRED LONGWORTH @ www.repairaudio.com/. He's an AK member and has many years of experience with all kinds of audio. He knows about the bias problems.
C25 and C29 are your Voltage Doubler Caps. 100uf/200V. Operating voltage is 385 at C25. Too close for comfort. Bump them up to 220uf @ 350V each. This gives you more than 15V of headroom and also increases the
capacitance a bit to help with Dynamics.
C23 and 28 are your Main CAN CAPS. 3000uf / 35v. B+ and B- is 32V at them so upping them to 50V is a good idea. 3300uf/50V.
Leave the rest of the can cap values alone. Raise the voltages a bit tho as they are generally running close to the max value of the cap. C20A-B-C raise to 47uf @ 450V. C20D raise to 68uf@350V. The increase here is due to the "new" value system from the 70's.
C21 and 22 are fine (value and voltage) as is. 220uf@35V.
Replace all the resistors in the POWER SUPPLY. They get
over hot and cook. Values are off at this point. These power supplies run very hot and the parts take a beating as the ventilation just ain't there.
R44-45-46-48-49-50-51 are all 3w resistors and should be replaced with 5W resistors. R43 and R47 are 100K unknown wattage. If you can determine the wattage currently there, increase it to the next higher value. They will still dissipate the same as before but because they are able to handle more wattage they will be cooler, overall heat will be somewhat less.
On the PREAMP/TUNER the MPX Relay has a wire clip holding it on. For god sake don't lose it.
Clean all the RCA JACKS with DeOxit (D-5) and a Pipe Cleaner, Dental Braces Brush, or a Gas Welder Tip brush. A lot of the hum and noise problems on these units come from the jacks making lousy contact.
DeOxit all the controls again. A lot of times 1 application and exercise of pots and switches does not get thru the crud on the surfaces to clean metal. Here's how I DeOxit a 49A.
Spritz ALL Pots, Switches, and RCA's. Walk away for 30 minutes. this gives the solvents time to soften up the Atmospheric Sulfates that have gathered on the contacts (And Southern Calif. has more than it's share of pollution).
Come back and spritz each one at a time in turn. As you spray(another short spritz) Work it up/down, in/out, roundy round 40-50 times. One last good shot to flush out the junk. Plenty of paper towels needed.
Do each one in turn. When done, give them all a shot of FADERLUBE (F-5), and wipe down all areas as good as you can to get the overage so it doesn't drip all over.
ReAssemble the unit. DO NOT PLUG IN AT THIS TIME! Walk away and let it sit overnight with a fan on it to dissipate the odor, and to dry up the solvents.
In the morning, before starting up exercise all pots,and switches again. 20-30 times each is sufficient. Plug it in. With the Volume all the way down, turn on the unit and let it warm up for 3 minutes. Set the volume to about 8:30 and exercise the tone controls listening for changes in sound (do this on an AM or FM station). Switch to Phono and test again. Same with AUX, and Tape Monitor (a CD Player in the TAPE PLAY Jacks). Listen for tonal changes and hum. If everything runs fine, good to go.
The Phono section is the furthest from the amp, then Aux, and the tape monitor is closest to the amp. So as you go from one to the other with the volume set the same, you may notice a slight decrease from Aux to Tape Monitor. This is normal as Tape Monitor is 1 gain stage closer to the outputs. It's the way they were designed.
---------------------------------------------------------------------------------------------------
About the easiest thing you can do is to change the speaker xover caps. Axial caps of 100uf for the Woofer, 18uf for the Mids, and 2uf for the tweeters. One each per side. Partsexpress has nice Dayton 100V axial caps that work well for this. You may have to parallel a couple of caps for the 18uf tho as it's an odd size. Open up the speaker enclosures from the back and you'll see a piece of plywood with the network on it.
Larry
ODYOFAEL
The Voice of Vintage HiFi
Larry, thanks. I'll be doing the last part first which is to replace the caps on the cross over.
so I walked to speaker city here in Burbank and bought the parts except for the 100uf (prixey). I have the 2 and 18.
I wanted to ask why a big jump for the cap value. I opened the baffles and saw the caps and one is a 1.0 uf 150vdc and a 4 uf 50vdc. what will happen here?
TIA
so I walked to speaker city here in Burbank and bought the parts except for the 100uf (prixey). I have the 2 and 18.
I wanted to ask why a big jump for the cap value. I opened the baffles and saw the caps and one is a 1.0 uf 150vdc and a 4 uf 50vdc. what will happen here?
TIA
Not sure about the 100uf for the woofer or the 18uf for the mid. My Futura is set up the same way.
If your's has a 4 and a 1, install the same values.
Larry
If your's has a 4 and a 1, install the same values.
Larry
ODYOFAEL
The Voice of Vintage HiFi
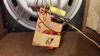
I'm not sure if this is the original cross over. I also checked the schematic for the Crossover and mine does not have the same drivers as the the ones on the the diagram .Not sure about the 100uf for the woofer or the 18uf for the mid. My Futura is set up the same way.
If your's has a 4 and a 1, install the same values.
Larry
Attachments


Last edited:
Looks like your's is a very early '64 and it has a mix of A-68 and A-69 parts. The A-68 xover and speakers are very close to what you have. The Woofer and tweeter are the same #'s but the Mid is a 113 in the manual. You have a 114. Close enough. The caps are a 6uf and 2uf in the manual. AND the Resistors should be a R1=10ohm, R2=15ohm. Looks like you have a 22ohm and something else (upper left can't read.).
Compare the other side and see if it's the same or different. If it's the same, replace with same. If different post the changes.
I did some digging afterthe above and found out that....................................
YOU HAVE THE XOVER AND SPEAKERS FROM A '63 FUTURA (680-A). Same basic setup, just different values. Go with what you have and make the notation in your manual. It was not uncommon for FISHER to use up excess parts from previous years. Nothing wrong with it just that it gets cornfusing 50 years later. Pull the manual for the 63' Futura and keep it handy. Check the AMP Model on the Ambassador. It may be a 680-A or a 690-A. Either is fine. Basically the same amp.
Last edited:

ODYOFAEL
The Voice of Vintage HiFi
Sorry if it took a while for me to respond. I finally got my antenna working right so now I get to listen to my favorite station here in LALA land, 88.1 KKJZ. All I can say is the last time I heard FM like this was on my dad's old setup. It sounds so real, it's live! Really, thigh is Fisher Amssador sounds amazing. There is nothing like big speakers. And I haven't done anything to it yet except the detox it part and recapped the Phono section (.022 uf 450 vdc).Looks like your's is a very early '64 and it has a mix of A-68 and A-69 parts. The A-68 xover and speakers are very close to what you have. The Woofer and tweeter are the same #'s but the Mid is a 113 in the manual. You have a 114. Close enough. The caps are a 6uf and 2uf in the manual. AND the Resistors should be a R1=10ohm, R2=15ohm. Looks like you have a 22ohm and something else (upper left can't read.).
Compare the other side and see if it's the same or different. If it's the same, replace with same. If different post the changes.
I did some digging afterthe above and found out that....................................
YOU HAVE THE XOVER AND SPEAKERS FROM A '63 FUTURA (680-A). Same basic setup, just different values. Go with what you have and make the notation in your manual. It was not uncommon for FISHER to use up excess parts from previous years. Nothing wrong with it just that it gets cornfusing 50 years later. Pull the manual for the 63' Futura and keep it handy. Check the AMP Model on the Ambassador. It may be a 680-A or a 690-A. Either is fine. Basically the same amp.
Now the bad.
The radio sounds better...far better than when I'm playing records. I have to turn the treble full blast to get highs and not even enough to get realistic highs. With radio, I have the settings to flat, smetimes I turn down the bass to around 9 o'clock setting.
I've already tried a different cartridge (newer) and still got the same sound.
I really need advice.

TIA
What cartridge was in it and what did you replace it with. It's normal to have to "crank up the volume" some when playing LP's due to the low input voltage of the phono stage, (single digit millivolts) vs. the "line level or Radio inputs (100's of millivolts). As for the treble being cranked it's probably because of the rest of the preamp that hasn't been recapped. Phono adds a whole Gain section to get approx the same input at the tone control section (not totally the same but close) that the AUX, and Tape Monitor inputs don't have. Also did you change C72 and 73 (.01uf/500v)ceramic? At least check them for value. If low or high change them out.
If you have a outboard phono preamp, try it. Plug it in to the AUX RCA's and the turntable to the preamp. Set the Control panel to AUx and play a LP. If there is an increase in sound levels with attendant reduction in treble use, then the phono section has a problem.
You may have to go with a HIGH OUTPUT Magnetic cartridge with the Type "A". All of my 60's FISHER consoles (see signature) came with a FISHER BRANDED variation of the PICKERING V15 (V15F) or ATE cartridge. These have an output of between 4 to 6 mv. I have tried the STANTON 500V.3 and the now NLA 400V.3. The 400V.3 can be had still on EBAY. It's output is 10mv, and you hear everything. When I say everything I mean EVERYTHING. Motor vibrations from worn motor mounts, idler offcenter, idler pits, bumps and bearing noise on the platter. Once you get past those the 400V.3 is a decent cartridge. It's best on a direct drive or a belt drive, but it can be used on a idler that has been worked on to minimize the noise leaks.
You can get conicals, ellipticals, and JICO SHibata styli for the V15 which the 400V.3 is the modern version of. the 500V.3 is slightly lower in output (about7 to 8mv IIRC) but it's not so sensitive to noise leaks from the turntable.
I'd go ahead and recap the rest fo the preamp, and the amp. Then work on the turntable (clean and relube, new motor mounts, idler wheel, and rewire the tonearm. This will correct 99% of the problems with the turntable. The other 1% is figuring out what cartridge works well in your situation. I tend to stick with the 400V.3 or 500V.3 with the FISHER's.
Larry
P.S. If you don't have the owners manual, get the one for the F-59 (1964 FUTURA V) It uses the same AMP and PREAMP/TUNER, controls are the same. www.fisherconsoles.com.
Larry