Zether
New Member
Hi all,
I have been listening music so far using a Naim NAIT 5i with Dali Oberon 7 speakers, but found this combination to be lacking in the low end so went on a quest to find a "new" amplifier which would hopefully be able to drive the speakers better.
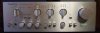
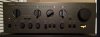
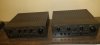
Due to the environment I have been raised in, I have always had a soft spot for Technics amps, especially the semi-separates with large VU meters. However, as I was doing my research I ultimately kept being drawn to the Technics SU-V8 with its dual mono block setup.
I was scouring Ebay and other sources for quite a while and ultimately ended up buying 2x Technics SU-V8, one had a rather low price and the other one somewhat more expensive. I thought it would be cool to restore both to their former glory and was hoping I could restore one and listen to the other one.
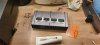
The cheaper one had all sorts of muck on the outside and the inside and had a very particular smell to it (I think it was covered with tar from cigarettes), there was even a bit of rust on the chassis, the New Class A bulb had burned out, high frequency filter switch was wonky (does not have the same feel as others, does not feel "solid"). There was sound coming out of both channels, but all the switches were dirty and sometimes working, sometimes not. Volume knob was producing crackling sounds. It did not seem as if this had ever had much love, albeit I could see some re-soldering having taken place at some point and later found a couple of electrolytes that had been replaced. This one had flux all over all the PCBs. Incorrect and not enough screws holding the cover to the chassis.
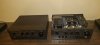
The prettier and more costly specimen looked fine on the outside, produced sound in both channels, looked a bit dirty inside, but nothing compared to the other one, and seems quite original. There are still places that show its age, such as solder joints, some DC voltage at speaker terminals etc, but it works fine.
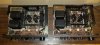
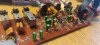
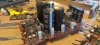
Anyways, I decided I would confront the cheaper one first, mostly due to the smell and the obvious issues it had. I dismantled it and gave it a good wash using polypropylene to get rid of the flux, tar, dust and everything else that had found its way into this amp. I re-soldered every single solder joint on all of the boards. I also decided to check all the electrolytes one by one and I found quite a few dead ones on the equalizer/voltage regulator board which is placed vertically on the right, plus one of the filter caps was leaking.
This made me think of a total recap as I did not feel I wanted to revisit and troubleshoot ancient electrolytes every once in a while. So I made a list of all the caps and decided to order 2x the amount needed (excluding the filter caps) so that I would have them at hand when I start working on the other one. This ended up being a stroke of luck as I had misread some of the caps when making my list, but was saved by the fact that I had bought more of the correct sizes, so I could still do a full recap without having to wait for another order to arrive.
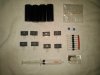
I decided on Nichicon Muse series caps and for the filter caps selected 12000uF Cornell Dubilier Electronics 382LX123M080A082 (in real life they ended up being ~10800 uF) as they were the exact same dimensions, pin out etc as the originals. I also got the necessary 6,3 V, 250 mA bulb.
All the transistors seemed to be in working state, i.e not shorted.
While I was waiting for the parts to arrive, I was mostly reading this forum and trying to educate myself - this led to building a DBT.
Once the parts arrived, I replaced all the electrolytes. Cleaned all the switches and the volume knob, cleaned the heatsinks and reapplied heatsink paste (I reused the micas and made sure to check for any shorts) and ultimately put it all together again.
To my great surprise there was no smoke coming out the first time I switched it on even though I went Gung ho on this. The bulb tester seemed to indicate everything being in order.
I then proceeded with adjusting the voltage regulator, DC balance, Clamp voltage and Icq according to the service manual (with no bulb tester connected).
Things that need to be sorted still:
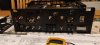

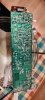
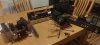
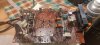
I am looking for advice regarding the DC voltage on the speaker terminals. I am guessing that those voltages warrant some further work on this unit and does this usually indicate a problem with the driver transistors? The manual says Q614 (2SC2632-R), Q618 (2SC1913-Q), Q616 (2SA1124-R), Q620 (2SA913) are all drivers for the right channel. Any thoughts on how to go about this?
I have been listening music so far using a Naim NAIT 5i with Dali Oberon 7 speakers, but found this combination to be lacking in the low end so went on a quest to find a "new" amplifier which would hopefully be able to drive the speakers better.
Due to the environment I have been raised in, I have always had a soft spot for Technics amps, especially the semi-separates with large VU meters. However, as I was doing my research I ultimately kept being drawn to the Technics SU-V8 with its dual mono block setup.
I was scouring Ebay and other sources for quite a while and ultimately ended up buying 2x Technics SU-V8, one had a rather low price and the other one somewhat more expensive. I thought it would be cool to restore both to their former glory and was hoping I could restore one and listen to the other one.
The cheaper one had all sorts of muck on the outside and the inside and had a very particular smell to it (I think it was covered with tar from cigarettes), there was even a bit of rust on the chassis, the New Class A bulb had burned out, high frequency filter switch was wonky (does not have the same feel as others, does not feel "solid"). There was sound coming out of both channels, but all the switches were dirty and sometimes working, sometimes not. Volume knob was producing crackling sounds. It did not seem as if this had ever had much love, albeit I could see some re-soldering having taken place at some point and later found a couple of electrolytes that had been replaced. This one had flux all over all the PCBs. Incorrect and not enough screws holding the cover to the chassis.
The prettier and more costly specimen looked fine on the outside, produced sound in both channels, looked a bit dirty inside, but nothing compared to the other one, and seems quite original. There are still places that show its age, such as solder joints, some DC voltage at speaker terminals etc, but it works fine.
Anyways, I decided I would confront the cheaper one first, mostly due to the smell and the obvious issues it had. I dismantled it and gave it a good wash using polypropylene to get rid of the flux, tar, dust and everything else that had found its way into this amp. I re-soldered every single solder joint on all of the boards. I also decided to check all the electrolytes one by one and I found quite a few dead ones on the equalizer/voltage regulator board which is placed vertically on the right, plus one of the filter caps was leaking.
This made me think of a total recap as I did not feel I wanted to revisit and troubleshoot ancient electrolytes every once in a while. So I made a list of all the caps and decided to order 2x the amount needed (excluding the filter caps) so that I would have them at hand when I start working on the other one. This ended up being a stroke of luck as I had misread some of the caps when making my list, but was saved by the fact that I had bought more of the correct sizes, so I could still do a full recap without having to wait for another order to arrive.
I decided on Nichicon Muse series caps and for the filter caps selected 12000uF Cornell Dubilier Electronics 382LX123M080A082 (in real life they ended up being ~10800 uF) as they were the exact same dimensions, pin out etc as the originals. I also got the necessary 6,3 V, 250 mA bulb.
All the transistors seemed to be in working state, i.e not shorted.
While I was waiting for the parts to arrive, I was mostly reading this forum and trying to educate myself - this led to building a DBT.
Once the parts arrived, I replaced all the electrolytes. Cleaned all the switches and the volume knob, cleaned the heatsinks and reapplied heatsink paste (I reused the micas and made sure to check for any shorts) and ultimately put it all together again.
To my great surprise there was no smoke coming out the first time I switched it on even though I went Gung ho on this. The bulb tester seemed to indicate everything being in order.
I then proceeded with adjusting the voltage regulator, DC balance, Clamp voltage and Icq according to the service manual (with no bulb tester connected).
Things that need to be sorted still:
- Replace the high frequency filter switch (waiting for the part to arrive)
- Need to source some screws for the cover
- DC voltage at speaker terminals (11 mA on the left and 45 mA on the right channel)
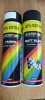
- Need to sand down the rust on the back panel edge which touches the cover and spray paint it.
I am looking for advice regarding the DC voltage on the speaker terminals. I am guessing that those voltages warrant some further work on this unit and does this usually indicate a problem with the driver transistors? The manual says Q614 (2SC2632-R), Q618 (2SC1913-Q), Q616 (2SA1124-R), Q620 (2SA913) are all drivers for the right channel. Any thoughts on how to go about this?