• The move to the new server is done. There are some software and database maintenance updates in process. This has us passing the hat around to help out. We appreciate any donations. Seriously, even a dollar helps. The payment page may be found here - https://www.audiokarma.org/support.html

AK Design Collaborative - Insignia-Class Economy Speakers (a.k.a Indignia)

What the hell happened to Mindignia (or whatever) subwoofer project?
:scratch2:

russellc

Mindignia is the .25cuft version of Indignia using the smaller drivers from the center channel. Here they are awaiting finish.

attachment.php


Insubnia is the subwoofer and it hasn't become anything yet. There's a seperate thread for the 3 chamber bandbass design that was started but I don't think it was finished. I was thinking more along the lines of a simple powered, sealed sub for this one. Discuss amongst yourselves.
 

Attachments

  • mindignia.jpg
    mindignia.jpg
    23.3 KB · Views: 780
Re: Insubnia

There was a small powered sub made with the subject Tang Band woofer at the Nor Cal meet. Once the pics are up, I will post it here. It was part of an uber-cute mini system. I'll invite the builder to share the design details; we were never able to come up with a workable small alignment using that woofer like what I saw yesterday.... :dunno:

attachment.php
Laub photo.

Edit:

http://www.rjbaudio.com/Cerberus/cerberus.html
 

Attachments

  • obj233geo234pg12p13.jpg
    obj233geo234pg12p13.jpg
    33.2 KB · Views: 388
Last edited:
Interalian's Indignias

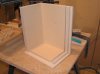
The cabinets are coming together now but man, my garage is sure a dusty mess. Seeking an opinion: I'm using 1" MDF (regular weight). Should I add any internal bracing or will it be sufficiently resistant to resonance with thicker stock?

I just stopped for the day since I just about made a stupid mistake...

p1010001.jpg


p1010002.jpg


p1010003.jpg


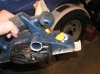
Oh, and this new tool had to be added to the cause - makes trimming a gnat's wing off the panels a breeze, plus takes out any saw marks.

p1010004.jpg
 

Attachments

  • p1010001.jpg
    p1010001.jpg
    55.9 KB · Views: 17
  • p1010002.jpg
    p1010002.jpg
    61.3 KB · Views: 16
  • p1010003.jpg
    p1010003.jpg
    62.1 KB · Views: 19
  • p1010004.jpg
    p1010004.jpg
    79.7 KB · Views: 16
Last edited:
Using 1" MDF for a small box like Indignia, I'd say no bracing required, but Ray's our expert on that.

A planer?

That's serious wake-the-neighbors power tooling there.... :banana:
 
I wouldn't think you'd need any bracing for a cab that small with 1" MDF. I also wouldn't want to carry them very far. :) That's going to be a chunky little set of speakers. Very nice looking joinery there.

We need a Tim "the Tool Man" Taylor grunt smiley for that planer. Like they say...I gotta get me one of those!

Ray
 
A planer?

That's serious wake-the-neighbors power tooling there....

Naw, they're used to it. Well noise, anyway:

P1010011-1.jpg


I might use this for break-in. :yes:

I wouldn't think you'd need any bracing for a cab that small with 1" MDF. I also wouldn't want to carry them very far. That's going to be a chunky little set of speakers. Very nice looking joinery there.

We need a Tim "the Tool Man" Taylor grunt smiley for that planer. Like they say...I gotta get me one of those!

Ray

Thanks Ray. I spent the better part of an hour just aligning the saw. It's amazing how far out of square and true it gets just being moved around on the mobile base. Now that it's set up properly it won't be moved until the cutting is done.

AD
 

Attachments

  • P1010011.jpg
    P1010011.jpg
    108.4 KB · Views: 17
Last edited:
I spent the better part of an hour just aligning the saw. It's amazing how far out of square and true it gets just being moved around on the mobile base. Now that it's set up properly it won't be moved until the cutting is done.

I do that every time I start a new project even though my saw never gets moved. Vibration, sawdust, and wear all contribute to changing settings. That said, I still measure each new setup rather than trusting the saw indicators. Takes longer, but then that's part of the fun of using the tools. :banana:

BTW a good featherboard makes sure the material stays where it's supposed to be. :yes:

Very nice work! :thmbsp:
 
More pix. Done for the day barring cleanup (need to get the car back in the car-hole). Before final assembly, I need to pick up my brother's brad nailer and a few more clamps. I'll just use cabinet maker's glue but was tempted to use PL400... :smoke:

Braces machined and in place (old Kenwood KR-3130 peeking out from behind all the junk on the work bench):

p1010005.jpg


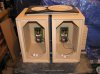
Dry fit with x-overs wired and mounted:

p1010003-1.jpg
 

Attachments

  • p1010005.jpg
    p1010005.jpg
    73.4 KB · Views: 18
  • p1010003.jpg
    p1010003.jpg
    79.7 KB · Views: 18
Last edited:
That ain't junk, it's SNORKEL DUCTS!

[Feel the love.... :thmbsp: ]

I had all the ABS bits save one 45 street. Any preference just put the street (M) into the baffle then extend from there? Or is it best to have a short straight piece in the baffle then the 45s?

Don't forget the ancient VPI 16 project...
 
I put a straight piece in first, but it looks like you're going to have an interference fit problem with any flange against your sidewall unless you relieve it.

Straight duct the whole way would be an option, but it's gonna exit next to the wall, so some angle may be required somewhere along the path.

That argues for going with a street first, I believe, if it'll clear the woofer magnet.... :dunno:
 
I am going to be using the cabinets from a set of Epicure model 5"s that I have. The cabinets are 16" tall and around .5 ft3 so I can put the tweeter and woofer vertically aligned with the port at the bottom of the cabinet. Is this going to be a problem? Im not going to be using the slot port unless someone can guide on the size it needs to be. Thanks
 

Attachments

  • DSC00319.jpg
    DSC00319.jpg
    23.7 KB · Views: 64
Thanks Zilch. Im having trouble with WINSD and the zero point division error on the Dayton woofer. I will try to find another program.
 
Ok, I got winisd to cooperate and it says .875 x 5 x 16.4 on the slotted port so thats out. I will just go with the 1.5x8 round port.
 
Ok, I got winisd to cooperate and it says .875 x 5 x 16.4 on the slotted port so thats out. I will just go with the 1.5x8 round port.

Couldn't you run the port across the bottom and part way up the back for 16.4 inches? If that's not the issue, I believe you can change any of the variables in WinISD to arrive at more agreeable port dimensions.
Mike
 
Ok, I got winisd to cooperate and it says .875 x 5 x 16.4 on the slotted port so thats out. I will just go with the 1.5x8 round port.
Another choice is to add depth to the slot with a horizontal cross brace just above the opening. I'm saying box in the slot to make a rectangular duct down there. It's the cross-sectional area of the duct that controls how deep it must be.

At 0.5 cuft, you can afford to give up some internal volume and not have to extensively mod the baffle.

Yeah, what Mike just said. You've already got an opening there; use it.... :thmbsp:
 
Last edited:
interalian, nice cabinet making skills. Glad mine aren't near yours. It would make mine look even more like amateur work than they already do.

oldskl, interesting reuse of an existing cab. Can't wait to see how they turn out.
 
interalian, nice cabinet making skills. Glad mine aren't near yours. It would make mine look even more like amateur work than they already do.

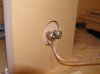
Thanks! Another detail added tonight. I wasn't happy getting only 1 turn of threads on the securing nuts (due to the 1" MDF) so I recessed the binding posts. A few minutes with a hole saw and freehand router.

p1010001-3.jpg


Before:

p1010002-1.jpg


Now the binding posts have a little more meat under the nuts.

p1010002-3.jpg


BTW, is that your tii? I've always wanted a '74 tii with the big bumpers. I had a lowly '76 2002 with twin DCOE and a Schrick 292 in an e12 head.
 

Attachments

  • p1010001.jpg
    p1010001.jpg
    60.1 KB · Views: 15
  • p1010002.jpg
    p1010002.jpg
    59.2 KB · Views: 18
Last edited:
Back
Top Bottom