• The move to the new server is done. There are some software and database maintenance updates in process. This has us passing the hat around to help out. We appreciate any donations. Seriously, even a dollar helps. The payment page may be found here - https://www.audiokarma.org/support.html

Akai GX-635D full restoration

Hello Steve, now I understand everything correctly.
I could read and translate your last two entries well.

I don't have a parts list as such. I followed the circuit diagram.
I myself chose Elna Silmic Gold on the audio board.
Experiments with others, Panasonic, Nichicon Audio FG, result in these beautifully clear mids and very light frequency emphasis around 15-20kHz.
Coupling capacitors Wima Folie. In Wima Styroflex equalizer networks. Headphone amplifier Philipps polypropylene.
I also installed Philipps capacitors measured in pairs.

At the time, these were recommended to me by a Mr. Burmester from Berlin at the radio exhibition.

In general, all coupling capacitors or areas used in frequency-influencing areas are measured in pairs.
Power supply Elna Cerafine. Additional 2.5mm² power supply from the Syscon to the audio board.

Components all ordered from Mouser USA.

Yes, the chassis is covered with alubutyl, in addition to soundproofing against drive noises of the mechanics with fire-resistant insulation for air conditioning systems.

Extra tip: large relay coils on the chassis become quieter in operation if a little silicone spray is applied to the pistons. (Pause / FF / FRWD)

Counter is self-made. Originally it is like you.

Greetings Andre
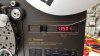
Is there anyway you could provide a layout and schematic for the counter, that would make an awesome addition to this machine. I understand now why you insulate and the reasoning for the silicon spray. I have a lot of questions for you for sure.
 
No, there is no circuit diagram or layout for the meter. This is only available as a finished product. Later for a possible sale with installation instructions and all 3D printing. It is a completely in-house development. At the moment there are 3 Akai GX 635 and a Technics 1506 with automatic time change when speed changes. These have been installed and compared by me.
 

Attachments

  • 20200206_143751.jpg
    20200206_143751.jpg
    73.9 KB · Views: 60
  • Akai-GX-635-Black_0110.jpg
    Akai-GX-635-Black_0110.jpg
    40.5 KB · Views: 62
No, there is no circuit diagram or layout for the meter. This is only available as a finished product. Later for a possible sale with installation instructions and all 3D printing. It is a completely in-house development. At the moment there are 3 Akai GX 635 and a Technics 1506 with automatic time change when speed changes. These have been installed and compared by me.

what would the cost be to order one for my machine that I could install myself?
 
Well, after some common sense and some advice from @Sinder, I put the Trimpots back on the component side of the board. I know some of you are reading this shaking your head thinking to yourself (this guys a real bone head.) that’s probably true, sometimes creation and innovation just doesn’t work. I also replaced Tr-15 which was a 2SD571 with a KSC1008Cyta C as you all know means that the collector is in the center mostly for those of you who didn’t know that. So this is how far I got today with having other things that had to be done around the homestead. It’s been a hectic and heartbreaking day but tomorrow will hopefully be more fruitful in this endeavor. I just hope that whoever reads this thread will not make the same mistakes as me. That’s all for today folks. I hope you all enjoy the pics.

p.s. the 30K no one has so I have to order them from of all places, eBay!
 

Attachments

  • E64E6E44-CDBC-4C9C-9861-50772ADB025F.jpeg
    E64E6E44-CDBC-4C9C-9861-50772ADB025F.jpeg
    157.4 KB · Views: 65
  • 1B09D8F4-CA74-46FD-9275-297559E369E2.jpeg
    1B09D8F4-CA74-46FD-9275-297559E369E2.jpeg
    169.8 KB · Views: 62
  • B6F0D29F-346F-4FA1-BA74-A8AC918E2342.jpeg
    B6F0D29F-346F-4FA1-BA74-A8AC918E2342.jpeg
    193.1 KB · Views: 56
  • 309A1F5B-03DA-4392-B505-EE2F8BEC1A85.jpeg
    309A1F5B-03DA-4392-B505-EE2F8BEC1A85.jpeg
    147.7 KB · Views: 58
  • E54F9B88-1AF5-40DA-AE31-1FDBC11EFEA2.jpeg
    E54F9B88-1AF5-40DA-AE31-1FDBC11EFEA2.jpeg
    187.3 KB · Views: 57
  • FDB001EA-3112-4329-BB4F-C1ED206C7FD6.jpeg
    FDB001EA-3112-4329-BB4F-C1ED206C7FD6.jpeg
    117.2 KB · Views: 63
....Tr-15 which was a 2SD571 with a KSC1008Cyta C as you all know means that the collector is in the center mostly for those of you who didn’t know that. ....

p.s. the 30K no one has so I have to order them from of all places, eBay!

do you mean the TR 13?:) I would swap both VR5 / VR6 in the headphone amplifier area for the sensitivity of the VU meters. The current installed ones are difficult to adjust. Or do you have a matching set?
You can put all other trimmers in the middle. To get used to. Otherwise, it can happen that a power may be too large for a base. As a result, secondary errors or dead transistors can occur in an Indian way.:(:yikes:
Sorry but I don’t understand what you’re saying. And I mean TR-15 it was a 2SD571 it’s on the amp board.
 
Last edited:
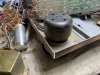
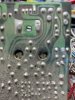
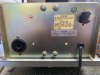
Pics of the teardown.
 

Attachments

  • 5B0307BE-07CD-4B8D-A247-C74799D396C6.jpeg
    5B0307BE-07CD-4B8D-A247-C74799D396C6.jpeg
    98.2 KB · Views: 69
  • FBC93866-772F-4ED2-86FF-B5F20B29E900.jpeg
    FBC93866-772F-4ED2-86FF-B5F20B29E900.jpeg
    74.6 KB · Views: 65
  • 6E95185C-3A31-4A31-A69E-4814D76EACAA.jpeg
    6E95185C-3A31-4A31-A69E-4814D76EACAA.jpeg
    48 KB · Views: 61
  • 7A69CE33-A596-4DF3-B95F-EC9D10F4E669.jpeg
    7A69CE33-A596-4DF3-B95F-EC9D10F4E669.jpeg
    99.9 KB · Views: 59
  • 0A3CB124-F268-473F-A88A-24A4C8EBC4E9.jpeg
    0A3CB124-F268-473F-A88A-24A4C8EBC4E9.jpeg
    100.8 KB · Views: 59
  • A0A98E9C-0811-4C6A-B4B4-B665E0BE7670.jpeg
    A0A98E9C-0811-4C6A-B4B4-B665E0BE7670.jpeg
    115.8 KB · Views: 61
  • 62636F5E-C868-4A59-88EE-9CC11A332338.jpeg
    62636F5E-C868-4A59-88EE-9CC11A332338.jpeg
    90.7 KB · Views: 61
  • C3832DE5-9CEF-43F2-96BB-38DD2EE4CAF0.jpeg
    C3832DE5-9CEF-43F2-96BB-38DD2EE4CAF0.jpeg
    103.6 KB · Views: 69
  • 7A38174A-2B68-4FE2-8747-166C4CE868C9.jpeg
    7A38174A-2B68-4FE2-8747-166C4CE868C9.jpeg
    106.7 KB · Views: 64
  • FB8E86B7-F071-4B82-9B89-D59E21DDE67A.jpeg
    FB8E86B7-F071-4B82-9B89-D59E21DDE67A.jpeg
    169.3 KB · Views: 68
More pics
 

Attachments

  • 7D489A6B-8448-40C7-8B1F-E54FE465C47D.jpeg
    7D489A6B-8448-40C7-8B1F-E54FE465C47D.jpeg
    80 KB · Views: 35
  • C6DC0500-0E4F-4BF1-822E-D318289704A5.jpeg
    C6DC0500-0E4F-4BF1-822E-D318289704A5.jpeg
    99.5 KB · Views: 34
  • 495BFD3A-8D98-467C-AB5F-29A1A15C95CE.jpeg
    495BFD3A-8D98-467C-AB5F-29A1A15C95CE.jpeg
    58.2 KB · Views: 32
  • D52C655B-C80B-43DD-95A3-EE160AAF480B.jpeg
    D52C655B-C80B-43DD-95A3-EE160AAF480B.jpeg
    101.8 KB · Views: 31
  • A41CD122-0EE7-4256-A8C4-661EE26E79C7.jpeg
    A41CD122-0EE7-4256-A8C4-661EE26E79C7.jpeg
    97.7 KB · Views: 31
  • CAA9A462-2CC3-4CD5-906F-C87E8E54039E.jpeg
    CAA9A462-2CC3-4CD5-906F-C87E8E54039E.jpeg
    92.9 KB · Views: 30
  • 255CD2A8-FBFD-4E85-AC39-3BC1DAB575D1.jpeg
    255CD2A8-FBFD-4E85-AC39-3BC1DAB575D1.jpeg
    90.7 KB · Views: 32
  • E7AE81E0-224F-4642-95E3-67F59A18929F.jpeg
    E7AE81E0-224F-4642-95E3-67F59A18929F.jpeg
    76 KB · Views: 31
  • 3CD8A8E0-7EBC-4095-888C-53464F432E66.jpeg
    3CD8A8E0-7EBC-4095-888C-53464F432E66.jpeg
    116.1 KB · Views: 32
  • 6B1AE9D9-0ECD-42DE-8251-F1150DFC6B34.jpeg
    6B1AE9D9-0ECD-42DE-8251-F1150DFC6B34.jpeg
    126.4 KB · Views: 35
Even more
 

Attachments

  • 7403D83C-EC37-4461-B2B7-1FA291B5D81C.jpeg
    7403D83C-EC37-4461-B2B7-1FA291B5D81C.jpeg
    104.3 KB · Views: 34
  • F7942AA8-0234-4122-88E6-CE7FA2F6369A.jpeg
    F7942AA8-0234-4122-88E6-CE7FA2F6369A.jpeg
    88 KB · Views: 30
  • F28A160D-BA56-44E3-964B-3429D288C632.jpeg
    F28A160D-BA56-44E3-964B-3429D288C632.jpeg
    87.1 KB · Views: 30
  • AFF03DFC-1AAD-4577-AACF-6EEF6AC81E78.jpeg
    AFF03DFC-1AAD-4577-AACF-6EEF6AC81E78.jpeg
    106.1 KB · Views: 30
  • 814E393E-AE1E-4A74-8094-8DE92DBF5928.jpeg
    814E393E-AE1E-4A74-8094-8DE92DBF5928.jpeg
    89.8 KB · Views: 30
  • 956743AF-388A-46D6-803C-392053CEA465.jpeg
    956743AF-388A-46D6-803C-392053CEA465.jpeg
    91.8 KB · Views: 31
  • 739F9A9A-DF7D-4865-ADF2-AED05DC37D3D.jpeg
    739F9A9A-DF7D-4865-ADF2-AED05DC37D3D.jpeg
    138.4 KB · Views: 29
  • D6C84C76-FB58-448D-910C-DFF9BFF4C0D7.jpeg
    D6C84C76-FB58-448D-910C-DFF9BFF4C0D7.jpeg
    131 KB · Views: 31
  • 44023C3B-2699-499E-80FF-26D1185D39E8.jpeg
    44023C3B-2699-499E-80FF-26D1185D39E8.jpeg
    112.5 KB · Views: 31
  • 8BF388DB-4B7A-49C0-BD28-0B73DAB12E7A.jpeg
    8BF388DB-4B7A-49C0-BD28-0B73DAB12E7A.jpeg
    98.2 KB · Views: 32
Last ones
 

Attachments

  • 6C095991-4528-4D25-8271-E51AA4025749.jpeg
    6C095991-4528-4D25-8271-E51AA4025749.jpeg
    129.7 KB · Views: 27
  • AA59CBF6-725A-44A2-8493-090B8BCA2FE8.jpeg
    AA59CBF6-725A-44A2-8493-090B8BCA2FE8.jpeg
    113.8 KB · Views: 27
  • 2A45D5F1-F038-465B-82B5-062C5A866203.jpeg
    2A45D5F1-F038-465B-82B5-062C5A866203.jpeg
    126.4 KB · Views: 29
  • 8D165EE6-07F1-4250-AA45-B78EA90DEC7E.jpeg
    8D165EE6-07F1-4250-AA45-B78EA90DEC7E.jpeg
    117.5 KB · Views: 27
  • CE7417EA-3168-43B4-912E-DB4A5E95A9EE.jpeg
    CE7417EA-3168-43B4-912E-DB4A5E95A9EE.jpeg
    109.7 KB · Views: 28
  • F4CCDF3A-6F8B-4BA6-B888-E60789C9F1E9.jpeg
    F4CCDF3A-6F8B-4BA6-B888-E60789C9F1E9.jpeg
    171.4 KB · Views: 29
  • 23F0BCAE-15F7-4E00-8CB8-21320B24A639.jpeg
    23F0BCAE-15F7-4E00-8CB8-21320B24A639.jpeg
    180.1 KB · Views: 29
  • 546799E9-0032-493B-926D-05F319F25D32.jpeg
    546799E9-0032-493B-926D-05F319F25D32.jpeg
    134.7 KB · Views: 28
  • 047BDC16-109C-4F40-B1DD-3002648EBD51.jpeg
    047BDC16-109C-4F40-B1DD-3002648EBD51.jpeg
    136.2 KB · Views: 31
  • D6B510E3-2794-4C58-8F83-0BFBB56D9819.jpeg
    D6B510E3-2794-4C58-8F83-0BFBB56D9819.jpeg
    87.4 KB · Views: 30
Oops, I forgot a couple.
 

Attachments

  • 840C3884-9D3B-4379-9179-999867D3EFD7.jpeg
    840C3884-9D3B-4379-9179-999867D3EFD7.jpeg
    116.1 KB · Views: 29
  • 2A069ADD-4955-4C1A-BD6E-E88550F92DEF.jpeg
    2A069ADD-4955-4C1A-BD6E-E88550F92DEF.jpeg
    134.6 KB · Views: 28
  • 55720356-A05F-4616-8222-07948965F9B9.jpeg
    55720356-A05F-4616-8222-07948965F9B9.jpeg
    118.8 KB · Views: 27
  • F439BEB6-AE77-4493-B4AD-EE07308E8CD2.jpeg
    F439BEB6-AE77-4493-B4AD-EE07308E8CD2.jpeg
    126.4 KB · Views: 23
  • 384555B4-11B1-4E8A-82CF-40843FCDA67F.jpeg
    384555B4-11B1-4E8A-82CF-40843FCDA67F.jpeg
    144.2 KB · Views: 22
  • E0AED462-0BF0-4CE4-9A9D-D8B172DE1EB1.jpeg
    E0AED462-0BF0-4CE4-9A9D-D8B172DE1EB1.jpeg
    121.5 KB · Views: 24
  • 81DDD7C6-FDBA-4CC4-AC16-1358C3DD5A48.jpeg
    81DDD7C6-FDBA-4CC4-AC16-1358C3DD5A48.jpeg
    99.4 KB · Views: 25
  • C0A6A0A1-5951-4F3F-80AB-9FA27D998F7A.jpeg
    C0A6A0A1-5951-4F3F-80AB-9FA27D998F7A.jpeg
    113.6 KB · Views: 29
  • 09EE0330-9480-4B5D-B763-291379D8629B.jpeg
    09EE0330-9480-4B5D-B763-291379D8629B.jpeg
    121.1 KB · Views: 27
  • DD9255CB-CFCC-4355-86BD-F3B2A7AA119E.jpeg
    DD9255CB-CFCC-4355-86BD-F3B2A7AA119E.jpeg
    130.7 KB · Views: 32
So I’ve run into a problem, I’d like to replace TR13 2SC2336 but obtaining any sort of replacement has been futile as has been the same for the 2SC106 T, 2SD794, as well as the 20 and 50k trimmers on the syscon board. I have 1 burnt relay FRL-264 D024/04CL-01 p/n.) I’m also curious on wether or not to update D1,3,9,50 and CR1-14. Should I replace these or leave them be also the motor run capacitor does one generally replace or stuff the can with separate electrolytic caps. Since this is a full restoration I feel that some of these parts especially the 2SC2336 which I’ve read is a good idea to replace. Also, I’ve scoured mouser, digikey, and even fleabay to no avail. I’m really concerned with how I’m going to go about finding a replacement for the burnt relay on the syscon board seeing as how I can’t seem to find a replacement. Now that I have it completely disassembled it is the perfect time to tidy up the entire unit wiring as it’s an absolute mess. Complete disassembly actually wasn’t planned but rather a necessary evil to clean the smoke covered dust which is actually a sticky hard to clean residue from various sections of the chassis and syscon board. In hind sight it might have been more advantageous to disassemble a little here and reassemble after cleaning BUT, call me mr hard way as that’s the way I seem to operate (geez, Mr hard way! I missed the boat on a good name in the porn industry......) back to the task at hand, it’s time to phone a friend in this post for advice on the above mentioned components. Please keep in mind I really don’t wanna change any unnecessary components which may jeopardize the integrity of this very nice machine. Also, as a final thought to anyone reading this for advice I absolutely do not advise disassembling the entire unit all at once just to clean, there are much better methods of doing that job without completely tearing the whole unit apart. At least I documented everything I took apart for reassembly which will be done tomorrow as I don’t want too much time to pass as train of thought and memory only last so long. And I guess this unit won’t get a digital counter as I really wished I could’ve made that happen.......if only I were a real EE.........
 
Hi Steve
don't throw the shotgun in the grain.
When you have all the documents, you can put the device back together. If necessary, I look to see if I still have photos in my collection that show details.
On Monday, the day after replacement, I look at parts and components that fit. My documents with the notes are there.
For the TR 13 2sc 2336B you can use a MJE 13007. Check D9 Greatz (SVB10-200) right away. It's best to switch with. And dimension larger from the electrical values. You can install the TR 13 from the cooling plate below to the cooling plate above under the transformer.
Relay burned: contacts or coil itself?
Contacts: carefully disassemble, clean. When the contacts are burned: replace CR capacitors. All! You can also equip them individually: 100nF 220V AC withstand voltage + 100 Ohm / 1W in series. Every CR.
Motor capacitors at the Syscon: Comply with the installed values. You can also assemble the capacity from two parallel ones.
If more Kapa comes together, the tape tension increases during play. Motors will also get warmer. Therefore, stick to the built-in capacity.

Everything else later, go to the beach now. Water is already 8 degrees Celsius. Don't need to give up.

And if all strands really break, you don't get it yourself at some point, but you want to keep it, you send it to Germany.
Take a day off, then put new energy on the device.
I've been doing this for over 35 years. Steve already does it!
 

Attachments

  • 20190319_161435.jpg
    20190319_161435.jpg
    122 KB · Views: 65
  • 20190411_064252.jpg
    20190411_064252.jpg
    152.6 KB · Views: 68
  • 20190411_064256.jpg
    20190411_064256.jpg
    109.3 KB · Views: 63
  • 20191008_072702.jpg
    20191008_072702.jpg
    159.1 KB · Views: 63
  • Akai GX 635 Black_0096.jpg
    Akai GX 635 Black_0096.jpg
    140.1 KB · Views: 63
  • Akai GX 635 Black_0097.jpg
    Akai GX 635 Black_0097.jpg
    107.2 KB · Views: 61
  • Akai-GX-635-Black_0065.jpg
    Akai-GX-635-Black_0065.jpg
    78.4 KB · Views: 64
Hi Steve, I just had my English text translated back into German. Horrible. But somehow we are communicating. Best regards
.

Ich bin Deutscher und spreche leicht fließend Deutsch, wenn Sie mir nur eine Nachricht auf Deutsch senden möchten.
 
Okay, ich kenne einige Kollegen die in Masar-i Scharif, Camp Erbil und anderen Orten waren oder sind. Mehr Infos kommen nicht.
Lass uns wieder zur Tagesordnung übergehen: Wie weit bist du mit deinem Gerät?
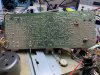
Ich kann dir zur 635 nur von Bildern oder Unterlagen und Wissenstand helfen. Beide Geräte wurden verkauft. Habe jetzt nur noch die 747 mit LED.
Bilder von der Techncs, GX 77, 270 oder anderen Geräten, egal welcher Art sind nur im Zuge der Revision oder Restaurierung gemacht. Diese Videos und Bilder wurden den jeweiligen Besitzern von mir vorgeschlagen. Dann immer wieder gewünscht.
In den Plänen meiner ehemaligen 635 sind viele Anmerkungen, Abgleichhinweise und sonstige Memos enthalten. Mein Service Manual ist komplett in Deutsch und HiRes PDF.
Desweiteren hatte ich die letzte Probehalber mit einem P4 500 und einem R4 242 ausgestattet. Hervoragende Aufnahmen und Wiedergaben. Bei Verkauf wieder ausgebaut, da ich diese Eigenschaften nicht mit angegeben hatte.

Okay, wir machen weiter mit deiner Maschine.

Grüße aus Deutschland
 
Back
Top Bottom