Audio Fan
YT Channel - https://tinyurl.com/29zytwu9
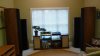
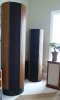
The day is finally here. Since getting them in mid-April, I have been steadily working on getting them going again. Having worked on the Model 5's prior, I was much more comfortable tearing them down and working through each area until finally, tonight, I put them in place for some listening time. And I can honestly, say.... WOW! Being 6.5 feet tall, they absolutely fill the room with sound.
Before I get too far, let me state that I am only in "Phase 1" of listening. After spending so much time on the restore, I'll next start working on fine tuning the listening configuration. I have some external crossovers (a Beveridge model is one of them) that I want to put into the mix, some other amps/pre-amps, etc. so there is much more to come, including getting some external subs. One step at a time...
The next few entries will be some of the restore process so others can benefit if they should happen upon a pair. Also, I need to give a very big THANKS to 24hrez for helping me greatly with all sorts of technical questions as I worked through getting the crossover fixed for the one blowing fuses.
Also, for reference, here is the link to the Model 5 restore thread I started last year. This was my first pair of Beveridge speakers. This thread also has a lot of information about Beveridge and history of the company: http://www.audiokarma.org/forums/showthread.php?t=352331
Day 1 - Below is a pic of the day I brought them home. All the Bev models used a thick foam material for a grill cover. While it worked fine when new, the material disintegrates and falls apart in to small particles over the years. These small bits then find their way into the transducer which I will show you later.

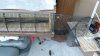
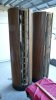
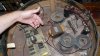
This is a pic of what I found when I opened up the first speaker. This one had water damage and the base was severely damaged, however, it still worked. The other one was blowing fuses and needed trouble shooting.

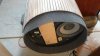
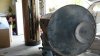
Years of dust and the top woofer was desperately in need of a refoam.

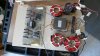
I decided to mount the crossover on a separate board. This is the dry fit, before I completed the recap.

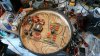
All new base. The old base was falling apart. I used much better quality plywood to cut out the circle. The trim repair was much more challenging. It is basically a paper tube with a black laminate. I had to carefully cut out the bad section, bend some new fiberboard and glue it in. Then, glue the new trim piece around the new base. It came together very well and is much stronger than the original. You can also see all new caps in this pic.

Before I get too far, let me state that I am only in "Phase 1" of listening. After spending so much time on the restore, I'll next start working on fine tuning the listening configuration. I have some external crossovers (a Beveridge model is one of them) that I want to put into the mix, some other amps/pre-amps, etc. so there is much more to come, including getting some external subs. One step at a time...
The next few entries will be some of the restore process so others can benefit if they should happen upon a pair. Also, I need to give a very big THANKS to 24hrez for helping me greatly with all sorts of technical questions as I worked through getting the crossover fixed for the one blowing fuses.
Also, for reference, here is the link to the Model 5 restore thread I started last year. This was my first pair of Beveridge speakers. This thread also has a lot of information about Beveridge and history of the company: http://www.audiokarma.org/forums/showthread.php?t=352331
Day 1 - Below is a pic of the day I brought them home. All the Bev models used a thick foam material for a grill cover. While it worked fine when new, the material disintegrates and falls apart in to small particles over the years. These small bits then find their way into the transducer which I will show you later.
This is a pic of what I found when I opened up the first speaker. This one had water damage and the base was severely damaged, however, it still worked. The other one was blowing fuses and needed trouble shooting.
Years of dust and the top woofer was desperately in need of a refoam.
I decided to mount the crossover on a separate board. This is the dry fit, before I completed the recap.
All new base. The old base was falling apart. I used much better quality plywood to cut out the circle. The trim repair was much more challenging. It is basically a paper tube with a black laminate. I had to carefully cut out the bad section, bend some new fiberboard and glue it in. Then, glue the new trim piece around the new base. It came together very well and is much stronger than the original. You can also see all new caps in this pic.
Attachments
Last edited: