• The move to the new server is done. There are some software and database maintenance updates in process. This has us passing the hat around to help out. We appreciate any donations. Seriously, even a dollar helps. The payment page may be found here - https://www.audiokarma.org/support.html

Bose 1800 series 1 restoration - help appreciated!

Hi,

It's the second bose 1800 series 1 in my family. My other one I also took completely apart, added a loudspreaker protection board and replaced the 2 resistors needed to avoid the board from blowing. Did the most necessary stuff on it and plays fine (except for the silent buz it makes, but that's another topic). It has the C transformer

I bought a second one in France recently and would like to do the full monty on this one. it looks like it had a tougher life, it always lived in a rack. The handles on it are completely worn and I don't think I will put them back (my other one also doesn't have handles). First thing i did was screw some feet under it, huge improvement to move around. It also has the slightly older transformator. I had some 'hickups' opening the thing, buttons on the front could not be taken off in a normal way as the screws inside were completely worn. Had to drill them off and scratched the front doing it.

Thermal paste is completely dried out, had to take it off using a razer (more than 1 hour of work...).

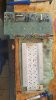
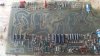
Most worrying thing though is the fact that the board left and right are different, one is from a 1801, and even more worrying they have been messing around and changed some transistors... On one board they used the same BOSE serial number but different make, on the other board 2 have been switched to 'unmarked' ones, which troubles me.

Some other components are used as well on both boards (but I plan on replacing most)

There is also a difference between both boards, R5 has been changed on the rev4 and the rev5 has some extra parts on it! Not sure how I can fix it, best thing would be to drill holes and add the pieces on rev4.

One other annoying thing is that one board has a different heat sink, slightly higher, which gives less mounting space.

Some questions:
- should I replace the strange transistors? The one board with the different styles of the bose transistor don't worry me but the 'blank' ones do. It worked fine though.
- If I replace the two blancs, should I replace all transistors on this board?
- Same question, should I also replace all transistors on the other board?
- Should I worry about the small changes on rev5 and do them on rev4? Logic says yes, but just want to be sure
- I plan on changing all resistors and caps (there aren't many) but should I use the values given in the manual or the ones which are mounted on my board? Is there somewhere a comprehensive list, I know there have been quite a few topics on this (and I think I read them all)
- Should I also replace Q1 and U1? both boards use different versions and I guess better updates are available now, or will I loose the typical sound?
- Same questions for the diodes and other stuff which isn't a resistor or capacitor

Thanks!!

(
I am trying to add pics, they are on my phone, and 'samsung sync' is testing the extent of my nerves, crappy software. When it works, I will add some)
 
Register to hide this ad
So many questions, I think you need to read a couple of AK Bose 1800 restoration threads. :)
 
So many questions, I think you need to read a couple of AK Bose 1800 restoration threads. :)

Exactly. Seriously, look for all threads by "Thierry". He's an expert on these old gals, and his work is awe-inspiring. I'm no techie, but I read everyone he posts. It's like art.
 
Hi there,

My ears were ringing, here I am. Let's go for some answers :

- should I replace the strange transistors? The one board with the different styles of the bose transistor don't worry me but the 'blank' ones do. It worked fine though.
Difficult to answer :
do you have a test bench to sort the TO3 devices ?
does this board show different results compared to the other one ? (not by ear, with actual performance check : output power, noise and distorsion figures)​
- If I replace the two blancs, should I replace all transistors on this board ?
- Same question, should I also replace all transistors on the other board ?
[QUOTE/]
See above, replacing 14 or even 28 TO3 transistors is not cheap, think twice before going this route.​
- Should I worry about the small changes on rev5 and do them on rev4? Logic says yes, but just want to be sure
I would leave it alone​
- I plan on changing all resistors and caps (there aren't many) but should I use the values given in the manual or the ones which are mounted on my board? Is there somewhere a comprehensive list, I know there have been quite a few topics on this (and I think I read them all)
[QUOTE/]
the Service Manual lists every single part with required specifications​

- Should I also replace Q1 and U1? both boards use different versions and I guess better updates are available now, or will I loose the typical sound?
- Same questions for the diodes and other stuff which isn't a resistor or capacitor
replacing Q1 and installing decoupling capacitors on its rails has proved to work nicely
as far as a diode or a transistor is not faulty there's no reason to replace it​

I hope it helps

Thierry
 
Wow, thanks for the quck replies, dd not expect this much response so quickly!

Regarding measuring the transistors, I don't have a test bench only a multimeter. Difficult to test them now as I desoldered them all from the board.

I will replace Q1 (you did it with LME49710 TO99 I hope this is still the best option) and start ordering all materials based on the Bose manual. Only resistor I should not replace is the 'résistances d'émetteur des transistors de puissance' but which one do you mean exactly with this?
I also think you did not change any 'wirewound' resistor?

Question remaining, regarding C2 and C3, you have some 'very special' ones you had to order specifically. Can I get a good equivalent from mouser which can be delivered quicker? I searched but all of them have two leads coming out of the bottom, not a lead on bottom and one on top to be able to mount them flat on the board. I could mount this one, it's below 2 cm so I could get it under the heat sink, but lead time 19 weeks???
http://www.mouser.be/ProductDetail/Nichicon/UBW2A330MPD/?qs=sGAEpiMZZMsh%2b1woXyUXj7ErcgLuBCyRyuyp/odF3H8=

Furthermore, you made the modification to add in parallel for CR6 a capacitor type 100µF/35V - 105°C. It's only for CR6, I also see it on C3?

Other question regarding capacitors, you replaced some in silver mica, some in polypropylene, styroflex, where should I put which? Those styroflex are really cheap, but better?

The 'decoupling' of the LME using Z5U 100nF I will also do, good you added a pic how to solder it!

Regarding the rectifier bridge, there is now a solitron G775-2 which is only 200V (but 75A?) but looks really good, as if they replaced it recently. I could replace it with this one: mouser 905-KBPC5010T and will add 4 ceramics 10nF 1000V . It's a bit strange that 4 ceramics are more expensive than the bridge itself though!

C10 and C11 are in both my boards empty, you put a styroflex in it, accordig to the manual it should be a http://www.mouser.be/ProductDetail/Vishay/D103Z25Z5VF63L6R/?qs=GtWgGqLahXfPUmEzpKg22A== what is the advantage of this styroflex, can you hear it?

Did you also replace all resistors on the led board? I don't think it's really needed but just to be sure now it's open...

PS checking the components one by one on both boards:
R30 not mentioned in manual (should be 10Ohm 5% based on color bands)
R1 mentions 1MOhm in manual, but colors indicate 1kOhm (??) I will thus go for 1 kOhm (you left it unchanged)
C5 is empty on one board, on the other one is a '22k' (22nF I guess) but the manual says 27nF. On your board it is not even there.(left of U1)
C4 is empty on both boards, but on yours there is something there (I think silver mica) 14000µF 100V? should be electrolytic according to the manual
R6: 2KOhm according to manual, 33 Ohm is mounted
R4; 150Ohm according to manual, 20kOhm mounted
R50 should be 470 Ohm according to manual, 410 Ohm is mounted
...

I stopped looking at the manual by now!! I used this one: https://www.hobbielektronika.hu/forum/getfile.php?id=29137 I hope it's not the wrong version?? It drives me mad, I'm checking every component one by one
 
Last edited:
I also think you did not change any 'wirewound' resistor?
Take it the other way round : replace only the carbon resistors. All others shall stay.

Question remaining, regarding C2 and C3, you have some 'very special' ones you had to order specifically. Can I get a good equivalent from mouser which can be delivered quicker?
Yes, it's just me, because I'm mad and a perfectionist :confused:
Rather go fot this : http://www.mouser.fr/ProductDetail/Vishay/MAL213819331E3/?qs=cAZGeXF9iMpvotWAQXFYBQ==
(I wish those had been readily available when I did my mods)

silver mica, some in polypropylene, styroflex, where should I put which? Those styroflex are really cheap, but better?
It would be a looooong post to explain those choices because they are based on experience and individual properties for each type. To make a long story short :
- silver mica : excellent for stability in frequency and temperature
- styroflex : extremely accurate precision, low profile, long lifespan
Go there, there are some good hints : http://www.audioxpress.com/article/Choosing-and-Using-Electronic-Parts-A-Survival-Guide-Part-1.html

Did you also replace all resistors on the led board?
Pointless, leave them alone (as far as the display works)
 
Thanks! I wrote down all current values on carbon resistors and hope they have them on stock in my local electronics shop.

Will read the part about the capacitors, have been reading about it but most say leave the ceramic disc alone but audiophiles say replace them all :)

The capacitor you linked is 330ųf but there is a 30uf installed now, you sure about the link you sent?

Have been looking on mouser, and actually, there are 30uF available but with a higher voltage rating for not a lot of money, will be closer to the quality I need as well:
http://www.mouser.be/ProductDetail/...=sGAEpiMZZMtZ1n0r9vR22UzXQwAPJeqEcHflFFLRX4Y=

These are perfect I think!

Thanks for helping this noob :)
 
Last edited:
Thanks will measure them. Was going to replace them as I learned they are time bombs waiting to go wrong but if you say to keep them if they measure okay who am I to debate :) will keep you posted
 
Last edited:
soldered out 2 out of 1 board, they measured at 38,3 and at 37,5 uF. It's out of spec compared to the 30uF (20%) spec sheet, but still in spec of a 33 +/- 20%. My call would be to replace them, what's your opinion?
 
Difficult to say as value of C isn't enough to decide if a cap is reaching its useful life duration. ESR and leakage current are important parameters. Anyway, it won't hurt to replace them with similar specifications ones.
 
one board all resistors replaced, other board will be done tomorrow I hope. Rectifying bridge and capacitors ordered via mousser, wasn't too happy with A/ shipping cost (20 eur??) and B/ VAT (added after ordering). Had to order for min 50 euro and in total paid 66 euro...i'm hoping for a killer sound now! Painting will be done end of this week, the speaker protection board and transfo arrived this morning in my mail...going at a very good pace!

Thursday the wood for my 2 folded horn subs will arrive so I hope to have this finishes soon!
 
Work has progressed really well, but also for the worse...

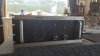
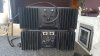
let's start with some pictures, this is how I got the amp (on top of it is my other one)
20170702_172127.jpg 20170702_172651.jpg 20170702_172657.jpg
 
Then I stripped everything, and replaced all carbon resistors and most capacitors. Cleaned all transistors and put new heatsink paste. Used a lot of sandpaper to get the outside heatsinks smooth again and painted them (used radiator paint, nice effect and durable) and worked on the faceplate.

20170723_174609.jpg 20170725_184615.jpg 20170728_183002.jpg 20170729_184904.jpg 20170729_184933.jpg IMG-20170729-WA0006.jpeg 20170729_195517.jpg

you can see there are different transistors per board:

20170729_222958.jpg
20170729_210659_001.jpg
 
but now for the bad news, hooked everything up, including my new rectifying bridge and R7 (10W!! 5Ohm) went up in flames, very spectacular but not what I expected.

Checked all the connections and the only thing I forgot was to connect the ground to the chassis and the amp was connected to a non grounded wall socket

picture of the burnt resistor, I hope nothing else has bee killed by it, any idea what else could be gone? checked everything and looks ok but that doesn't always mean it's still ok...

20170729_232712.jpg
 
anybody? I checked the fuse on the amp on the back and this is still OK, bit strange given the firework I just got. It cannot be linked to the boards I have rebuilt, so what can it be, can't be that much? I checked the boards and they look fine, really have no clue what could be the reason (don't think the fact the ground was not connected can give this amount of firework?). Any help is greatly appreciated, would really like to finish this project so I can start building my subwoofers (and repair another amp with a dead channel which is sitting in my atic for six months now...)

PS this is the resistor which blew:

burnt resistor.PNG
 
That's in the primary side of the transformer. Disconnect both diode bridges and use a dim bulb tester or a variac to bring up AC. I'll bet it works ok.

If so, disconnect the big Molex connectors to both boards, reconnect both diode bridges and test again.

Let us know the results that far along. What size fuse is in the Ac line fuse?

Cheers,

David
 
Back
Top Bottom