• The move to the new server is done. There are some software and database maintenance updates in process. This has us passing the hat around to help out. We appreciate any donations. Seriously, even a dollar helps. The payment page may be found here - https://www.audiokarma.org/support.html

BOSE 901 EQ Restoration

Well, I got it all together and it looks beautiful... but when I plug it in and turn it on, only the left channel works. Nothing out of the right... I guess I need to take it apart and inspect all my soldering joints. Blah.

Any tips on troubleshooting to offer? I probably just need to go through it.
 
but when I plug it in and turn it on, only the left channel works. Nothing out of the right... I guess I need to take it apart and inspect all my soldering joints.
If I remember correctly, I had a similar issue after restoring my 901 EQ. There are wires running under the circuit board and there is little clearance between the circuit board and the bottom plate. I verified nothing was amiss on the board and then I clipped some capacitor leads under the board which appeared too long, possibly making contact with the lower plate and/or wires.
I then carefully reassembled the EQ, hooked it up to the system and everything worked fine afterwards
 
You know, I bet you guys are onto something. I did try to reseat the connections and that didn’t work... so I’ll inspect the solder joints and clip any long leads.

also, I’ve done this with guitar effect pedal kits... I’ll adhere a thin piece of cardboard along the bottom plate to prevent contact from the board to the bottom metal. I’ll leave a channel for any wires running along the bottom.

This is a hobby project for me, so all of this is part of the fun.
 
Ok! I resoldered all the points that didn’t look good, I clipped any long ends, and I put a thin cereal box cardboard under the board to insulate it from the metal frame and IT WORKS! Sounds awesome!

pics soon. Thanks for your guidance and support! Couldn’t have done it without y’all!
 
Ok! I resoldered all the points that didn’t look good, I clipped any long ends, and I put a thin cereal box cardboard under the board to insulate it from the metal frame and IT WORKS! Sounds awesome!
pics soon. Thanks for your guidance and support! Couldn’t have done it without y’all!
Awesome, and enjoy!! :music:
 
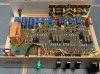
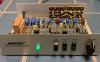
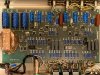
Ok, here are pics of the electronics. The red bulb was burned out, so I replaced it with a green LED to match my McIntosh system. I didn’t have the original knob, so I went with this chicken head knob. I like it. I’ll be making a solid maple case for it next. It’s something I intend to keep forever, so it’s worth the effort.E7576A1F-600E-4981-A747-F227ACD44D45.jpeg63FA6633-3CDB-492D-B02B-14CAC027E3BE.jpeg68B8FD2C-389B-49BD-9318-FC201B522B9A.jpeg
 
Got me to wondering if there wasn't a software version of the 901's active equalizer, and come to find out, there's a custom configuration written for the MiniDSP that does just that. Use it as an overlay (similar to what you'd do to add a standard room curve) so you end up with exactly what you need for your system and room.

Search "eq901b" on the MiniDSP support forum ...

PS - Bit of a learning curve, but nice winter project for anyone interested. Also, 'twere me, I'd voice the room using REW (free!) as it has a plugin for the MiniDSP and is a lot easier to work with and has a lot more options than the stock tools.

But to the op ... you've already got the equivalent of a shiny new OEM solution, so forget I mentioned it. ;-}
 
Thanks sKiZo, I'm sure there is a software equivalent for this old EQ that I just rebuilt... But here's the thing for me personally. I work in the Silicon Valley for a large company that all of you have heard of. I've done software for 20 years. I do it all day every day. So for me to come home and relax, I was looking for an experience that didn't involve any software whatsoever... that's why I listen to vinyl on a completely restored stereo system from the mid 1970s... There's no python, or kernels, or software patches to address vulnerabilities... Just music. This restore is more hobby for me that involved a soldering iron rather than a keyboard.
 
Yah ... I see your side. I'd also agree that if you've got the OEM equalizer, stick with it, especially fully restored. Software DSP is probably more efficient and technically correct, but ...

Where the DSP model is handy is for folk who scored a pair of the speakers, didn't know they needed the EQ, and were sorely disappointed. That may account for a lot of the bad rep on the speakers. I've got a similar deal here with my McIntosh XR16's ... those also need an external environmental EQ to optimize the bottom and bring out the best of the boxes.

PS - for anyone shopping those auction sites or the local thrifts, DO make sure the EQ is included in the purchase. If it ain't pictured in the listing, it probably ain't there. Same thing with "smart" EQs that use calibrated mikes - you'll never get it to work right if the OEM mike is missing. Lot of those "gotchas" with classic equipment, so let the buyer beware.

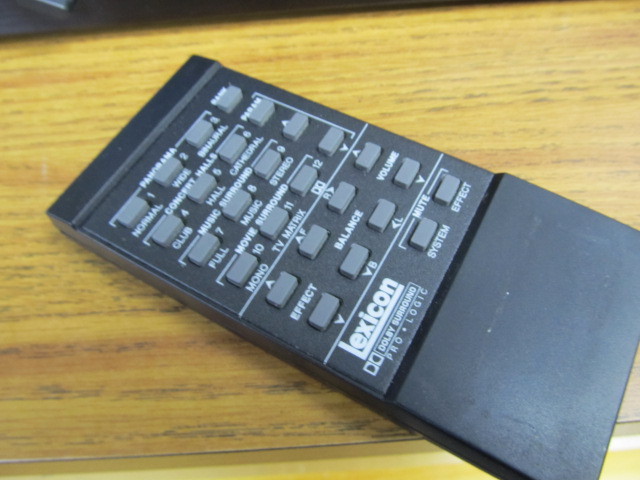
Speaking of which - my latest audio purchase was a Lexicon CP1 ... Amazing device for fine tuning your environment, with an incredible amount of options, but without the remote, it's a brick, as there's minimal buttons on the unit and no way to access the menus for the tasty bits.

5641425.jpg
 
Last edited:
Beautiful restoration work - it looks brand new.

I have a pair of Series II that came without a crossover, so I've been using them with DSP-based equalization. I do like them very much; not a super analytical sound (hah) but really pleasant. The EQ curves I'm using are just an approximation: I looked at the various EQ graphs that I found online, and drew an approximation using the MiniDSP equalizer, then fine-tuned it by ear. The latest iteration of this uses a Raspberry Pi running CamillaDSP into a USB DAC; my EQ configuration files are all here if anyone's interested.

I would really like to rebuild these curves based on real measurements from an original analog EQ. My simulation skills aren't good enough to do that from the schematic. Does anyone have measurements from Room EQ Wizard or similar, of the EQ on its own (not in-room playback), in a digital format?
 
YOUR ATTENTION please. Referring to the removal of components. AFTER you confirm you have all your correct replacement components, CLIP the leads for the components you are removing, de-solder, and they should drop right out. Rather than pulling them through the hole. Hope that makes sense. I've done this in the past. Way quicker and easier. Awesome post. I've bookmarked for future reference. Thank you to everyone participating.
 
All,
I was just revisiting this old thread. I’ve got another Bose 901 equalizer in the project pile that I thought I’d start to think about. This one is a series 1. This thread is specifically for the 901 series II.

would any of you know of a parts list for the series 1? Toastedmaple included one for the series 2, which was awesome…. Looking for a similar one for the series 1. If not, I could try to make one up myself and share…
 
This post is amazing. Huge thanks to Toastedmaple for sharing a parts list. I inherited a set of great condition 901 series 2 within the last few years. Everything works and sounds way better than I expected to hear from a set of Bose speakers. But, the noise floor is way too high and dirty sounding. I was going to go the Deer Creek route but I've always wanted to dive into recapping, so I can one day start recapping my old amplifiers.

Here's my question, do I just need to take the all or nothing route and replace virtually everything? Or, can I tackle the project in steps? Start with one section of caps, test, then continue if needed?

I have soldering experience but haven't done a recap job. Thanks in advance!
 
Hi pnw_wildcat,
You've got the series 2? That's what I rebuilt. There really aren't that many caps on the board compared to transistors and stuff. Plus it's kind of a pain to take it out of the enclosure and put it back in. I'd plan to do all caps at once to tell you the truth. That way it's done and you know it's done. I probably didn't need to do the resistors and transistors, but i did anyway. it's not hard. Do you have a good de-soldering iron (aka solder-sucker) ?
 
Hi pnw_wildcat,
You've got the series 2? That's what I rebuilt. There really aren't that many caps on the board compared to transistors and stuff. Plus it's kind of a pain to take it out of the enclosure and put it back in. I'd plan to do all caps at once to tell you the truth. That way it's done and you know it's done. I probably didn't need to do the resistors and transistors, but i did anyway. it's not hard. Do you have a good de-soldering iron (aka solder-sucker) ?
Yes, mine is a Series 2 as well. I have a few soldering irons but am trying to decide between buying a basic electric desoldering iron or just picking up a manual pump. I always have wick on hand. Either way, I'll have what I need.

So, I could just do all the caps and see how things sound, then tackle the resistors and/or transistors at a later date if needed? Does you list consist of upgraded and/or higher-spec caps? From what I understand, there are a ton of combinations of parts that can be used, as pretty much anything is an improvement over 50-year old parts. I just want to make sure I'm only replacing once. I don't need the highest end components but would like to make sure I'm getting the best ROI.

Thanks again!

 
So be careful…. When you get the gear like desoldering irons and stuff like that, all the sudden you’ll find yourself restoring all kinds of stuff! I’ve done a couple of guitar amps and am working on my second vintage stereo right now. It’s a hobby. Just have fun with it.

as far as the list goes, it’s in the first post in this thread from toastedmaple. It’s a good list. It does have upgraded components. You could opt to only purchase the capacitors and replace only those. The resistors seldom go bad. The caps are a bit more like batteries. They don’t last forever, so swap those for sure. We’ll, swap most of them. The small yellow disc shaped ones are minor…. Probably fine. Just purchase the caps from the list, replace them and I guarantee you, you’ll hear the difference.

I do think that if the sound isn’t as clean on the highs and lows as you think it should be, go ahead and do the transistors also. I think there are only 8 or so of those, no big deal.

One more piece of advice that I may or may not have mentioned in my earlier post. Before you put the board back into its metal chassis, cut a thin piece of cardboard like a cereal box or something and glue it to the bottom of the chassis to prevent contact. If any of your leads make contact with the middle chassis, it could cause a short period it’s probably not necessary but better safe than sorry
 
Yes, mine is a Series 2 as well. I have a few soldering irons but am trying to decide between buying a basic electric desoldering iron or just picking up a manual pump. I always have wick on hand. Either way, I'll have what I need.

So, I could just do all the caps and see how things sound, then tackle the resistors and/or transistors at a later date if needed? Does you list consist of upgraded and/or higher-spec caps? From what I understand, there are a ton of combinations of parts that can be used, as pretty much anything is an improvement over 50-year old parts. I just want to make sure I'm only replacing once. I don't need the highest end components but would like to make sure I'm getting the best ROI.

Thanks again!

I recapped a Series II eq not long ago. I did all the electrolytics but left everything else.

Did before and after sweeps with REW loop through. Whilst I did all the electrolytics, there was actually only one truly bad cap. Replaced that one first then retested. With just that one part replacement the unit functioned within specs. YMMV, of course.
 
I recapped a Series II eq not long ago. I did all the electrolytics but left everything else.

Did before and after sweeps with REW loop through. Whilst I did all the electrolytics, there was actually only one truly bad cap. Replaced that one first then retested. With just that one part replacement the unit functioned within specs. YMMV, of course.
Hi whoaru99, newbie here. Just recapped a series IV eq with nichicons just cause I read they were good sounding. All the caps on that series are specified 10uF 5%. So before doing the job, I measured capacitance on my little DMV that goes up to 20uF. Well ALL those caps measures about 8.5uF. So I am out of tolerance 10%. Being a newbie, I am wondering if that will affect antrhing like operation, distortion or sound quality etc. FWIW I also had ordered elna's and those were all around 9,5uF, so within specified tolerance. Still got those on stand-by in my drawer. Thanks for your input.
 
Back
Top Bottom