• The move to the new server is done. There are some software and database maintenance updates in process. This has us passing the hat around to help out. We appreciate any donations. Seriously, even a dollar helps. The payment page may be found here - https://www.audiokarma.org/support.html

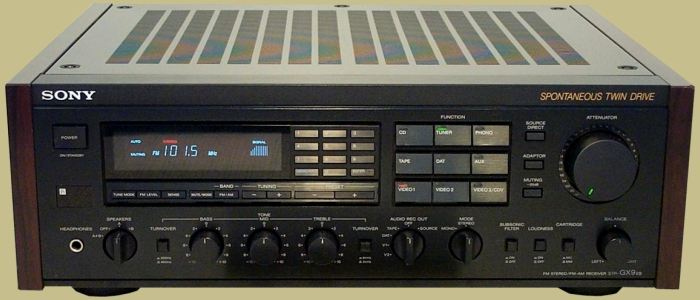
Classic 80s Black and Rosewood - Sony STR-GX9ES

No. There may be concealed moisture. If you must hurry the drying process, use a hair dryer. Otherwise, I would let sit for a day or two.

Ok, well I've just been using the time wiping down everything with a damp microfiber. Pulled the faceplate and got the dust off the knobs and stuff. I'm amazed with the build quality of this in comparison to the other Sonys I've owned. This chassis is fascinating - like a thick cast resin or something. That whole buttons area on the front cleaned up just like I expected after seeing the listing photos. Had it survived shipping intact, it would've been exactly what I was expecting.

That's a shame (the damage), but it sounds like a positive outcome to an unfortunate situation. As an ES collector, I'm happy to see any of these rare, wonderfully contracted and aesthetically gorgeous pieces saved from the recycling depot. With regard to your damaged side panels, you are right, they are usually just veneered on the visible edges, and hence are not interchangeable from side to side. I did purchase one ES amp missing its side panels, and then found another identical amp on eBay for parts only. The seller and I negotiated, and I purchased his side panels only, and he kept his receiver, to re-list it later (win win!). That might be an option for you. Another time, I found the side panels for sale from a European vendor, and purchased them, thus restoring yet another ES piece to its full glory. Do some research, and find out what Sony ES models are similar/dimensionally close to yours, they might be donors to fix your receiver. Good luck, and I will be curious to see how you make out.

I'm still really bummed about the rosewood panels though. I've looked to see if they can be flipped, but there's a cutout at the front to hug the faceplate, so that probably won't be an option. I'm good with wood though, so I may head off to see if I can find some nice real wood planks that are close in size. Then trim them down, drill some holes, finish them as close to that burgundy rosewood color. I could probably make a pretty good match. Even go as far as to veneer the front edge so that wouldn't look like a butt-end.

But then there's still the possibility it doesn't even work. :/

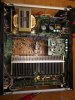
Here's a glimpse inside for fun. It's really clean. Those caps on the power board look very nice - no bulges or leaks that I can see.

Kinda tempted to just take all the boards out to visually inspect them individually. Probably wouldn't hurt to re-seat all the connectors anyway.


IMG_6557.JPG
 
Maybe it was raining where the seller lives, he might have carried it in the rain just before packing it. He could have carried from his car to where he was setup to pack it, gave it a quick wipe but not doing the back good. Then when it got all sealed up it never dried.

Yeah, I'm thinking that since the box wasn't wet on the outside that the source of moisture had to be something small. I do know that it came from Washington state, so maybe it was just condensation from the climate difference. It didn't really have time to adjust considering it left on Saturday afternoon, and was delivered this morning - just shy of a true overnight.
 
It didn't really have time to adjust considering it left on Saturday afternoon, and was delivered this morning - just shy of a true overnight.
Yeah the west coast was getting rain all last week and Saturday then dwindled down on Sunday. If it got wet in the rain, sealed and sent in 24 hours in a cold cargo plane it would be wet on delivery.
 
Yeah the west coast was getting rain all last week and Saturday then dwindled down on Sunday. If it got wet in the rain, sealed and sent in 24 hours in a cold cargo plane it would be wet on delivery.

Well, I've gone through the whole thing and I've found no evidence of any moisture on the inside - seems it was only on the outside surface. I've vacuumed the interior and wiped the dust off of everything, then unplugged and re-seated all the connectors I could get to.

Then I decided it was time. Grabbed my dim-bulb setup, put in 100W halogen, plugged it all in, pressed the power button, and...

A relay click, a bright bulb, another relay click, bulb goes out, no life to the receiver - no display panel, no green volume light, no button lights, nothing. All within a matter of a second at the most.

Thing is, I'm not sure exactly what that means. Is it that the bulb is interrupting its ability to turn on completely? Or is the bulb saving it from frying some electrical part inside? (like I think is what's supposed to happen).

It's a shame too, this entire cabinet, except for those panels and a little scratch on the top surface of the faceplate, cleaned up very nicely. A decent set of replacement panels, and this would've been a centerpiece if it actually worked - even more so if it had arrived without any damage at all.

There's an authorised Sony service center in Aguada which is only a few miles south of here and coincidentally where my barber is; and I'm about due for a visit with him anyway. I may end up down there in a day or so, so I'll talk with them and maybe set something up.

I'm no electronics expert, but my gut tells me that the repair cost of this one is going to exceed the cost of another one if I'm lucky enough to find one soon. So for the moment, it's just sitting here, all clean and all back together - my first real eBay mishap in over 10 years of being a member. Four turntables, including that fragile YP-701, that Sony D1090, my Yamaha CR-1020 - many other smaller things, all arrived without any drama. I guess all in all I've still been pretty lucky.

If any of you have any ideas on maybe what to check, please let me know. As always, thank you for your input and support.

- rey
 
Not a bad outcome at all considering it could have turned into a real pain.
I stopped buying anything heavy from eBay as after a few purchases I'm only at a 50% success rate when it comes to getting here without damage. The last amp I bought was wrapped in paper and thrown in a gigantic single wall box. You could imagine how sad of a Yamaha M-2 it was by the time it arrived at my place. That guy actually paid the $85 bucks to get the smashed carcass back along with refunding me the original purchase and shipping money. Not a good day for that seller at all.

As much as it sucks that it was damaged in shipping, if the electronic shop gives it a clean bill of health you are way up in being able to get some real wood sides made up for it. Did anything else get damaged aside from the end caps?

Sorry OMGCat!, I thought I had quoted you to reply earlier. Sad to lose a classic Yamaha like that, that's a great looking design. At least you were fully refunded with return shipping included.

Like I have mentioned in the post prior to this one, it now appears that it is non-functional to boot. But you're right, wood sides would be pretty easy to make using the originals as a template.
 
I would be thoroughly inspecting the PCBs for cracks. The poor thing has been dropped and he main filter cap PCB is the one to start at. Then the main amp board and then all the others.

It will be fixable, but powering it up without locating the inevitable damaged pcb/s is not a good idea.
 
I would be thoroughly inspecting the PCBs for cracks. The poor thing has been dropped and he main filter cap PCB is the one to start at. Then the main amp board and then all the others.

It will be fixable, but powering it up without locating the inevitable damaged pcb/s is not a good idea.

Ok. I guess that’s what I’m destined to do then. I’ll start pulling out all the boards and see what I can find. I’ll post some pics of each so eyes better trained than my own can see if there’s something I don’t.

The Ticking Clock: the remote is on its way, so let’s see if we can have this thing running by the time it gets here. Lol

I’ve been looking at rosewood veneer and edgebanding here for a few minutes. Gonna see now what’s available in solid planks. I’m kinda wondering if maybe a good looking solid plank of ‘whatever’ with a wraparound edgebanding of real rosewood veneer could all be stained and finished to match and present as well as the originals.

Thank you for your advice. I’ll be getting this project started later today.
 
sony-str-gx9es-front-1.jpg

(image/info https://classicreceivers.com/sony-str-gx9es)

Currently en route from WA to PR is my 'new' Sony GX9ES.

There's really no logical way to justify this, but we wouldn't be here otherwise now would we? - we're a special bunch and sometimes our BIN-mouse-trigger-fingers get itchy. LOL

Ever since I bought that STR-D1090 a couple years ago that was still almost mint in box, I've been scanning the internet wondering if maybe I shouldn't've gone ahead with one of these instead. I really like the 1090 and all, but had I done some more research, I might have cast sentiment and familiarity aside, and opened up my search a little wider rather than focusing on the nostalgia of my young college years. So my eBay search was set up to automatically alert if a GX9ES, GX10ES, or GX90ES popped up, and I've been watching them cycle through for a while now. Most have been out of my price cap, a couple parts only, one or two listed really low and sold instantly, so no luck. Finally everything came together, and a GX9ES listed with a great BIN price, and within just hours of the listing, already had 19 watchers. Decided this time it was my turn.

*CLICK!*

Pics from the listing show it to be in very nice shape, and probably just in need of cabinet dusting/wipe down for starters. It's an estate sale find, so my gut tells me that this one wasn't abused - and judging by the overall condition, that's probably the case. Those function buttons look a little dirty from being pushed on (remote not mentioned in listing), but the lettering is clear in the close-ups, and I've got a trick for cleaning up black plastic to like new. I'll bet I can get this whole thing looking fresh pretty easily. Got a couple remotes in watch list, but they're a off digit in model number. Cool thing is though, Sony remotes are so inter-compatible that I believe even the ones I have for the D1090 should work it with no problem. (I still have the original remote for my other D990 that I bought back in 91 - that remote was able to operate my neighbor's Sony LCD flatscreen TV, 20 years newer!) Might get the other remote once I see if the one I have works.

Notable Features: Those pretty faux-rosewood panels. That button closest to the balance knob is a MM/MC switch for phono cartridge - so it could be fun to see where that leads... cartridge upgrade maybe? True bypass switch to remove tone control circuit. Pre-outs. 130 Watts at 8 Ohms and 4 Ohm capable. Gets great praise on the net along with the GX10 and GX90. Should be an interesting addition. Now if I'm not mistaken, those speaker jacks should also be banana-style underneath the caps (IIRC I read somewhere here that a lot of manufacturers put solid caps over the banana jacks to prevent accidental plugging in of European AC equipment... because, of course). Each time I look at it, I like the style even more.

s-l1600.jpg

s-l1600.jpg

s-l1600.jpg

s-l1600.jpg

s-l1600.jpg

s-l1600.jpg

s-l1600.jpg

(Pics from listing)

Coming Priority by jet, so should be landing in my livingroom (and eventually my lounge in the back room) by mid next week, or even Tuesday if I'm lucky. Already have the manual downloaded from Sony and have been browsing through it - pretty straightforward stuff - probably print it out next time I'm on campus.

Not sure the fate for the D1090 at the moment so back in the box it will go. Might check around to see if any of my friends are looking for a little something with decent power and a phono input. Or maybe just list it here or elsewhere. Don't know yet - we'll see.

Cheers! :)

Great lookin' unit. Congratulations!
 
Just a thought, you might want send a message to AK member Asaalah.
He creates phenomenal solid wood cases and perhaps he could replicate ones for your unit if you choose not to do it yourself.
 
Great lookin' unit. Congratulations!

Just a thought, you might want send a message to AK member Asaalah.
He creates phenomenal solid wood cases and perhaps he could replicate ones for your unit if you choose not to do it yourself.


Thank you both! :) I’ll be sure to look him up when I get to that stage. I’m currently thinking that I might just be able to pull it off myself - I mean, two 5.25” x 16.5” panels, how hard could it be? (Famous last words! LOL)

I would be thoroughly inspecting the PCBs for cracks. The poor thing has been dropped and he main filter cap PCB is the one to start at. Then the main amp board and then all the others.

It will be fixable, but powering it up without locating the inevitable damaged pcb/s is not a good idea.

Ok, I’m about to start digging into this and see what all I can find. Is there anything in particular that I should be cautious around (big capacitors come to mind)? Is there anything I need to make sure my fingers don’t touch while I’m pulling out all these boards?

What about that giant transformer? It doesn’t have any stored electricity, right? We do know it’s been unplugged for at least a week, with the exception of me dim-bulbing it last night with no success.

I’m limited in both my knowledge in electronics and the tools that go with it. I do know what the different parts are (caps, resistors, diodes, etc) and I do have both a soldering gun and iron. I do know what a cracked solder connection looks like and how to reflow them.

The rest of the interior is just screws holding down different boards connected with plugged cables.

I remember mildly taking apart my D990 to clean it out, and that D1090 to reseat all the plugs when I was getting that speaker output issue, though I never removed any boards I don’t think. I’ve also dug in a little in my CR-1020 to do a cleaning which did require unplugging and removing a few boards to get to some switches for a deoxit. All my prior disassembles have been successful, resulting in a fully functional unit and no leftover parts. LOL

Ok, so enough rambling... short of it is, I’m not afraid to go rummaging around inside, I mostly know my way around, but I’ve had no formal education or training. So there may be things I don’t necessarily know to look out for.

Should I just disassemble the whole thing? Or do it 1 board at a time, trying a dim bulb between each?

And finally, should I clear off the dining table completely, or just maybe push the place settings off to one side? I do know I’ve got the best overhead lighting there. LOL
CD97EF64-D915-4425-9B7D-225F5BBCEFA5.jpeg


Well, let’s get this cracked open again...

mario-here-we-go.png
 
A46783B4-7C9F-45E1-BDF2-7C99F188052D.jpeg

11250811-3795-4915-A2D7-01ACB07077FF.jpeg

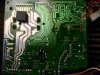
Here’s where I’m at so far. The bottom of the power supply board looks clean, with no cracks, maybe not evident in photo, but solder joints look good.

Nothing burned on top, no smell of previous burn.

That’s about as far as I can pull that board out without unsoldering power cord and transformer wires.

See anything I don’t?

Would there be any sense in trying to power it on with everything unplugged from it except the power switch?
 
View attachment 1147975

View attachment 1147976

Here’s where I’m at so far. The bottom of the power supply board looks clean, with no cracks, maybe not evident in photo, but solder joints look good.

Nothing burned on top, no smell of previous burn.

That’s about as far as I can pull that board out without unsoldering power cord and transformer wires.

See anything I don’t?

Would there be any sense in trying to power it on with everything unplugged from it except the power switch?

Does it have any fuses?
 
Does it have any fuses?

Yes. One. On the big interior pic above, it’s right where the orange and white wires from the transformer land on the board. Purple and white are there too.

It is the only one I’ve found so far, and it is not blown.

——

Is there any possibility that the dim-bulb is preventing power up? The switch on this is a soft switch, not a physical switch like my Yamaha has.

Is it possible that the resistance from the bulb is what’s causing the relay to not ‘stick’?
 
I'd give it each board a once over and then re-seat any connections that you can. Wiggle any big things like the power supply caps or any of the bigger components that would have momentum enough to pull traces or crack joints during the drop.

It's definitely possible that the dim bulb could be preventing power up on a soft start if it's not getting enough current through.
On my bigger amps with regular power switches a 100w bulb will take quite a long time for everything to stabilize and come out of protection. It's very possible that if the soft start system doesn't see the right inputs in a certain amount of time it just says 'nope' and no start for you. If you're using a 100w bulb maybe go up to 150w or if everything looks good just go for it and power it up.
 
I'd give it each board a once over and then re-seat any connections that you can. Wiggle any big things like the power supply caps or any of the bigger components that would have momentum enough to pull traces or crack joints during the drop.

It's definitely possible that the dim bulb could be preventing power up on a soft start if it's not getting enough current through.
On my bigger amps with regular power switches a 100w bulb will take quite a long time for everything to stabilize and come out of protection. It's very possible that if the soft start system doesn't see the right inputs in a certain amount of time it just says 'nope' and no start for you. If you're using a 100w bulb maybe go up to 150w or if everything looks good just go for it and power it up.

Ok, thank you for your reply and explanation. You’ve somewhat confirmed my suspicion that it may be the bulb that’s preventing power up, and not any physical damage to boards. I realize that doesn’t mean there’s no damage to the boards, but just that the bulb could be interfering.

The on/off and relay clicks are instantaneous, before anything else even has the chance to light up or operate, like it’s not getting a chance to go any further than the relay itself.

Lemme check a couple more, then just hold my breath while giving it straight AC.
 
Sure hope it is functional after all you have been though with this unit. I recently won an auction for one that worked properly except the display would not light. I dropped it off with my tech and he got the display working again. A very nice receiver indeed. Wishing you the best of luck with yours.
 
Very good to hear it's come to life! The DBT is great but can definitely have you chasing ghosts especially when there may be ICs that have a very narrow range of voltages they want to see.
That's also great to hear that the only apparent damage is to the sides. I'm sure you'll be able to come up with something to replace them that will look at least as nice as the originals.
 
Back
Top Bottom