• The move to the new server is done. There are some software and database maintenance updates in process. This has us passing the hat around to help out. We appreciate any donations. Seriously, even a dollar helps. The payment page may be found here - https://www.audiokarma.org/support.html

DCM Time Window Overhaul

bfstrysik

New Member
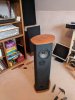
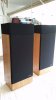
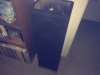
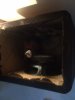
So I picked up these early DCM Time Windows a couple of months ago. In pretty good shape for probably mid 1970's, but I always seem to need to have a project to work on. All of the drivers work, the walnut tops need to be refinished and even though my research indicate these are a pita to get into to work on them, I decided to go for it. Hopefully this thread will be useful to others to keep these vintage speakers working.


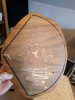
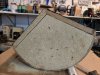
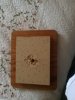
Not knowing how the walnut end caps were attached, I decided to use a piece of scrap wood ( it was cherry, but I am sure it doesn't matter) and a hammer to tap on the top end cap to see what would happen. Success!. There were 3 wood screws and 5 or 6 long staples securing it to the 1" particle board.

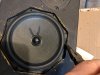
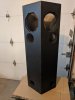
Next task was to try to remove one of the 6" drivers. I used a putty knife to carefully remove any of the black goo from around the screw holes and then with the assistance of a hammer I worked the putty knife around the entire driver. I then carefully bent the edges inward so I could gran them with a pair of needle nose pliers.Using a heat gun, I heated up the edge of the driver and then tried pulling on it with the pliers. It started to come up. I continued to work at it until I could get a screw driver under it and continue to work it out. Pretty happy and ready to keep going.

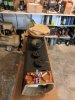
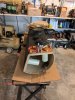
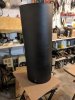
Next task was to figure out how I was going to remove the particle board top. I noticed that there were a couple of places where there was a small gap between the top and the sides. I used an old fillet knife to widen the gap until I could get a hack saw blade in there and began sawing through the glue and staples. Tedious and it was hard to not bend the blade all up. Decided to try a jig saw and it worked great. I just took my time and was rewarded with the removal of the top. Woohoo!!

On a roll. I decided to try a tweeter. Heat gun and a small screw driver worked. Got both out. My intentions are to clean everything up and when I put them back in I will use Armacell foam and wood screws.

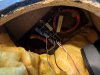
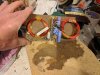
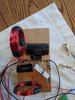
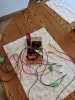
I removed the crossover mounting board by prying it of the particle board top with a putty knife and a mini pry bar. The masonite board is pretty messed up from the removal, but that is ok as I will make new ones. I ordered new caps and resistors today to rebuild them, as in my humble opinion 40 plus year old caps are way beyond their useful life. Not going boutique components, but anything will be an upgrade. While I am at it I am going to replace/upgrade the binding posts and the internal cabinet wiring. Hard to believe that lack of quality in this build from back in the day. In the late 70's I really wanted to buy a pair of Time Windows but could not afford them. I believe at the time they were going for $800?? I ended up buying a pair of Polk Monitor 10's for around $400 on sale. I still have the 10's (amongst quite a few other Polks) but now I want to breath new life into these Time Windows. Will continue to add to this thread as I progress in the overhaul
 

Attachments

  • DCM Time Window.jpg
    DCM Time Window.jpg
    48.1 KB · Views: 565
  • Final Stage of Removal.jpg
    Final Stage of Removal.jpg
    87.9 KB · Views: 520
  • Tweeter Removed.jpg
    Tweeter Removed.jpg
    32.5 KB · Views: 521
  • Crossover.jpg
    Crossover.jpg
    81.6 KB · Views: 505
  • Using a Jigsaw to Remove Top and Bottom.jpg
    Using a Jigsaw to Remove Top and Bottom.jpg
    54.9 KB · Views: 510
  • Top End Cap Removed.jpg
    Top End Cap Removed.jpg
    44.8 KB · Views: 506
  • Crossover Removed.jpg
    Crossover Removed.jpg
    114.2 KB · Views: 515
  • Removing the Top To Access The Crossover.jpg
    Removing the Top To Access The Crossover.jpg
    103 KB · Views: 490
  • Taken Apart.jpg
    Taken Apart.jpg
    65.6 KB · Views: 524
  • Taken Apart 2.jpg
    Taken Apart 2.jpg
    67.7 KB · Views: 512
Register to hide this ad
You have your thread on the TWs and it was starting to look like the place this rebuild was going to happen. Might be good to have the threads merged as your post above would tag along after Glenn's post of similar early TWs.

Interesting, the inductors seem to be homemade at DCM. The crossover for these early units is undocumented. Maybe you can post a diagram of the wiring for the world wide files on the DCM Time Window with your serial numbers. These numbers are on the edge of the bottom plate aren't they? Don't know how we would find out what the inductance is for those wire coils. Maybe the raw data on the construction would allow someone to make an estimated guess at that. Those are the type my friend had, but I never looked into what woofer they had. Yours have the early octagonal woofer and the early pre-Philips Mylar tweeter. Your ports seem to be symmetrically placed, too.

These speakers were $660 in late 70s/early 80s, from my selling days and my purchase of a pair from the factory at salesman's pricing. The Polks were 600 (according to Orion) maybe when they were last sold.

These should be nice when you are done. Will you be using a foam grille for them?
 
The octagonal woofers are Philips and the later (but still very early) TW went to a DCM made woofer. The Philips tweeter was changed, too, to the mylar one with the cover on it and in the TW it has a rubber foot attached to the cover.
 
So I picked up these early DCM Time Windows a couple of months ago. In pretty good shape for probably mid 1970's, but I always seem to need to have a project to work on. All of the drivers work, the walnut tops need to be refinished and even though my research indicate these are a pita to get into to work on them, I decided to go for it. Hopefully this thread will be useful to others to keep these vintage speakers working.


Not knowing how the walnut end caps were attached, I decided to use a piece of scrap wood ( it was cherry, but I am sure it doesn't matter) and a hammer to tap on the top end cap to see what would happen. Success!. There were 3 wood screws and 5 or 6 long staples securing it to the 1" particle board.

Next task was to try to remove one of the 6" drivers. I used a putty knife to carefully remove any of the black goo from around the screw holes and then with the assistance of a hammer I worked the putty knife around the entire driver. I then carefully bent the edges inward so I could gran them with a pair of needle nose pliers.Using a heat gun, I heated up the edge of the driver and then tried pulling on it with the pliers. It started to come up. I continued to work at it until I could get a screw driver under it and continue to work it out. Pretty happy and ready to keep going.

Next task was to figure out how I was going to remove the particle board top. I noticed that there were a couple of places where there was a small gap between the top and the sides. I used an old fillet knife to widen the gap until I could get a hack saw blade in there and began sawing through the glue and staples. Tedious and it was hard to not bend the blade all up. Decided to try a jig saw and it worked great. I just took my time and was rewarded with the removal of the top. Woohoo!!

On a roll. I decided to try a tweeter. Heat gun and a small screw driver worked. Got both out. My intentions are to clean everything up and when I put them back in I will use Armacell foam and wood screws.

I removed the crossover mounting board by prying it of the particle board top with a putty knife and a mini pry bar. The masonite board is pretty messed up from the removal, but that is ok as I will make new ones. I ordered new caps and resistors today to rebuild them, as in my humble opinion 40 plus year old caps are way beyond their useful life. Not going boutique components, but anything will be an upgrade. While I am at it I am going to replace/upgrade the binding posts and the internal cabinet wiring. Hard to believe that lack of quality in this build from back in the day. In the late 70's I really wanted to buy a pair of Time Windows but could not afford them. I believe at the time they were going for $800?? I ended up buying a pair of Polk Monitor 10's for around $400 on sale. I still have the 10's (amongst quite a few other Polks) but now I want to breath new life into these Time Windows. Will continue to add to this thread as I progress in the overhaul

Very nicely documented rebuild. They look like they are in pretty good shape. What are your serial numbers? Amazing how crudely built the crossovers are.
Mine are pretty early and I got them from the original owner at a yard sale.
Mine are completely stock, sands a replaced original woofer that buzzed. Warming up the black goo makes it relatively easy to remove the drivers.

Keep up the photos as you progress. These are very interesting speakers.
Cheers, Glenn
 
The Polks were 600 (according to Orion) maybe when they were last sold.

Yes, the Polks listed for $600 in 1979. The stereo shop I purchased them from ran a sale and I paid $400 for them. Since I had a strict budget at that time, I had to go with the 10's.

The serial numbers are carved in the bottom end cap2 - 1482 and 1484. I will be replacing the foam when they get put back together.

The tweeters are marked "Phillips - Made in Belgium". I believe the woofer are marked Belgium as well.

Well, the second woofer has been resisting my attempts to remove it. I will give it one more try when I have time and if it continues to not play nice I will just leave it.

I was able to reach through the speaker cabinet with a long screw driver and remove 2 of the 3 wood screws securing the walnut end cap to the particle board. One of the pvc ports was covering the 3rd screw. I tapped the end cap off and removed the 5 or 6 staples that were used. Will begin sanding and refinishing the end caps while I await the new caps and resistors. After they arrive I will figure out what I want to do with the new c/o boards. Because the new caps will be physically much larger, I may go with a 2 tier board for extra room to mount the components.

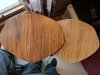
At this point I am leaning towards using a neutral stain on the walnut end caps and putting 5 or 6 coats of hand rubbed poly on them. I have used that
approach on several of my Polk rebuilds and really like the results.

Polk RTA 12b.jpg
 
I was able to remove the second 6" driver from the cabinet and have everything cleaned up. Components are in for the new crossovers. Making new c/o boards and also mounting plates for the binding posts. My goal is to have everything screwed in place using the Armacell foam to seal things so if they ever need to be taken apart again it will be a lot easier. Will post some more pics in the next day or two.
 
My goal is to have everything screwed in place using the Armacell foam to seal things so if they ever need to be taken apart again it will be a lot easier. Will post some more pics in the next day or two.
Lucky guy that gets these in 2041 and decides to look inside to see what is up and change the caps again.
 
I went the same path you did and dismantled pretty much the same way. There's a lot of info on here for taking apart and putting together TWs.

Welcome to the world of DCM. If you're wondering what "DCM" stood for, look at my name. Now you have to go figure out what that means.
 
Great thread...... after noticing my DCM QED's lids were loose I discovered this, deciding whether to fix and recap or just toss em... Good luck with those TW's , great speakers!
 

Attachments

  • IMG_0127.JPG
    IMG_0127.JPG
    34.1 KB · Views: 162
  • IMG_0128.JPG
    IMG_0128.JPG
    40.2 KB · Views: 153
  • IMG_0125.JPG
    IMG_0125.JPG
    22.9 KB · Views: 152
Good choice on rewiring these I suspect.

I repaired a pair of TW7s and each one had a short in the wiring.

I just refurbed a pair of Macrophones which are basically QEDs in a bookshelf form. Each of those had a short.

Not my favorite brand of speakers to work on between the black goo and overall IMHO poor build quality. Still worth the effort for me. I enjoy their sound. Easy to listen too.

Great thread! Keep up the what appears great work!!
 
Last edited:
I often think a complete modern rebuild of a cabinet using PVC pipe and MDF along with the full length thread and nut arrangement of the 1as would be good.
 
I have to say that the overall build quality of the early TW's leaves something to be desired. Some of the smallest gauge wire I have ever seen. A lot of work, but I think it will be worth it. Should have the c/o finished today or tomorrow. End caps are in the process of getting several coats of poly. Second speaker should go much faster since I have had to spend a lot of time on the first one figuring out the plan.
 
So the cabinets have been patched up with some wood putty around the driver openings where the particle board got a little messed up removing the drivers. I used some flat black spray paint to repaint them. Even though you cannot see them with the foam socks on them, I decided to take the extra step and make them look presentable. Crossover is complete. A little time consuming trying to decide how to lay things out since the new caps are so much larger. Pretty happy with the finished product. Hooked everything up to a source to make sure everything was working. Success! Except one of the 6" woofers appears to be dead. Crap! swapped them from side to side and still nothing. Grabbed a meter to check them. Good one reads 7 - 8 ohms. The other reads a big fat nothing. Now what. Try to replace? Try to have it repaired? Looking for some input.
 

Attachments

  • Cabinet Painted 2.jpg
    Cabinet Painted 2.jpg
    59.9 KB · Views: 238
  • Cabinet Painted.jpg
    Cabinet Painted.jpg
    32.9 KB · Views: 242
  • New Crossover.jpg
    New Crossover.jpg
    72.2 KB · Views: 254
  • New Crossover 2.jpg
    New Crossover 2.jpg
    73 KB · Views: 237
So the cabinets have been patched up with some wood putty around the driver openings where the particle board got a little messed up removing the drivers. I used some flat black spray paint to repaint them. Even though you cannot see them with the foam socks on them, I decided to take the extra step and make them look presentable. Crossover is complete. A little time consuming trying to decide how to lay things out since the new caps are so much larger. Pretty happy with the finished product. Hooked everything up to a source to make sure everything was working. Success! Except one of the 6" woofers appears to be dead. Crap! swapped them from side to side and still nothing. Grabbed a meter to check them. Good one reads 7 - 8 ohms. The other reads a big fat nothing. Now what. Try to replace? Try to have it repaired? Looking for some input.
The octogon woofers are more difficult to find, but they show up once in a while on fleabay.
Like DC said, check the wire leads from the VC to the wire tabs.
 
I am going to send the driver to a speaker repair place I spoke to. He says he can rebuild it. End caps are completed. Time to start putting things back together. I think I am going to mount the c/o on the side of the cabinet below the tweeters. If I mount it on the top the air core inductors are going to be very close to the woofer magnets. Any thoughts??
 

Attachments

  • IMG_20180317_131819.jpg
    IMG_20180317_131819.jpg
    88.5 KB · Views: 122
One of the Octogon drivers in my DCM Fans has a broken lead at the cone,leading to the coil. A little scraping to clean the end of the lead at the cone, a little solder and it is still working after 2 years. take a close look at those leads.
 
I am going to send the driver to a speaker repair place I spoke to. He says he can rebuild it. End caps are completed. Time to start putting things back together. I think I am going to mount the c/o on the side of the cabinet below the tweeters. If I mount it on the top the air core inductors are going to be very close to the woofer magnets. Any thoughts??
What about the bottoms? Any problems running longer wiring?
 
Back
Top Bottom